
MY DIY | Marbled Clay Jewelry


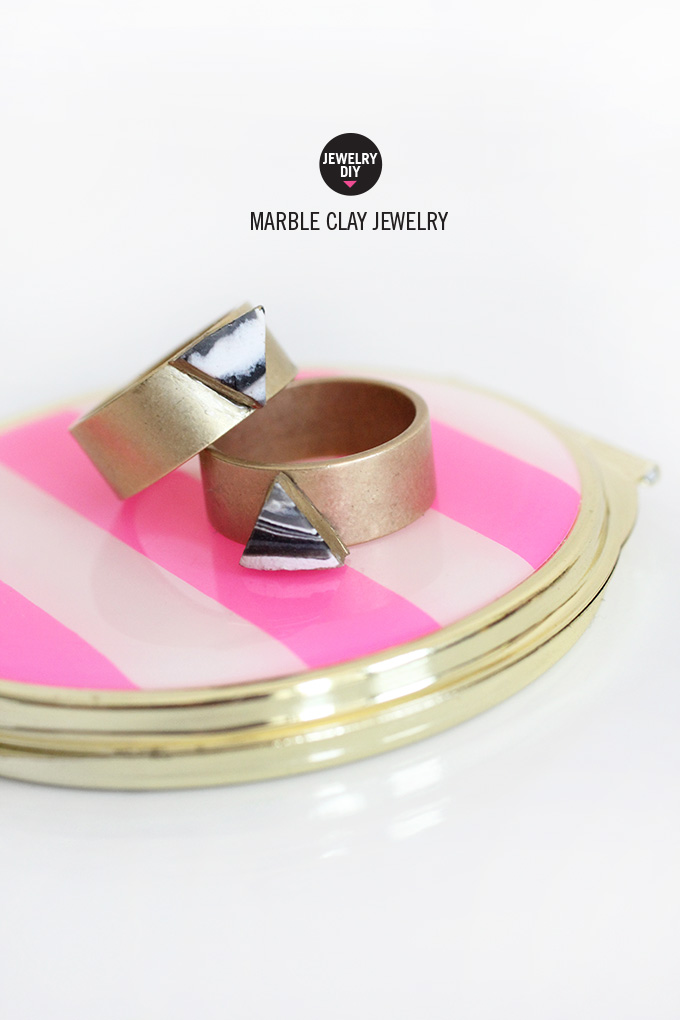
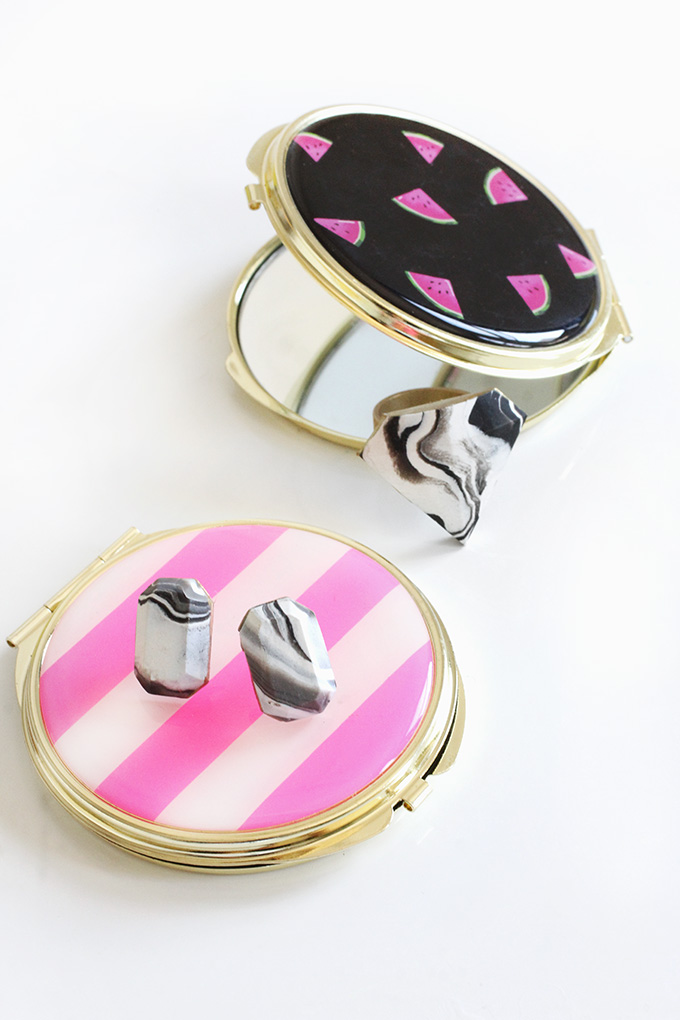
I am really digging trying out different kinds of clay, first it was the air-dry, and now I am testing out oven-bake clay. It was cool to mix up the colors and create a marbled look for the “gems”. For my first foray into the material, I started small and stuck with my favorite (non) colors, B&W, but there are an endless number of projects to be created with clay. Bigger, more intricate jewelry…jewelry holders…oh, the brainstorming begins. But first, the steps and supplies for these guys are after the break.

Supplies:
Polymer clay, 2 or 3 colors for best results
Metal rings
Earring settings
Silicon Gem Mold
E6000
Gold marker
X-acto knife
Steps:
With the clay colors of your choice, roll out long, skinny coils that are relatively the same length and thickness.
Twist all of the individual coils together to create a thicker coil that resembles a candy cane.
Fold your new coil in half and roll it on a hard surface so that the colors become intertwined. To create more swirls in your clay, twist the ends of the coil away from each other and fold in half again.
Take your clay and roll it into a ball that you can easily spread over your gem molds. Press the clay down into mold and spread it evenly to ensure that it every part of the well that you are using is covered.
Gently peel away your clay from the mold to reveal the gems.
With an X-acto knife, cut the excess clay away to create a distinct gem shape.
Preheat your oven to the temperature recommended on the polymer clay package and bake for the suggested time.
Once baked and cooled, outline the edges of your gems using a gold paint pen.
Glue the gems to the ring bands or earring settings, let dry completely, and wear in style!