
IHeart Kitchen Reno: Planking Progress
I probably could have posted Friday, but we were thisclose to getting our planks installed, that I decided to wait until we put in the last nail and our abs were screaming in pain from all of the nightly planking sessions. OK, so although our abs really are not feeling the benefits of all of the planking happening over here, our ceiling sure feels the results.


We purchased the plank wood from a local lumber company and ordered 16 ft. boards of primed tongue and groove planks. We looked at quite a few options, and landed with the AllPrime product because it is lightweight, split resistant and double coated with oil primer. What I love most is that the boards are already super smooth and coated with the primer, which means less work for us before and after installation. We believe it was worth a little extra expense up front to go with pre-primed, smooth planks because they do not have any visible wood grain or knots, and after my cabinets in my studio yellowed even with multiple coats of primer, I was not about to risk it again on such a large and important project.
The boards were delivered on Friday afternoon and we started installing them the following day.

The first step was to locate the trusses in the ceiling to ensure our nails had something to grip to during installation. Bryan found the first truss by measuring two feet off of an external wall, and using a screwdriver and hammer to tap up into the ceiling (this is the homeowner's special version of a stud finder, which we realized we didn't have on hand).

He continued to check every two feet and mark where each ceiling truss was located. With each of us on a ladder on opposite sides of the room, we then pulled a chalk line across the ceiling.


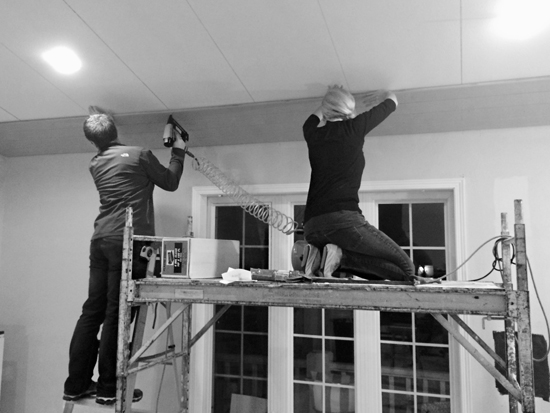
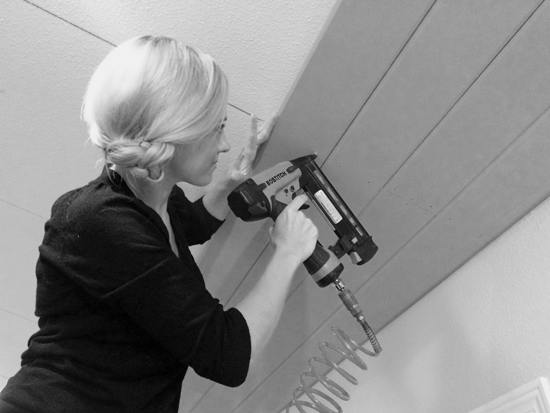
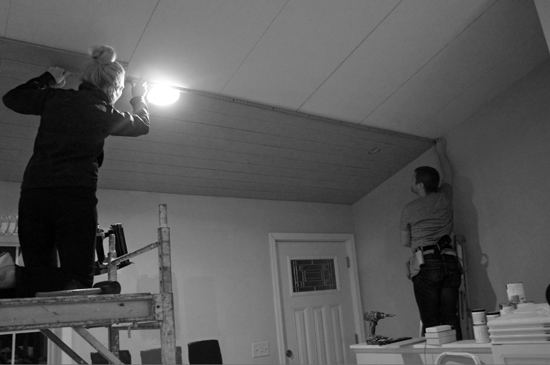
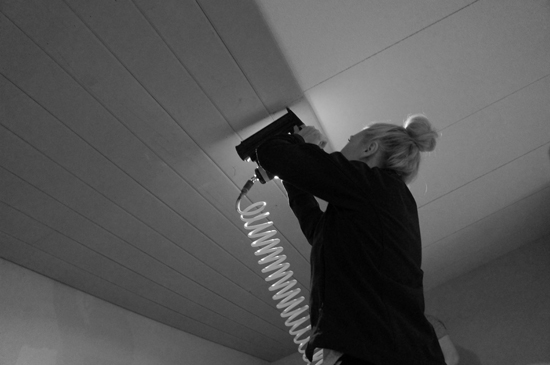
For this project, we borrowed my father-in-law's scaffolding, which was the key to our success in completing this project in a week. I was able to stay up on the scaffolding and be pushed across the floor to do a lot of the nailing.


We staggered the boards for strength, just as one would do when installing flooring. Every once in awhile a rubber mallet helped to tap the boards into the grooves (using a scrap piece as a buffer when tapping things in place).
The entire length of each row was 21 1/2" feet, and after the first day, we had a whopping five rows installed. We were definitely just getting our bearings and figuring out a system.

During the week, my husband would come home from work, we would feed the kids dinner, take them to their school activities, and typically start working around 7:30 or 8:00 as they were settling down for bed. A couple of hours later and we were ready to snooze as well.

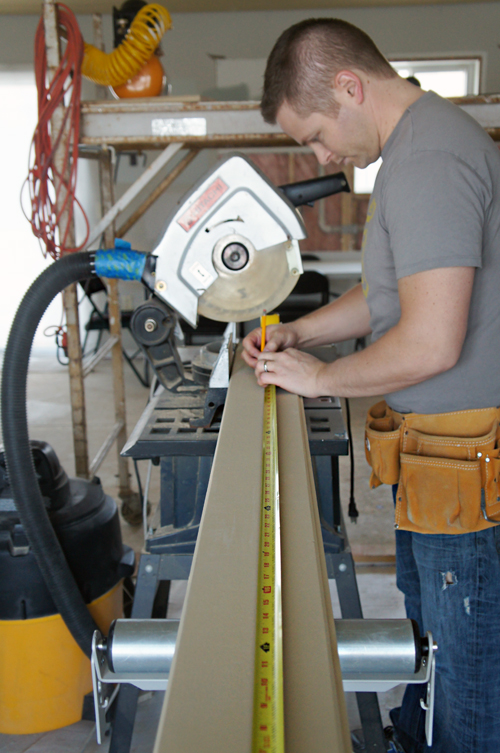
Measure, cut, glue, nail, repeat. We managed to get things done with two people, but when we had three or four working on it thanks to friends stopping by to help, it made covering the 550 square feet even faster. Six days fast! (And I thought it was a weekend project... funny how that happens.)


We did all of our cutting inside because the garage is full of items for the kitchen and it is coooooooold in Wisconsin in January. My husband took a note from his old shop teacher and used our shop vac to reduce the amount of flying dust while making his cuts. Another homeowner's special.

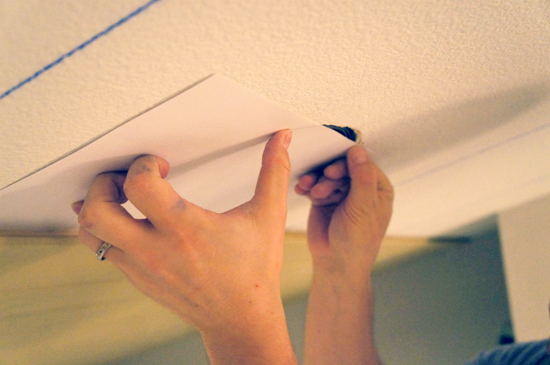
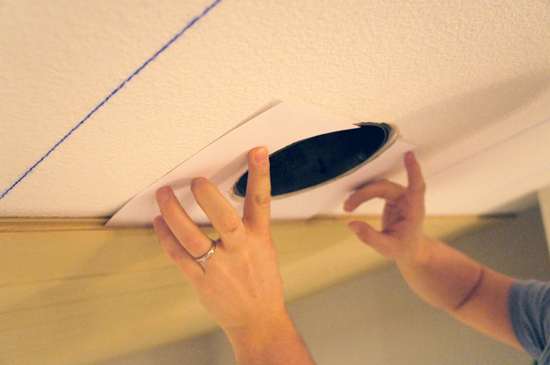
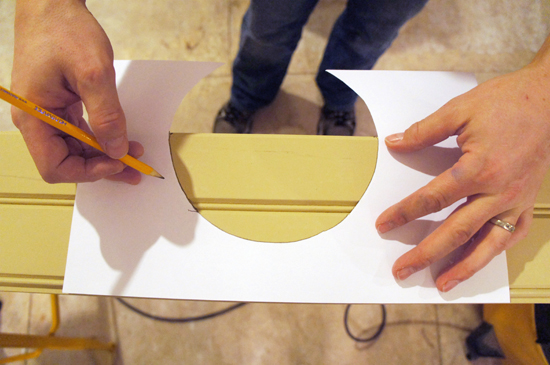
Although the process was time consuming, it was not all that challenging. The hardest part was cutting out around the recessed lighting kits.
My husband's trick for that process was:
1. Using a white piece of paper and placing it into the groove of the last plank, he pressed around the lip of the light.


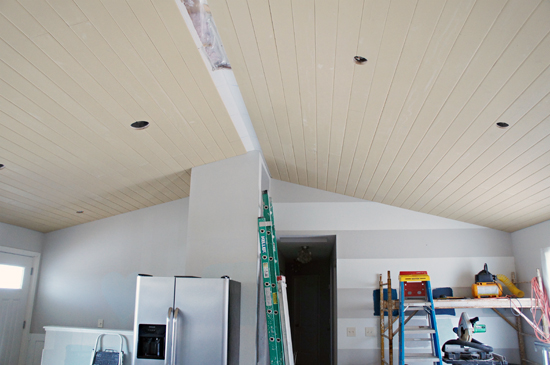
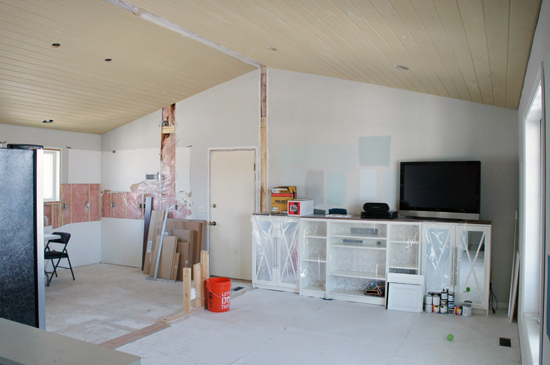
Still not anything pretty to look at, but there is so much potential happening here! We finally pulled down those final wall studs; that paired with the new planks and it feels like our space doubled in size! We couldn't be more thrilled about the openness and all of the light streaming through during the day.
We had no need to run the planks to the peak as there will be a giant faux beam installed there next. I really think that will be the major turning point for this project.

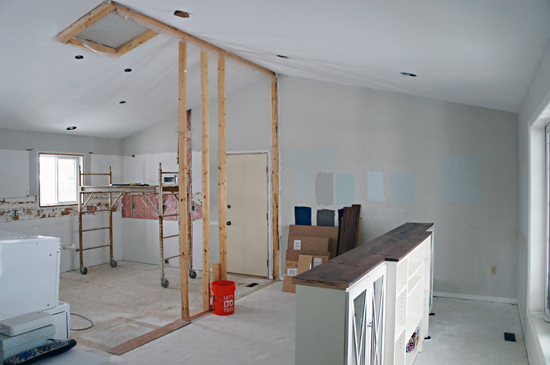
Well, that and finally getting some new sheetrock on the walls in the kitchen. So that is what is on the agenda for this week. We are building our beams and maybe even patching the walls. The best part? No more staples to be pulled! It was all uphill after that.
Once the beams are installed we will putty all of the seams and nail holes, and the entire ceiling will be sprayed white. And you may have noticed more colors have joined the paint swatches on the walls... and you know what? I still haven't committed to anything. I have never in my entire life had such a hard time picking a single paint color for a room. I may just go in a different direction all together. So stay tuned as the color drama unfolds. I am in suspense right along with you!

More posts from Jennifer Jones