
DIY Laundry Cupboard Shelving
Our laundry renovation is dragging on much longer than anticipated but we are starting to pick up the pace again with another DIY project completed on the weekend.
The built in cupboard in the laundry offers a heap of storage space and being right next to the kitchen is a perfect storage overflow to be used as an appliance cupboard - I can't be the Slow Cooker Queen without a place for my appliances!
The whole laundry was gutted, tiled and painted months ago and then nothing for a while until Lexi gave us that look ..... "For goodness sake you newly engaged love birds, stop with the wedding planning, and get back into renovating"!

So on the weekend we checked out the shelving in Masters and Bunnings but unfortunately all the shelves had a standard depth of 20mm, which is the same size as the old cupboard shelves and too small for appliances so we would be no better off getting those. We really needed something wider.
In Bunnings we looked at the sheets of wood and contemplating cutting them to size ourselves - then we spotted the long melamine shelves and had a brain wave that we could get an extra large piece and cut it in half thus making 2 shelves from 1 sheet.

Not only did this mean we would be paying less than $10 a shelf (when they are usually $20 each) but these sheets came in a variety of depths so we could go as wide as the brackets allowed - a whopping 45mm which is more than double the standard shelf size.
We pretty much did a happy dance right there and then after finally come up with a plan that worked and saving money along the way. We spent $51.75 on 6 shelves Vs $120 for 6 standard size shelves.

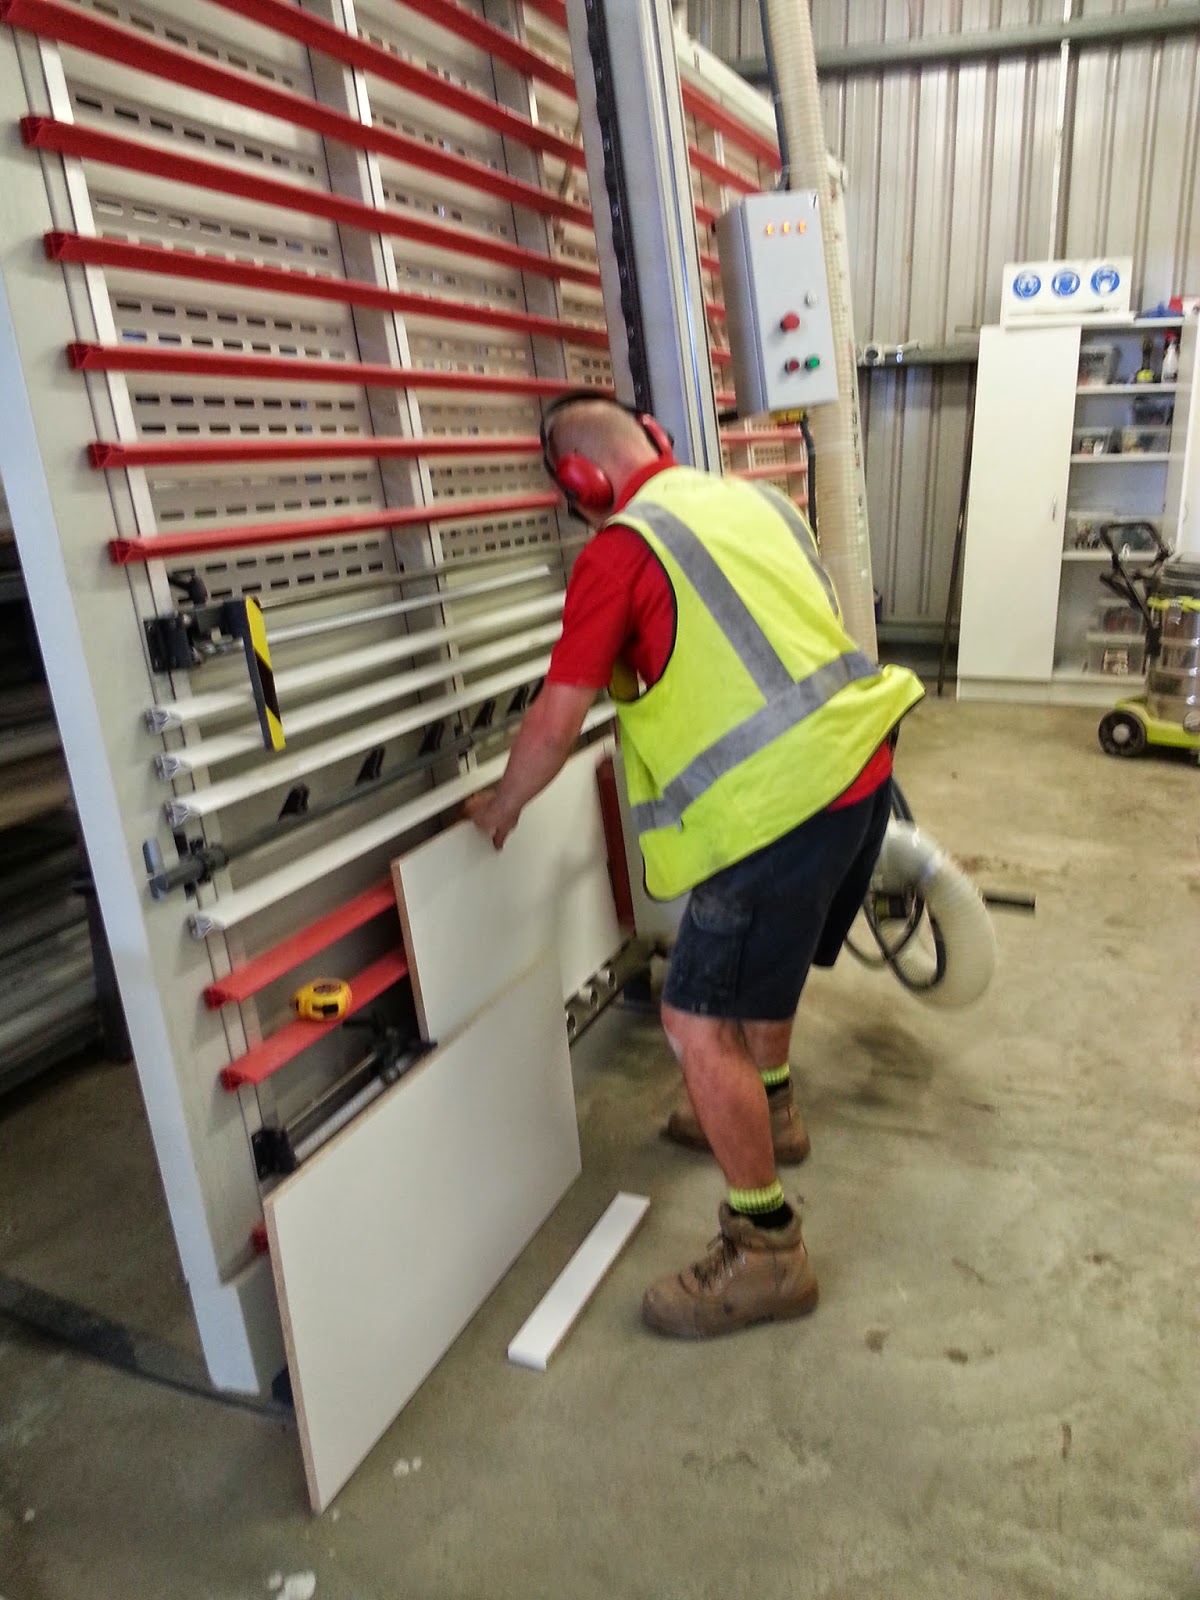
Then it got even better because Bunnings do a free wood cutting service so the kind fella at the cut shop cut our sheets of melamine in half with his fancy saw in less than 5 minutes.
It would've taken us at least an hour to set up the saw at home and measure and measure and measure again before cutting the sheets ourselves so this saved us a heap of time too.

Back home Mr P wasted no time installing the shelving.
Firstly, getting the wall tracks nice and level and then screwing them into place.

Then each shelf bracket slot neatly into place and the shelf placed on top.
There are no wonky shelves when Mr P is DIYing, it has to be done right!

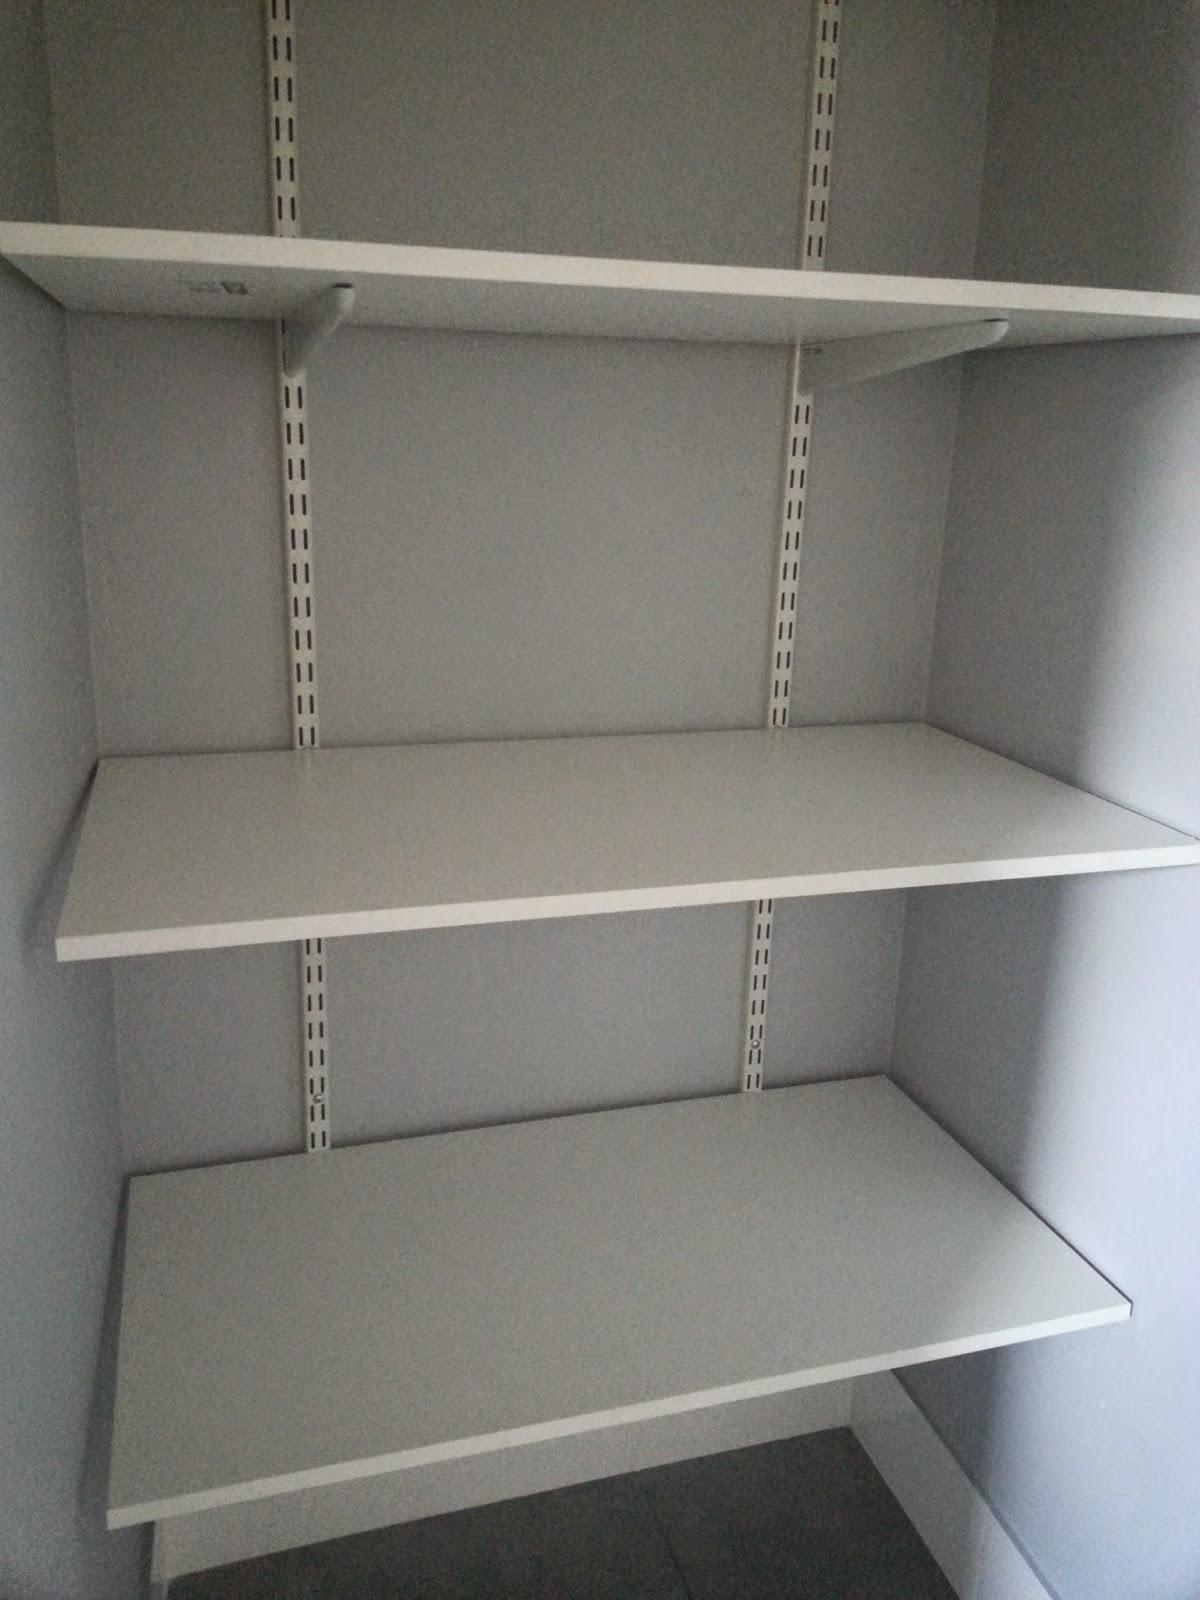
The extra wide brackets support the wide shelf perfectly and hold a maximum weight of over 100kgs which is way more than we need but good to know how strong they are.
All the fittings are a nice bright white colour too which is far nicer than the old aging beige colour the cupboard was before.

We managed to fit 5 shelves in the cupboard and this allows enough space on the ground and between shelves for some movement.
I'm hoping to fit the vacuum, brooms and mop bucket on the floor in here as well.

This is how the cupboard looked before - I know the shelves may look the same but they were very narrow at 20mm wide and couldn't hold the larger appliances very well.
The brackets were also wonky as they didn't sit flush against the shelf and they would wobble every time you took something off the shelf. It was a bit of a balancing act!

And after - the new shelves are twice the depth at a generous 45mm wide so I'll have no trouble fitting the appliances in here now.
The new brackets make them much more secure as they sit flush against the shelving. I have no concerns about anything falling down and breaking!

This was a great budget make over and I can't wait to unpack everything and fill up the shelves!
We purchased the wall tracks, brackets and shelves for under $150 and installed them in less than an hour.
Our next project in the laundry is to hang a new door on the cupboard and there are 2 more doors to be hung in here - one leading into the kitchen and the other an exterior door leading into the backyard. So a total of 3 doors to hang and paint and new handles to install.
It's time to get busy!
To see our laundry renovation progress to date check out these posts: Laundry Renovation - Wallpapering A Wall and A Door Laundry Progress - Plastering, Sanding and Washing
Laundry/Powder Room Renovation - Changing The Plumbing Laundry/Powder Room Renovation - Demolition Success
Laundry/Powder Room Renovation - Demolition Weekend Plans
Laundry Renovation - The Final Design
Laundry Renovation - Wood Look Bench Top Laundry Renovation - Turning A Wood Panel Into A Bench Top
Laundry Renovation - Flat Packs Vs Cabinet Maker
Laundry Renovation - Flat Pack Assembly and Install
Tips for picking out laundry flat pack cabinets
Powder Room Renovation - It's All In The Flush
Powder Room Renovation - Basin and Vanity: Take Two
Powder Room Renovation - Basin and Vanity
Splash Back Choices - Be Brave Or Play It Safe
Laundry Renovation - Let's Go Mosaic Tile Shopping
Laundry Renovation - Picking The Tiles
Laundry/Powder Room - Floor Tiles Laid
Laundry Before - Our 1960s Laundry/Toilet
edesign Mood Board for the Laundry
Renovating - 5 tips for planning and designing
Sharing with link party: Savvy Southern Style - Wow us Wednesdays

More posts from Jarrah Jungle