
Pinhole Photography: Developing the Darkroom Photo
It’s been a while since I talked about Pinhole Photography! This post covers how to develop pinhole photos using the black and white photo paper. (You can find the entire series here.)
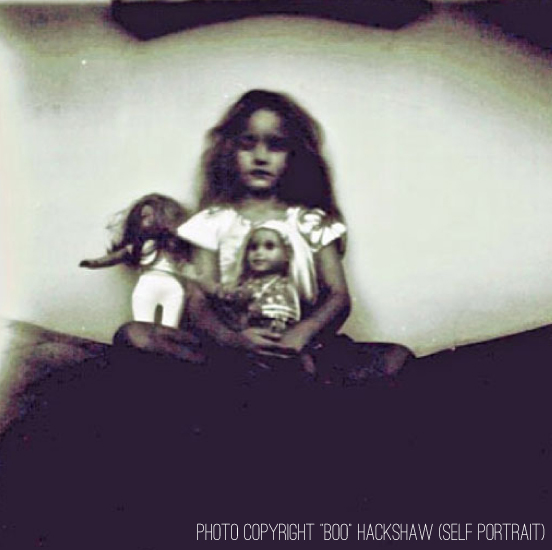
Boo’s photos that she’s taken with a pinhole camera are some of my favorite ever. They almost remind me of Sally Mann’s work.
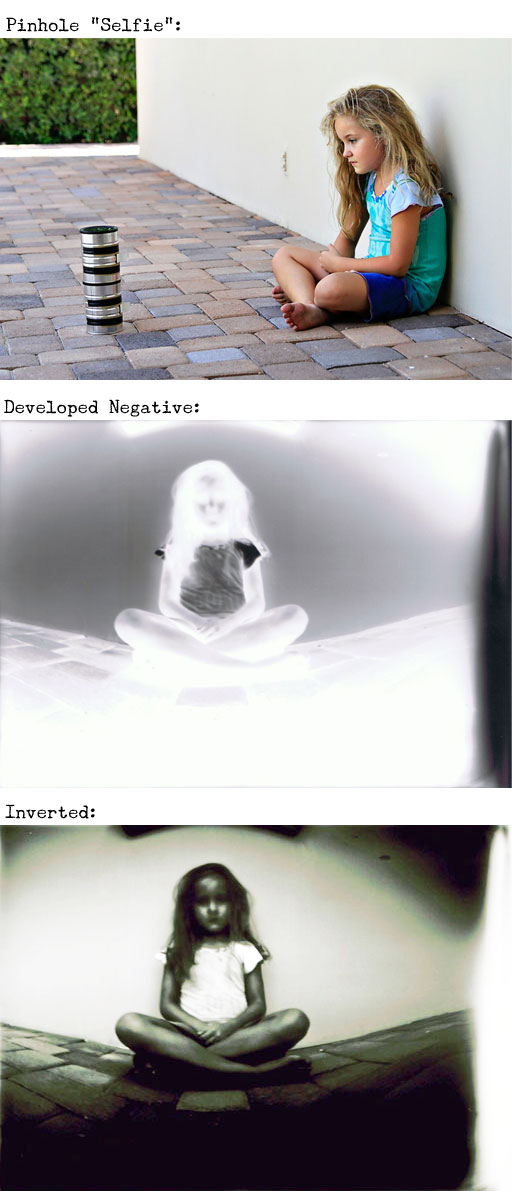
Pinhole self-portrait:


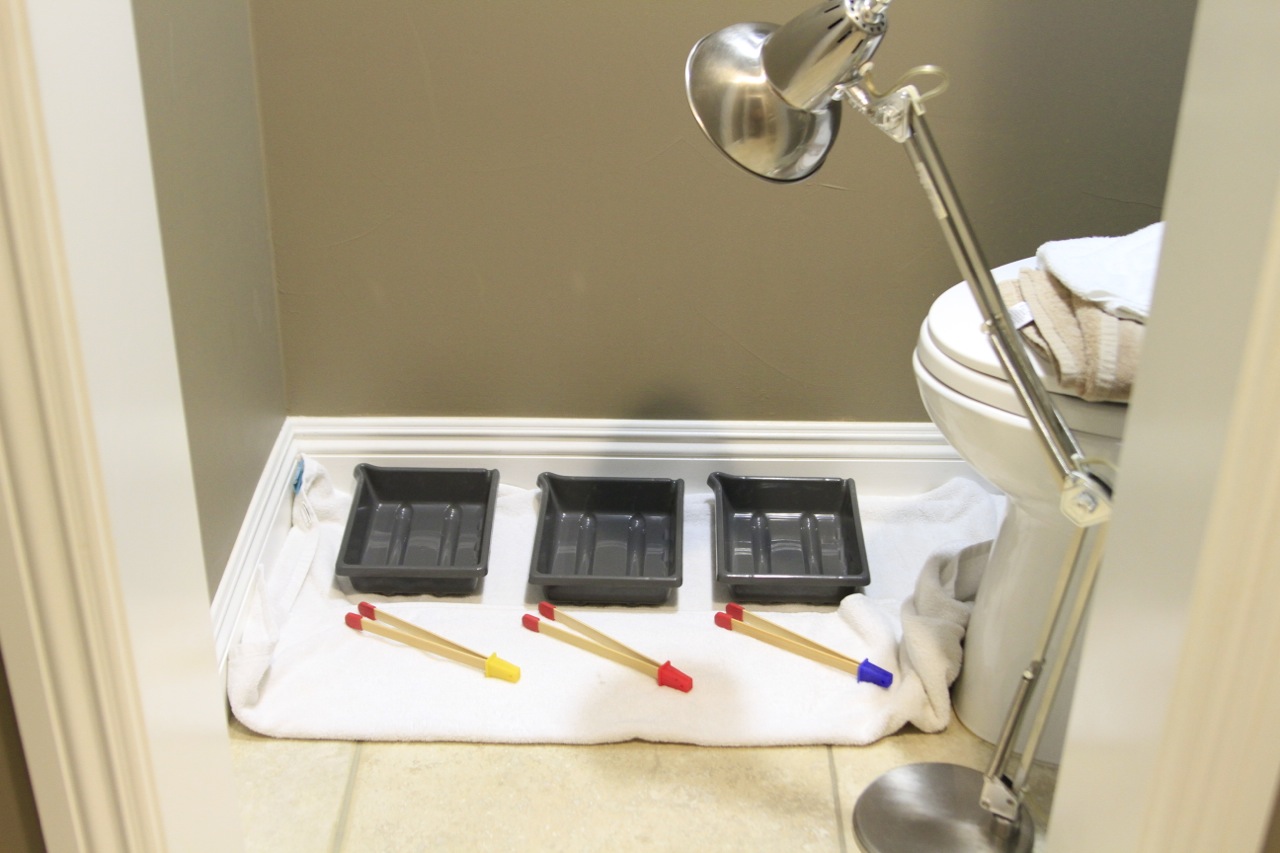
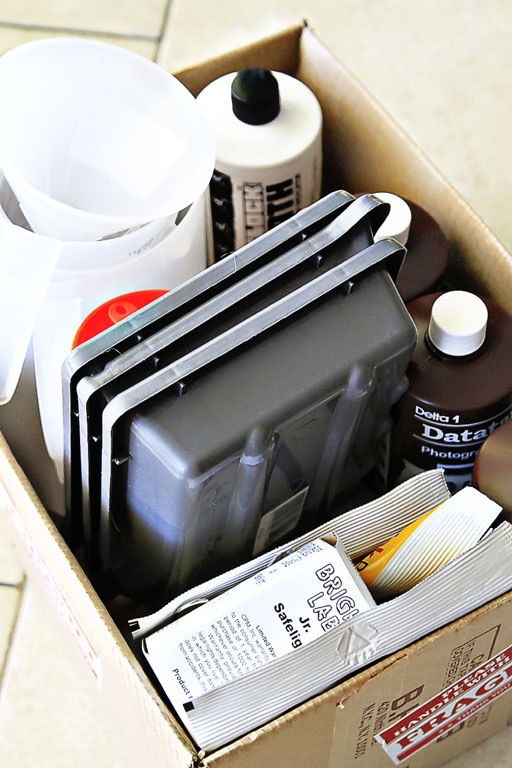
So once the photo paper has been exposed how do you develop it? Here’s an overview of darkroom supplies needed(click image to download the printable version):

Darkroom supplies you can find them at the below links. You’ll be able to use them over and over again (except for the photo paper):
Supply & Source Links: (all of the dark room materials and film paper will run you about $85.00)
A bathroom or laundry room without light
A small desk lamp
Film:
Foma Fomaspeed Variant III VC RC Paper 5×7/25 Sheets
Dark Room Supplies:
11W Red Safelight Bulb
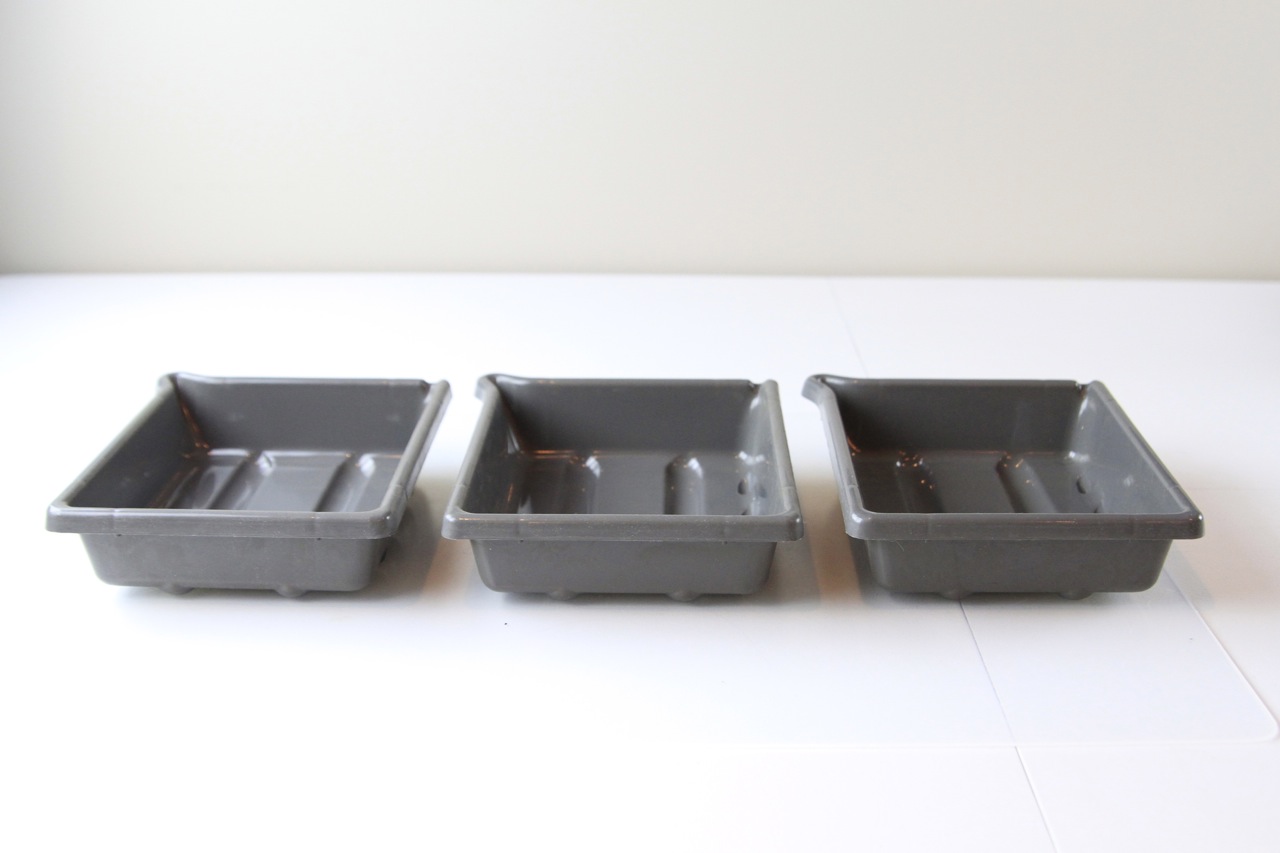
Three 5×7″ Developing Trays
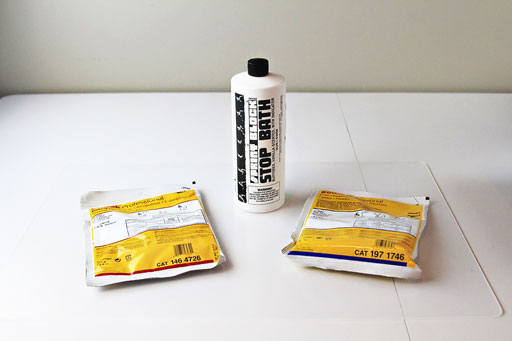
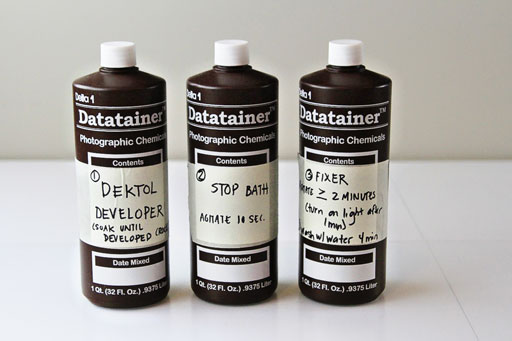
Developer
Stop Bath
Fixer
Filter Funnel
Print Tongs
Datatainers for Storing Chemicals
At this stage you’ve carefully loaded the black and white photo paper into the pinhole camera and opened the shutter to expose the paper. The most important thing here is to WAIT until you are back in your dark room set-up to remove the paper. If you open up your camera and remove the paper without using the safelight in a dark room you will ruin the photo!


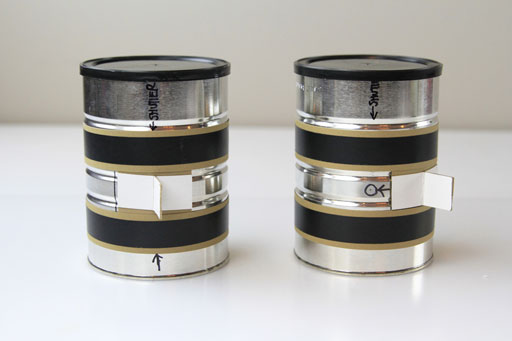
This works great because the materials easily pack up into a box for storage and we can bring them back out again when needed:

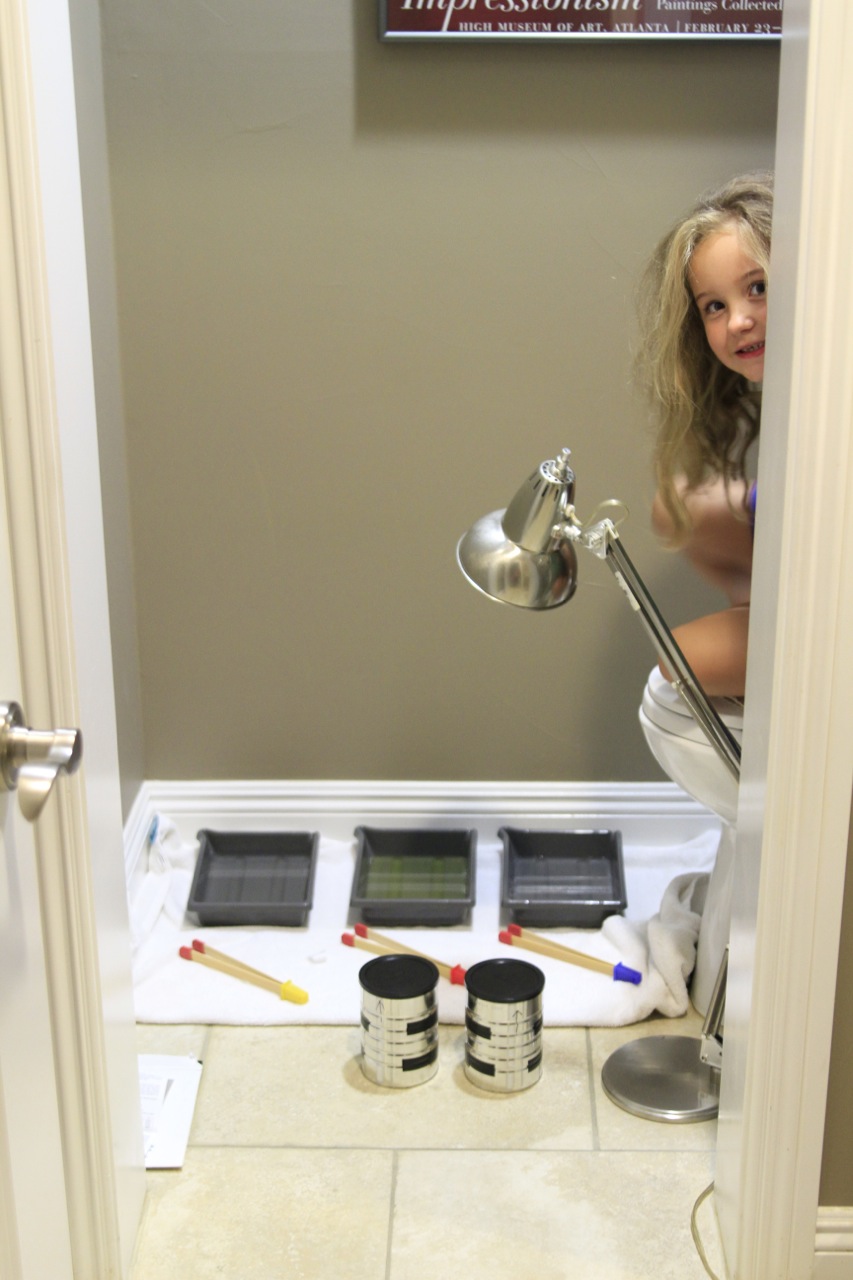
The most important part of the setup is that there’s no light coming through into the room. This is why we use a safelight. (I also put towels around the bottom of the door where light leaked in.) I just replaced the bulb in a desk lamp with the 11W Red Safelight Bulb:


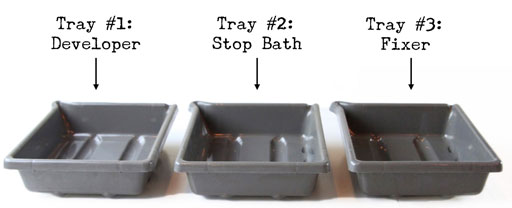
Once all your chemicals are mixed you’ll put a small amount in each tray, enough to cover the photo paper when it’s dipped down into the solution. Keep the trays in the following order:

Now:
Close the door to the dark room.
TURN OFF THE LIGHT.
ONLY THE RED LIGHT SHOULD BE ON.
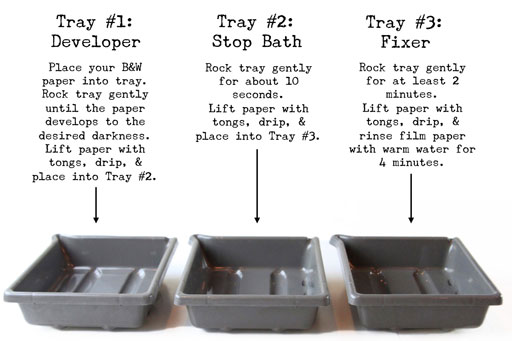
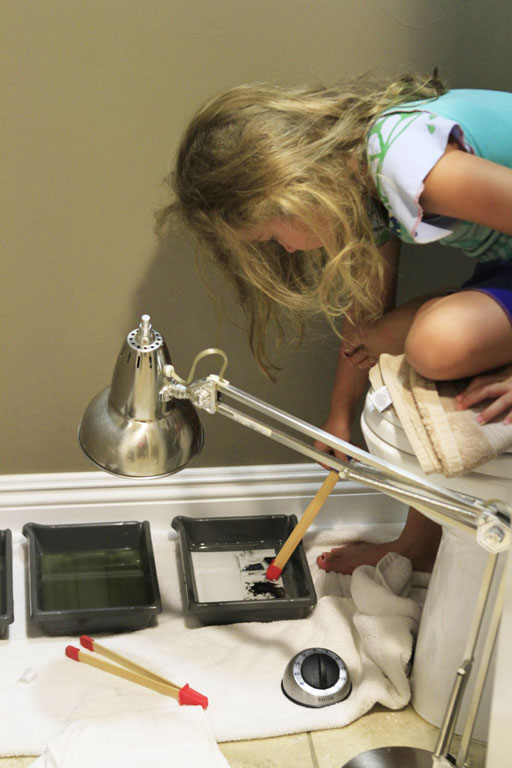
Carefully remove the photo paper from the pinhole camera and dip it down into the first tray. And follow the following directions:

While the lights are out you might as well reload the pinhole camera for another round of photos! Once the paper has gone through the fixer in tray #3 you can turn on the light to rinse under warm water. Boo getting ready to transfer her photo to the sink for rinsing:


There is a whole process for creating the final print where you take the negative and put it together with another piece of photo paper and expose it. I will cover it at some point but for now I am going to show you the digital process for creating the final print. I scan the negative into a photo editing program like Adobe Photoshop Elements or iPhoto and then invert the image:


Hope all of that is straight forward enough. Let me know if you have any questions.
P.S. I created this handy little guide sheet to help with the development stage. Click here to download the PDF or click the image below:

The whole series is indexed here:
The post Pinhole Photography: Developing the Darkroom Photo appeared first on Ashley Hackshaw / Lil Blue Boo.