
How To Choose a Paint Color: 10 Tips To Help You Decide

One of the most frequently asked questions I get is about choosing a paint color. I'm no expert, but after painting our entire house 2 times and experimenting with tons of different paint colors, I've definitely learned a thing or two. So, today I'm going to share some of our newly painted rooms, and share my 10 tips for choosing a color.
And then probably mix in some random nonsense. Because that's how we do.
For the past four years, I've been obsessed with paint. It's not normal. I know that. It started when I painted the guest bedroom for the first time. And then I went on a four year paint binge. I painted every room in our house, some rooms up to three times each. I would usually start out with a horrible color (that always seemed great at the time) and then slowly work my way towards a color that I liked. All of this painting took up a lot of my time, but despite the occasional tears of exhaustion, it was fun for me. Kinda like a hobby.
There's something about your first house that makes you do irrational things.
Like manual labor.
But, through the years of trial and error, I've really learned a lot about choosing a paint color. I still occasionally mess stuff up, but for the most part, I've figured out a paint-choosing-process that works pretty well. So, before I share some of our newly painted rooms, let's talk about my process for choosing a paint color.
1. Look at what you're pinning.
Choosing a paint color can be really overwhelming. If you're like me and pin a lot, you can really get some useful information by looking through some of your recent pins.

For example, when I look through my own boards (like this one or this one), I notice that the majority of the rooms I've pinned over the past year have had white walls. So, when it came time to choose a new paint color for the main level of our home, I decided I should go where I've never gone before: white paint. I had no idea if white would look good in our house, but it gave me a starting point.
Speaking of Pinterest, here's an amazing Pinterest board I follow with tons of suggestions for great paint colors.
2. Take cues from your decor.
Look for colors that complement the colors of your furniture, rugs, flooring, and fabrics, but make sure not to overwhelm the room. If you have a really bold rug (like I do in the master bedroom), you probably don't want to paint the walls in equally strong hues. Let the rug be the focal point, and keep the walls a soothing neutral. If you do decide to paint the walls a bold color, it usually helps to make the walls the focal point, and keep the decor fairly simple. Another thing to keep in mind is that dark colors create a lot of warmth, but can also make a small space feel even smaller. Light colors tend to open up a space and make it feel larger than it is.
In my experience, I need to either go white or go with the darkest paint color on the paint strip. I've done the in between colors and it rarely works out for me. So far, white walls and very saturated neutrals tend to be my faves.
3. Use neutrals for versatility.
Neutrals are simple and classic, and work with just about anything. By keeping the paint neutral, you can play around with the other items in the room, like art, fabric, and rugs. One of my favorite neutrals is Behr Wheat Bread. It's a great greige and I've been happy with our master bedroom ever since I painted it. The paint color works with just about anything, and you guys know how many times I've changed that room.

4. Use Paint chips.
There's an abnormal amount of paint colors out there.
Don't let it overwhelm you.

If you try to pick out a paint color AT the store (a mistake I've made at least 5 times), you'll get overwhelmed and probably end up with something you aren't 100% happy with.
So, bring the paint chips home first.
I know it's a pain, but it's worth the extra effort.
This time around, I went the extra mile. I had 3 full months to choose a color AND I was painting a massive area. Plus, I had zero desire to recreate the stain debacle with paint.
So, I went to Home Depot, Lowes, ACE, and Sherwin Williams, and brought home an illegal amount of paint chips from each one. I'm sure you remember seeing paint chips littered throughout the renovation posts.
Like my own little version of Where's Waldo.

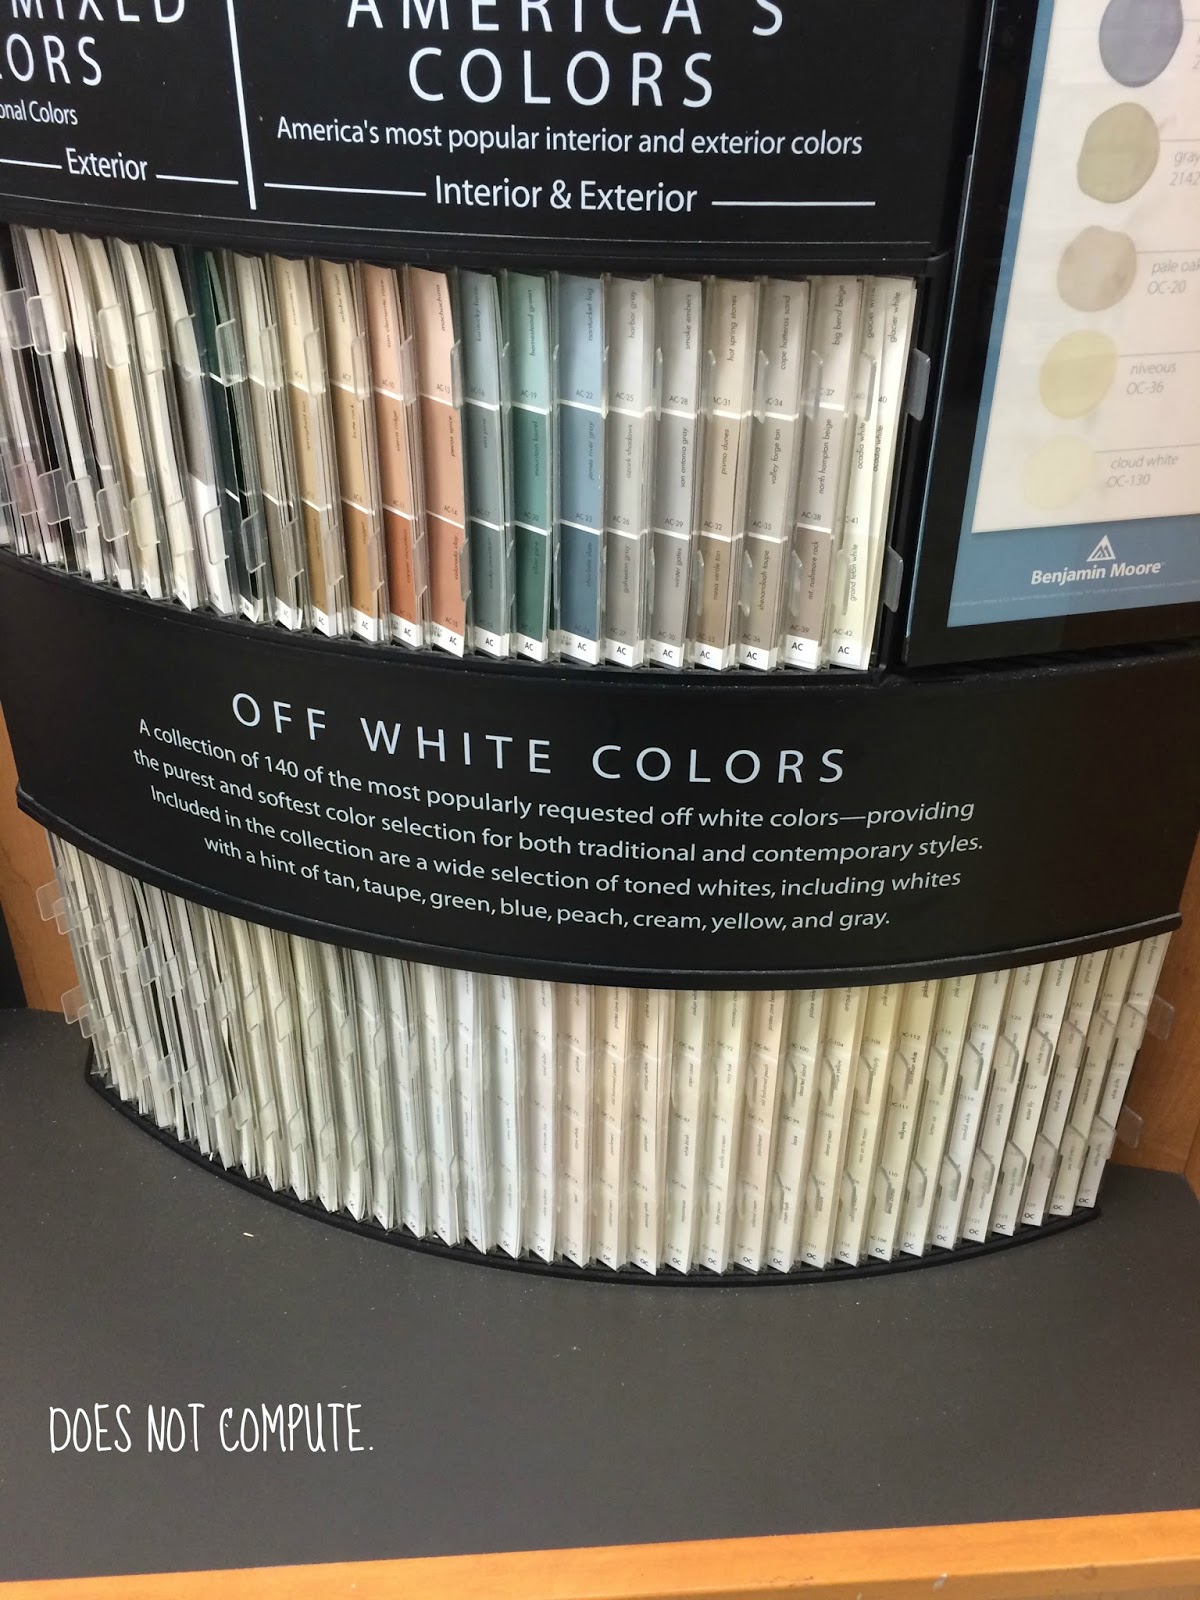
5. Understand color undertones.
Once you've brought home your paint chips, you'll need to narrow them down, and understanding color undertones can be really helpful in this process.

The best way to figure out the true color tint is to look at the darkest color on the strip, or to hold the color next to something that's true white (like a piece of white paper). Once you've figured out the undertone, it's a lot easier to narrow down your choices.
For example, in the above picture, look at the 'Blue' paint strip. One of the colors I was contemplating was SW Extra White. In the store it looked white.
In my 1970's house, kinda Smurfy.
6. Online Research
It's not a good idea to go by what a paint color looks like online, but a little online research can definitely help you find some colors worth testing out. I found about 10 different paint names online that I wanted to try, and then brought those paint chips home (along with 800 other ones I grabbed while at the store). After staring at them for awhile, I eventually narrowed down my favorites to Benjamin Moore Simply White, White Dove, Chantilly Lace, and Titanium.

7. Get Samples
After narrowing down my choices, I brought home some paint samples. This is a crucial part of my narrowing down process, as it allows me to see what the paint will actually look like in my home. The sample sizes are usually about $2 and worth every penny.
Benjamin Moore offers tiny pre-mixed samples, but they didn't have any of the colors available where I went. So, instead, I took the paint chips to Home Depot and had them color match the paint. They have giant sample sizes there, and can color match anything (including fabric), and most of the time if it's a brand name paint, they can just pull up the color formula on the computer and mix it without even needing a paint chip.
It's awesome.

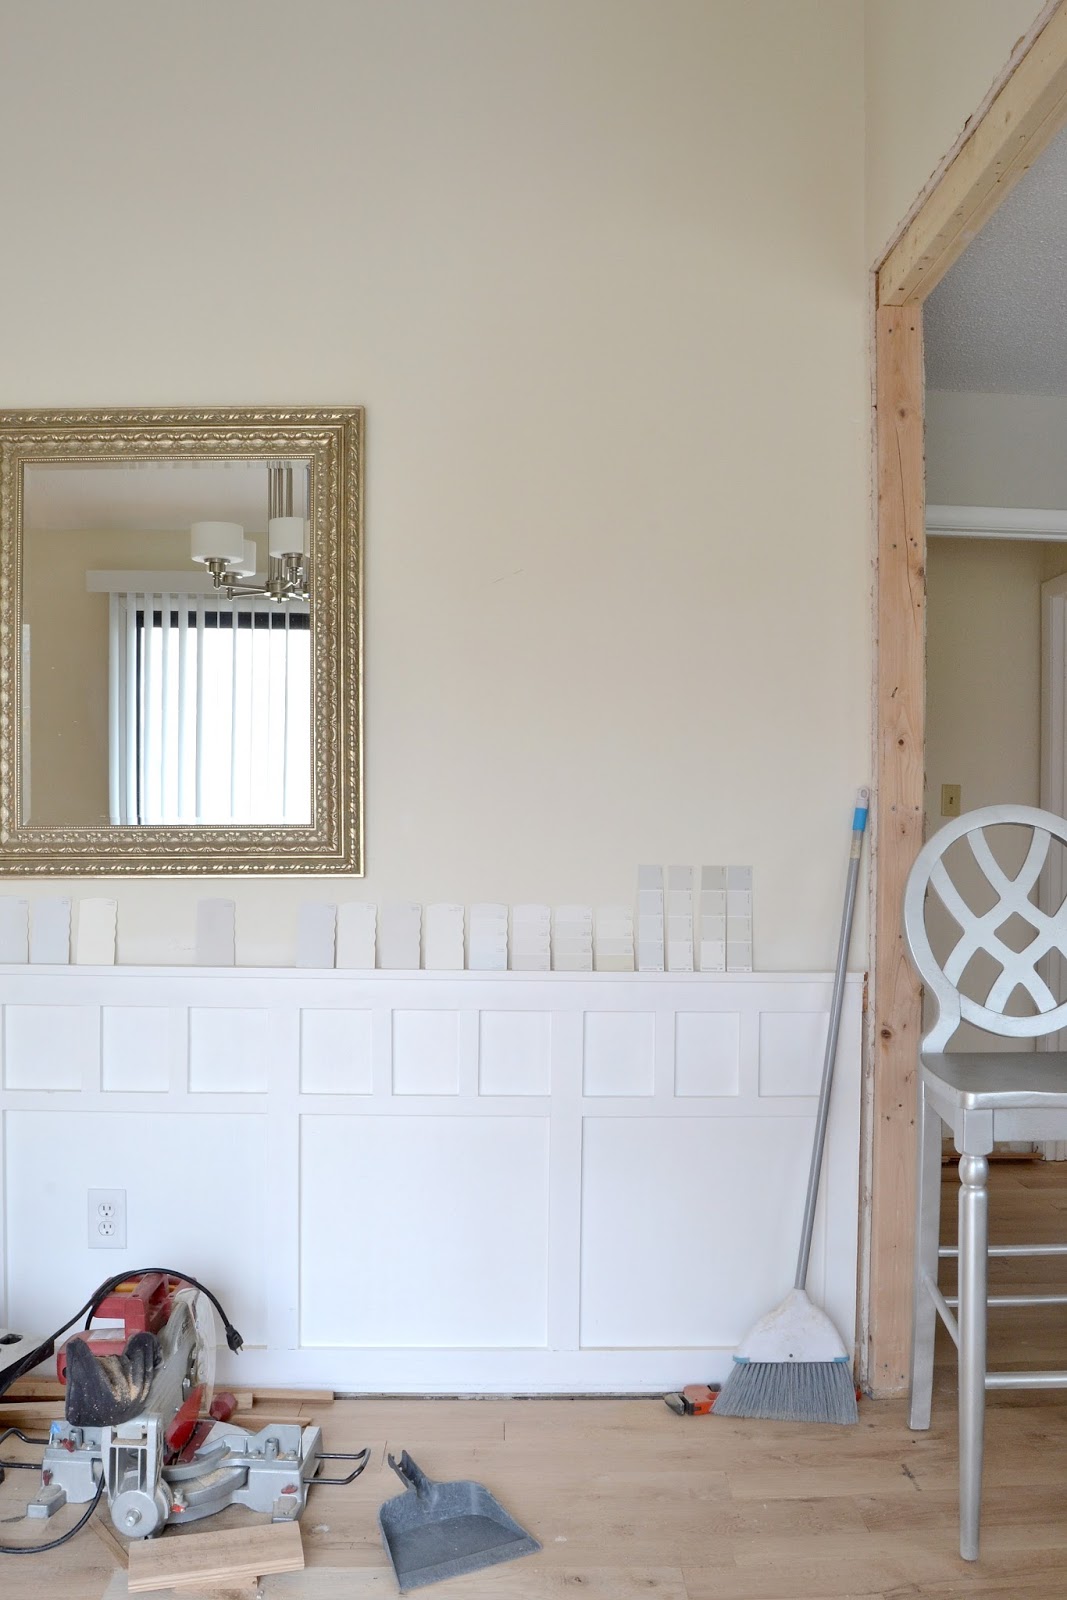
8. Paint swatches on the wall.
Once I've got my paint samples, I usually just find a wall and paint giant swatches on them. It's really helpful for me to see how the actual paint looks on my actual walls, and I don't worry about making a mess since I'm going to be painting over it anyways.
If you are worried about the mess, you can paint poster board and then tape it to your walls.
Or just tell your husband you're painting a mural in his honor.
Or I might just be living in a vacuum where Jesse would believe me if I said that.
Either way, options.

Funny story: The living room was already painted when we moved in four year ago, and I had no idea what color it was. And then I tested out White Dove on these walls and realized our entire main area was White Dove. In all of the online pictures of White Dove, it looks white, but, in our house, it looks yellow. I also figured out that Titanium was just too dark for this area of the house (although very similar to my master bedroom color, Wheat Bread).
And this is why you paint swatches.
9. Look at the paint in different light.
Paint can look really different during different times of the day based on the lighting in your house. As a general rule, natural light shows the paint's truest color, incandescent light brings out warm tones and yellows, and fluorescent light casts a sharp blue tone.
I was really going back and forth between Simply White and Chantilly Lace for quite some time, but ultimately decided to go with Simply White. The Chantilly Lace started looking really blue in the mornings and at night (when we don't get a lot of natural light in the front of the house), and Simply White stayed a really beautiful, neutral white all day long.
It was exactly what I was looking for.
10. Listen to reason (something I rarely do).
I've painted multiple rooms with a color I chose while standing in the Home Depot paint aisle. And then consequently hating the results. Had I read this post four years ago, I would have totally ignored it.
I learn things the hard way.
It's my nature.
Much to my dismay, taking the thorough approach actually pays off. I was forced to spend 3 months looking at paint chips (because of the neverending floor situation), and as a result, I ended up being so happy with my paint color choice that I never ever want to change it.
For the first time ever.
I barely know how to handle this new emotion.
So, let's just look at the house already.
A quick reminder, here's what the kitchen looked like after we first knocked down the wall and ripped up the tile.

And now today. We still have to install trim (underway now!!), but after painting over the chalkboard wall (I have a plan for that little wall that doesn't involve chalk.), and now with the new white paint, the kitchen feels so much bigger.
I'm so excited.

And now, here's a reminder of what the living room looked like after we ripped up the carpet. I was totally over the accent wall, and couldn't wait to see what this space would look like with new floors and fresh paint.

And now today.
Just imagine what it will look like with new trim and furniture.
Oh, and my sworn enemies...those dead-bug-hoarding lights? Their days are numbered. Jesse is installing the new ones for me sometime this week.
It should be an interesting climb. I'll report back.

Plus, my paint sprayer finally arrived today, so I should be able to begin painting my beloved stair rail this week.
I feel a furnished home on the horizon....
a sentence I've been longing to say for 13 weeks.

And that, ya'll, is pretty much all for today. Hopefully this helps you with your next paint-choosing adventure. Just know that whether you want to paint your walls red, or purple, or gray, or white, you should do exactly that. Do what makes you happy, make it your own, and if you get frazzled by the 8 million red paint chips, spend some time narrowing it down before taking the purchase plunge.
I imagine that last paragraph to be like the last few minutes of Full House or Family Matters where they play saxaphone music and summarize the moral of the story.
I'll be back later this week to answer another one of your FAQS: how to paint a room (like what supplies to buy, how to actually do it, what paint to get, etc.).
The house is finally getting put back together and I'm starting to actually feel kinda normal. I do laundry again, cook food in an oven, paint my nails, and DVR things.
I know I've been a little here and there over the past few months, and you guys have been so amazing with your support and encouragement. I've always been a blogger who finishes a project and THEN tells you about it, so I really had no idea what to expect when I started ripping up my house and blogging about my mess over a 3 month period. I just can't thank you enough for making it such a fun experience for me.
So, thanks for sticking around.
I never expected it, and I'm grateful for it.
Also, sidenote #15: Happy belated Mother's Day to all the mamas out there. You make the world a happy place. Jesse and I celebrated my sweet Mama (Jeannie) over brunch yesterday. There were Mimosas, bacon, and sunshine.
It was a happy occasion.

Love ya'll! Til next time! To read the other posts in the renovation series, go here: Part 1, Part 2, Part 3, Part 4, Part 5, Part 6 Or to see a list of previous paint colors I've used in our home, go here.


or
Subscribe to LiveLoveDIY with email!
Enter your email address:

//
// (function() { var params = { id: "faaf5f99-526d-4f0e-a838-370e89069b72", d: "bGl2ZWxvdmVkaXkuY29t", wid: "6595" }; var qs="";for(var key in params){qs =key "=" params(key) "&"}qs=qs.substring(0,qs.length-1); document.write('