
How To Paint Laminate Furniture in 3 Easy Steps!
.jpg)

When we moved into our house three years ago, I was faced with a little problem. We had two hot pink handmedown couches and a mattress on the floor. And that was the extent of our furniture. Rather than enjoy an empty house, I decided to find furniture at thrift stores and paint it. I had never done that before, but figured it was worth a try. 3 years later, I've furnished my entire house with thrifty finds. Oops.
Oh, and I still totally have those hot pink couches. You'll bear witness to this one of these days. Anyways, would you believe that after all this time I had never painted a laminate piece until this week? A good family friend was moving and gifted me a bunch of furniture that was in his basement. While the majority of the dresser was real wood, the top and sides were laminate. Oddly enough, I was excited by this discovery because ya'll ask me questions about painting your laminate furniture all the time, and I knew this would be a great opportunity to answer your questions. And just so you know, this tutorial applies to all wood furniture, too, not just laminate. You can paint nearly any piece like this and it will turn out great. So, without further adieu, here is my little post about how to paint laminate furniture.
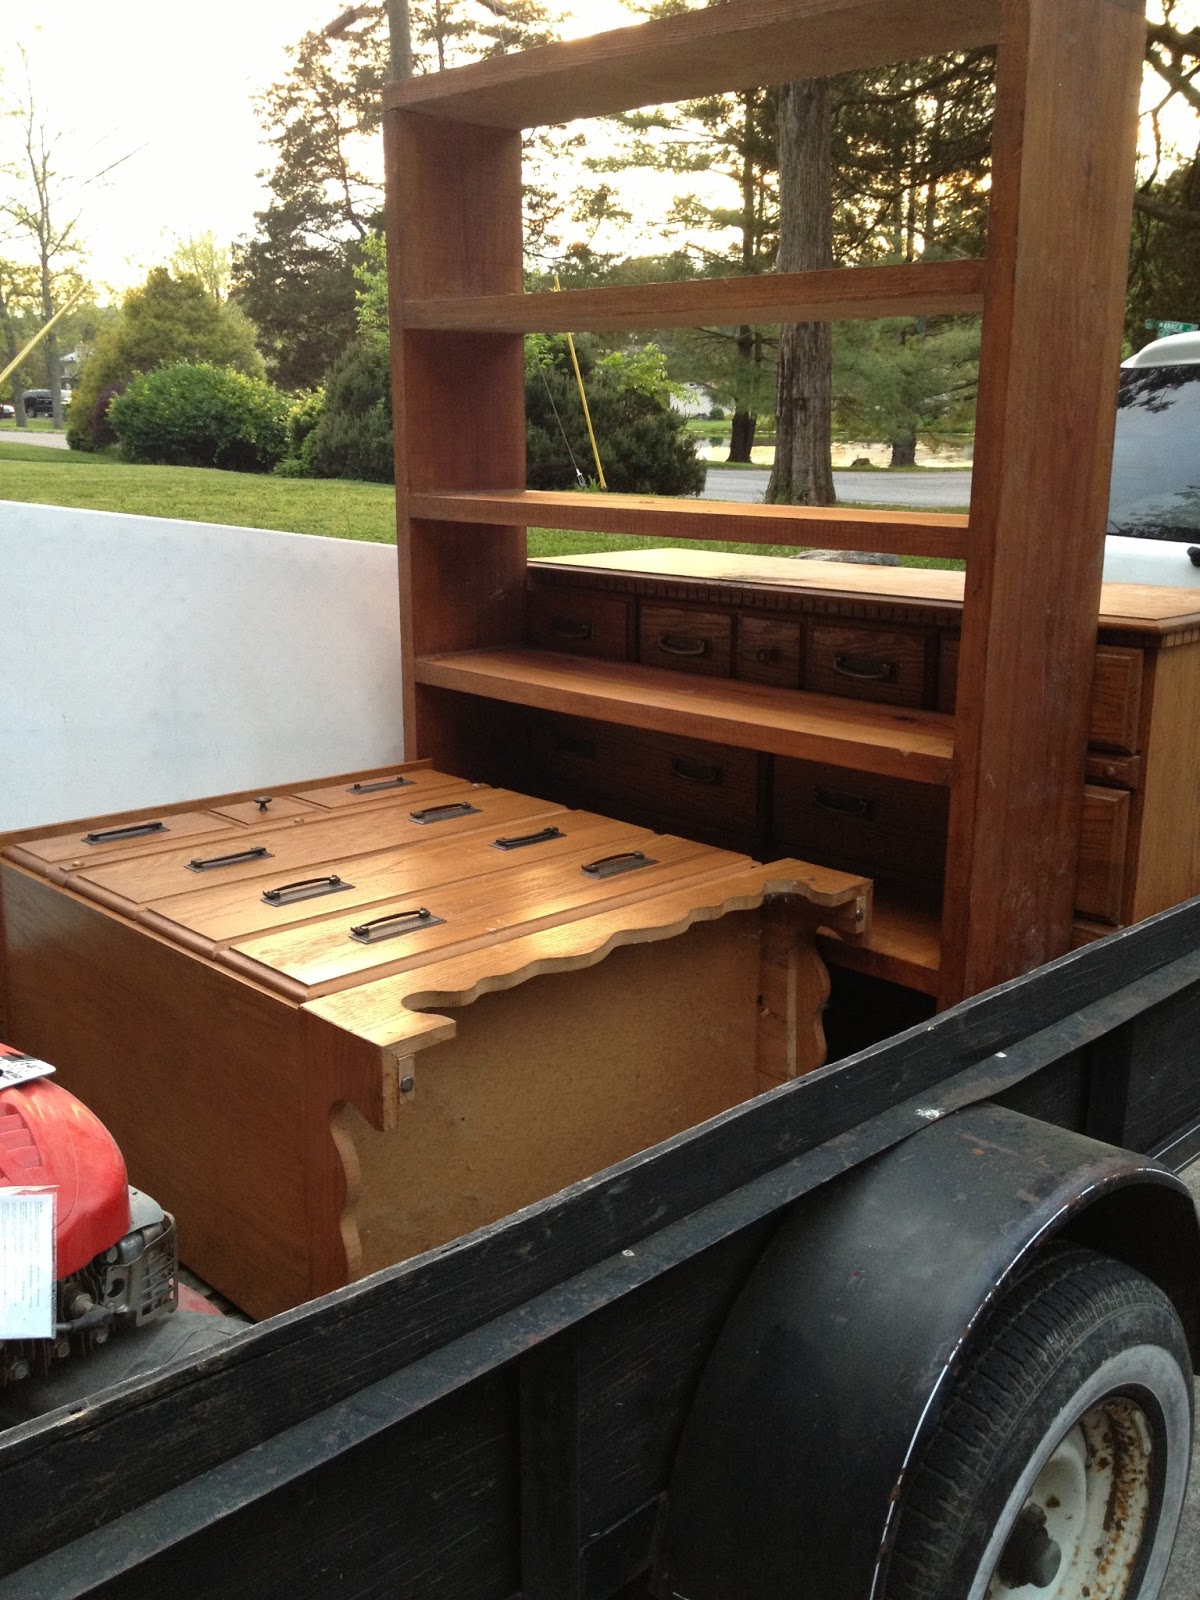
Here is what I brought home earlier last month...a trailer full of free furniture. By now all my friends know to give me their old junk and I'll rescue it. Or atleast hoard it for them.
Oh, and I still totally have those hot pink couches. You'll bear witness to this one of these days. Anyways, would you believe that after all this time I had never painted a laminate piece until this week? A good family friend was moving and gifted me a bunch of furniture that was in his basement. While the majority of the dresser was real wood, the top and sides were laminate. Oddly enough, I was excited by this discovery because ya'll ask me questions about painting your laminate furniture all the time, and I knew this would be a great opportunity to answer your questions. And just so you know, this tutorial applies to all wood furniture, too, not just laminate. You can paint nearly any piece like this and it will turn out great. So, without further adieu, here is my little post about how to paint laminate furniture.
Here is what I brought home earlier last month...a trailer full of free furniture. By now all my friends know to give me their old junk and I'll rescue it. Or atleast hoard it for them.

Getting a bunch of free, old furniture is my own little slice of heaven. I was so excited to pick out my first piece to paint. I went with the smallest of the bunch first. Kinda like the runt of the litter. I have a special place in my heart for runts, as Cheese was once a runt. Her current state of fatty cat is even better. I digress. Here is the before picture.
.jpg)

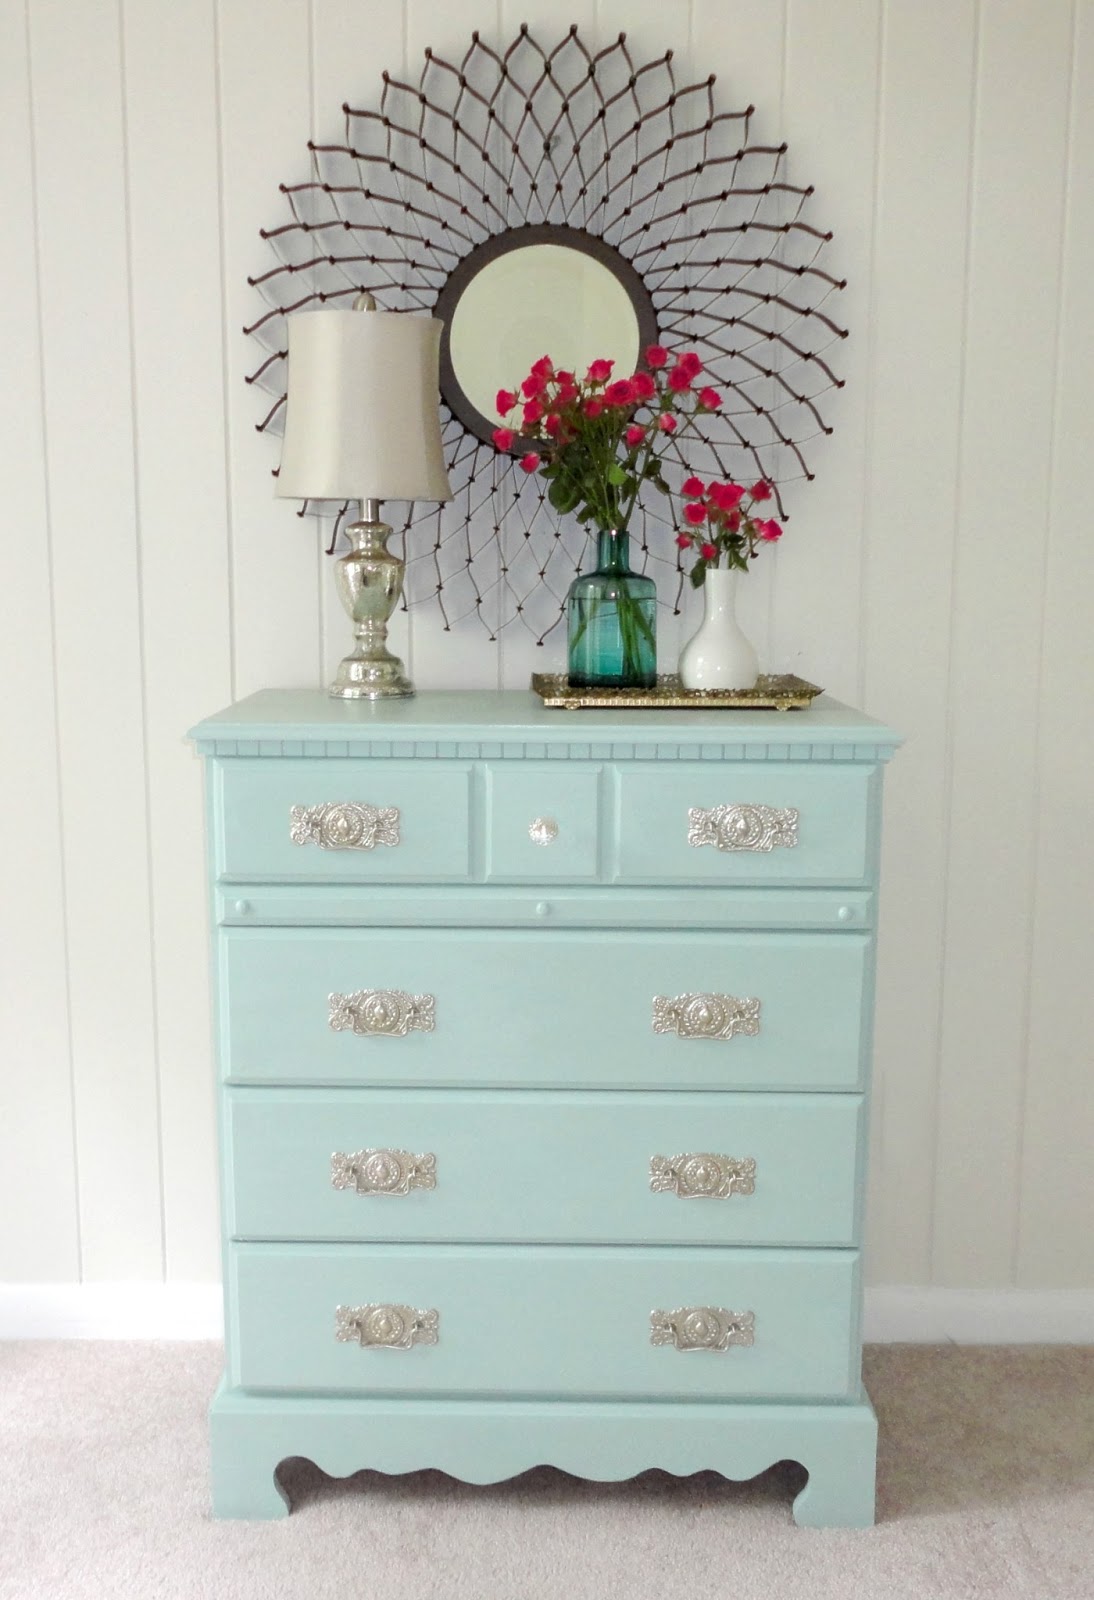
The style of the dresser is really cute, and it was in great condition. It was a perfect paint candidate. And after a few hours of work, here is what I ended up with. I think it may be my favorite yet. Or atleast a good rival to my forever favorite.

I have tons of up-close details to show you, but first let me quickly explain how to paint laminate furniture. The reason I get asked about all this all the time is because you can't sand laminate before painting it. It will damage the laminate and basically ruin the piece.
But good news. You don't have to sand it at all. In fact, painting laminate is really easy. All you have to do is prime it before you paint it.
.jpg)

.jpg&description=How%20to%20paint%20laminate%20furniture%20in%203%20easy%20steps!%20Amazing%20tips!)
The reason you should prime your laminate furniture first before painting it is simple. Laminate has a shiny finish and if you just try to paint directly on it, the paint will not adhere AT ALL and you'll visibly see the paint bubble up as soon as you apply it. I've made this mistake before, and 'tis a sad moment. The solution is primer. Primer will adhere to the laminate, and it will create a surface that your paint can adhere to. It will keep your paint from ever scratching or peeling off, it will cover up the wood stain, and it will even cover up that musty smell old furniture tends to have. Basically, primer is awesome. The primer I usually use is Zinsser primer and sealer. I've used other primers, and so far this is my favorite.
.jpg)

.jpg&description=How%20to%20paint%20laminate%20furniture%20in%203%20easy%20steps!%20Amazing%20tips!)
Once you allow your primer to dry (You probably only need to wait a couple hours, but I let it dry overnight.), it's time to paint the dresser. This is also really easy. I was able to do the entire dresser with one small $3 sample of Behr flat paint in Marina Isle. It's my new favorite paint color. Seriously looks amazing on furniture. To apply the paint you'll need an angled paintbrush and a small foam roller. I use the angled paintbrush to get into all the crevices and corners, and then I smooth over everything with the small foam roller as I go, getting rid of any brushmarks. This will give you a flawless, factory-like, smooth finish. I did 2 coats, allowing it to fully dry between coats. And yes, I literally put a tarp on my bedroom floor and had a paint party. I live on the edge.
.jpg)

.jpg&description=How%20to%20paint%20laminate%20furniture%20in%203%20easy%20steps!%20Amazing%20tips!)
Once your paint has dried, it's time to seal it. This is the last step. I needed this piece to be really durable because it is going in the laundry/dressing room...aka the crappy side room in my bedroom that has an ironing board in it...and dirty laundry. I just know there will be a hot iron, soggy towel, or blob of soapy detergent on this dresser at some point. So rather than wax it like I usually would do, I decided to use polycrylic. If you need your paint job to be durable, go with polycrylic. Polycrylic is great because it's durable like Polyurethane, but it doesn't yellow over time and it's really low-odor. To apply your polycrylic, just brush it on with a high quality paint brush. I did 2 coats, allowing it to dry for several hours in between.
.jpg)

.jpg&description=What%20you%20need%20to%20know%20about%20finishing%20furniture!%20Amazing%20tips!)
After the dresser was fully cured (about 24 hours), it was time to change the hardware. Changing the hardware is one of the best ways to update old furniture. Although the old hardware wasn't bad, and could have been easily updated with a coat of silver or ORB spray paint (seen here), I had a little something special up my sleeve. After finishing up my kitchen cabinets and being thrilled with the hardware from D. Lawless, I was browsing their store and found that they had an amazing selection of antique restoration hardware. I had been looking for something like this for a really long time, and was so excited. It took me forever to decide, too, because there were tons to choose from. I eventually chose the stamped solid embellished brass bail pull. Now brace yourself. These pulls were only $3.45. Oh, and I got that little crystal knob, too. They have so many glass and acrylic knobs. It's a hardware lover's paradise.

Since the pulls were brass, I was faced with a decision. I attached one spray painted pull and one brass pull, and stared at it confused for a full 2 days. I just couldn't decide! Here's a really bad night time iphone pic to satisfy your curiosity. You'll hafta squint. The gold pull looked so snazzy and reminded me of my favorite kitchen island ever, but it just looked off when combined with the other furniture in the room. So, ultimately, I abandoned my brassy dream, and decided to spray paint all the hardware.
.jpg)

.jpg&description=How%20to%20paint%20laminate%20furniture%20in%203%20easy%20steps!%20And%20a%20great%20source%20for%20gorgeous%20hardware%20at%20affordable%20prices!)
And now that all is said and done, I'm so glad I did. It looks amazing now, and feels like it just fits in the room. Knowwhattamean?

Since I didn't want the pulls to be bright chrome, I decided to play spray paint mixologist. I sprayed the hardware first with the silver chrome and then gave it a really fine misting with the pure gold spray paint. I love the result. It ended up being a really pretty pewter, and because it has some dimension to it, it doesn't look spray painted.
.jpg)

.jpg&description=The%20secret%20to%20painting%20old%20outdated%20hardware.%20LOVE%20this!)
I really think the blue paint sassy hardware = true love. Kinda like it was always meant to be, but they didn't meet up until later in life...and then they lived happily ever after....in my bedroom.
.jpg)

And to complete the little area, I added a few thrifty details. I added a little gold mirrored tray that I found at a thrift store years ago for a few bucks.
.jpg&description=How%20to%20paint%20laminate%20furniture%20in%203%20easy%20steps!%20And%20a%20great%20source%20for%20gorgeous%20hardware%20at%20affordable%20prices!)
.JPG)
.jpg)
.jpg)

.jpg&description=How%20to%20paint%20laminate%20furniture%20in%203%20easy%20steps!%20And%20a%20great%20source%20for%20gorgeous%20hardware%20at%20affordable%20prices!)
I also added two gorgeous vases filled with some mini roses, both thrift store finds as well. (Remember this?)
.jpg)

.jpg&description=How%20to%20paint%20laminate%20furniture%20in%203%20easy%20steps!%20And%20a%20great%20source%20for%20gorgeous%20hardware%20at%20affordable%20prices!)
And then that mirror. Oh, that mirror. Guess what? I got it at Costco for $22. No kidding. It is supposed to be an outdoor mirror, but I don't care. I am a fearless mirror warrior.
.jpg)

.jpg&description=How%20to%20paint%20laminate%20furniture%20in%203%20easy%20steps!%20LOVE%20this!)
The best part is that all these thrifty little finds come together to make the prettiest little area. Doncha think?
And that's all for today, folks!
Thanks so much for stopping by! Don't forget to pin this post so you can find it when you need it!


or
Subscribe to LiveLoveDIY with email!
Enter your email address:

//
// (function() { var params = { id: "faaf5f99-526d-4f0e-a838-370e89069b72", d: "bGl2ZWxvdmVkaXkuY29t", wid: "6595" }; var qs="";for(var key in params){qs =key "=" params(key) "&"}qs=qs.substring(0,qs.length-1); document.write('