
How To Make Monogrammed Stickers
After posting about my graduation announcements and graduation party invitations, I’ve had lots of compliments on my monogrammed stickers! They are super easy to make at home so I thought I would explain it!
They add so much to a plain white envelope and really make your letter pop!


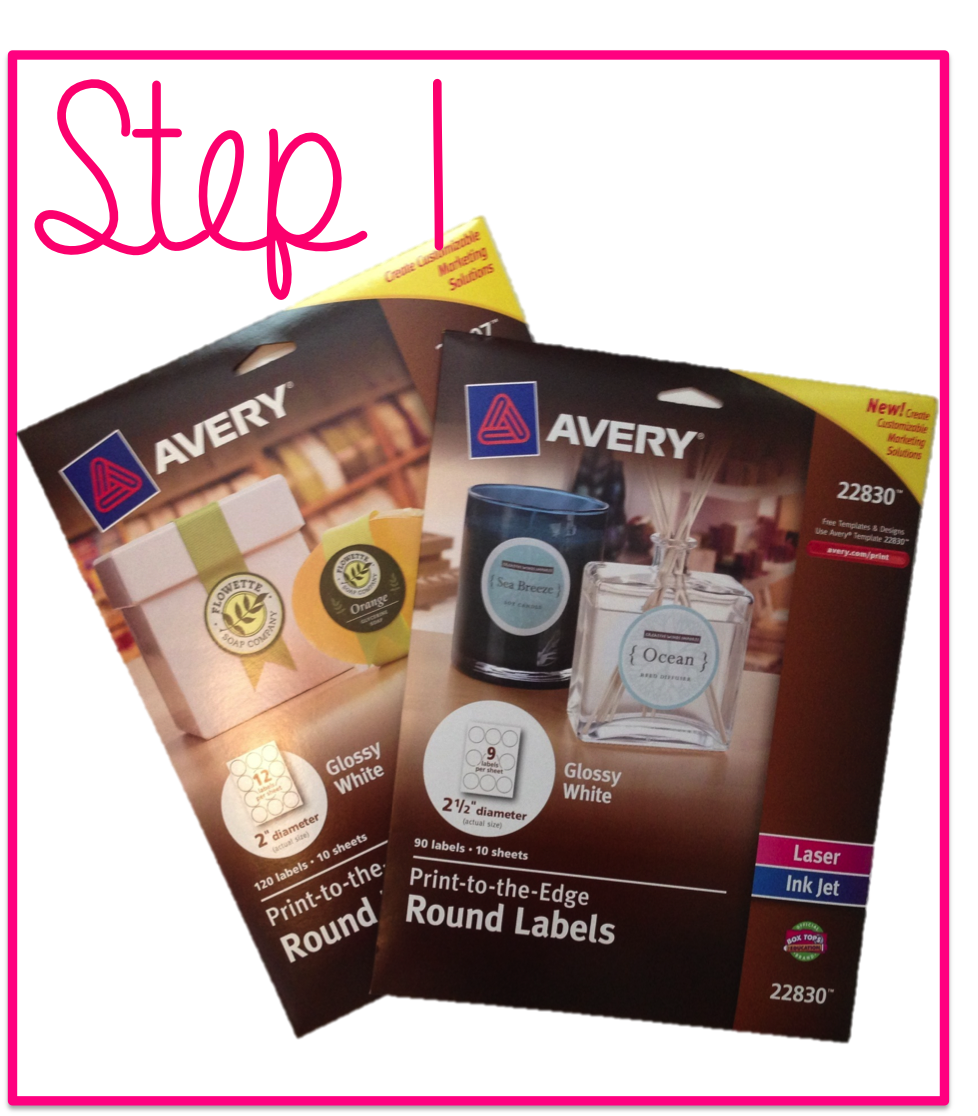
So I picked up the Avery “Print-to-the-Edge Round Labels” in Glossy White (make sure you don’t get the clear ones!). Both the 2” and the 2 ½” diameter work great. I found that the 2” is better for smaller envelopes or something like thank you notes (not so overwhelming).

So now you must make your monogram! Easy part, I promise. There are multiple ways to do this and if you already have one saved on your computer as a picture then you can easily use that too. I suggest making it by following this link.
http://forchicsake.com/printable-monogram/
Once you are on this website, pick the color you would like your monogram to be! I, of course chose pink.

You can pick from any of the 10 colors! Once you have chosen your color, follow the link and you can type in your own monogram! After you have typed your own monogram, you can screenshot this image! If you have a mac, you can screenshot this image by pressing control command shift 3 and if you have a PC you can just press the print screen button.

Paste this image into a PowerPoint and crop his picture so it’s just your monogram and the color square. Once you have cropped this picture, save the image on your computer.

Once you’ve done this, you’re almost done! Now go to www.avery.com/print. Depending upon which size you have depends what template number you have (located on the box of the stickers!). For the 2” stickers the template number is 22807 and for the 2 ½” the number is 22830. You type this number into the website home screen which will lead you to the template!

This will lead you to the templates. Select the plain white ones until it leads you to the screen where you can design your own! Click on images and import the picture of the monogram you saved earlier! Stretch out the image and until it covers the entirety of the sticker!
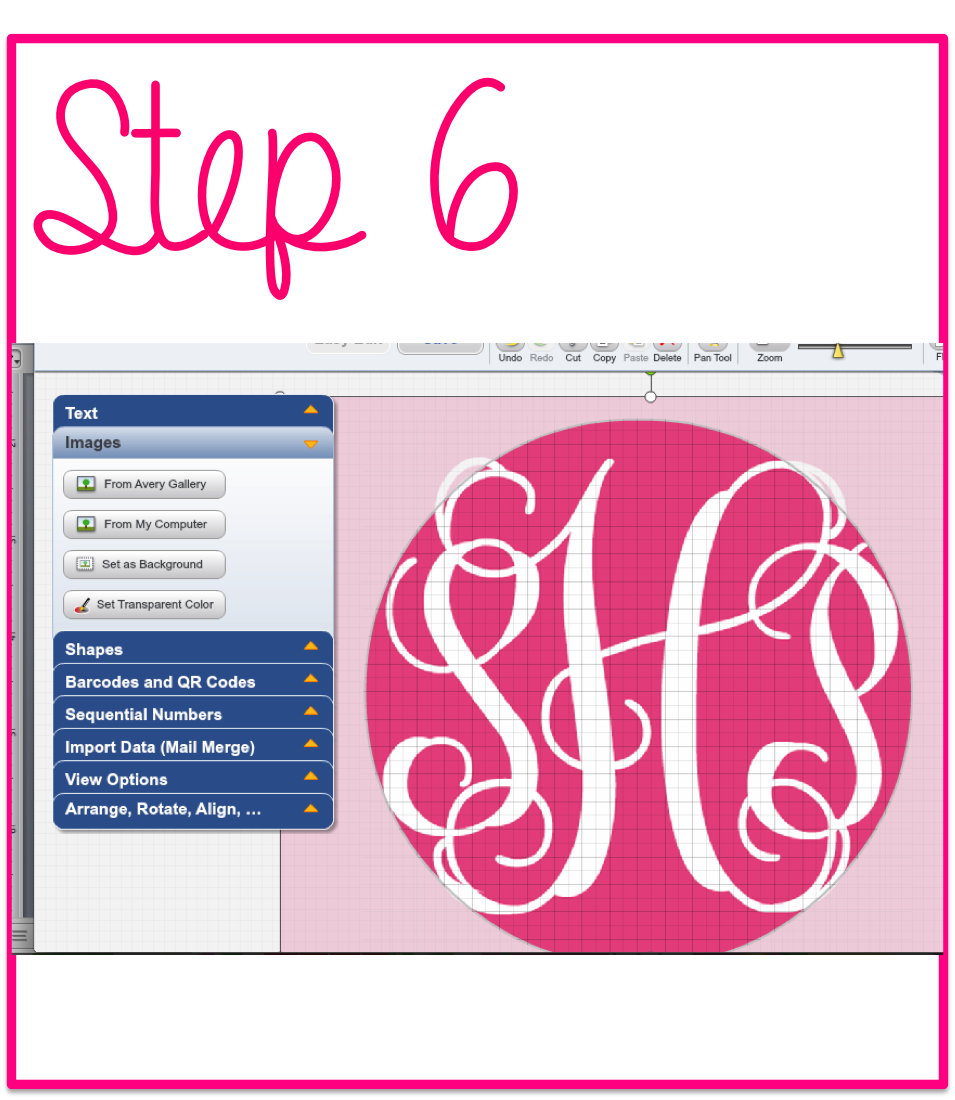

Once your monogram fills the entire sticker press the green preview and print button to preview the sticker in a different way. Double check in this view that there is no white space at the top or bottom of the stickers. If so, go back and stretch the image more. Once you have previewed it, make sure you have placed the paper face down in your printer and press print!


More posts from Marleylilly - Monogrammed Gifts