
Home is Where the Heart Is – Door Decor

How about an unusual front door decor idea today? Jaime from That’s My Letter here to share this house shape door decor project with free plans to make your own.

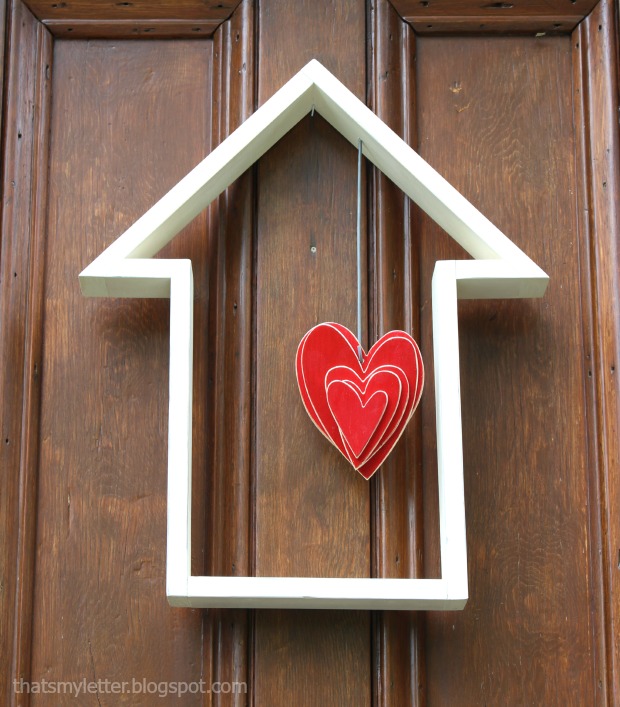
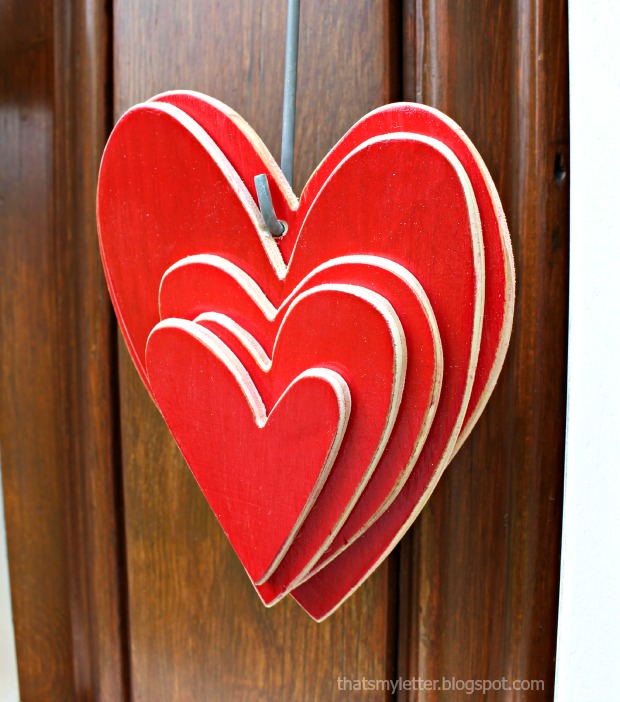
A little play on “home is where the heart is,” this door decor is definitely different and not your typical wreath. I used 1×3 pine boards to make the house shape then added the cut out hearts to hang in the middle. (Yes the house shape does look like an arrow. If you want to make an arrow shape, those plans are below as well.)


Supplies:
- 1 – 1″ x 3″ x 6′ pine board
- 1/4″ plywood scraps
- miter saw
- measuring tape
- pencil
- wood glue
- finish nailer
- 1 1/4″ finish nails
- 3/4″ finish nails
- scroll saw or jigsaw
- sandpaper
- wire hanger
- drill
- 1/8″ drill bit
- wood putty
- white spray paint
- red acrylic craft paint
- paintbrush
- clear exterior grade polyurethane spray
Below are the step-by-step instructions to make your own wood house shape door decor. Always follow all precautions and safety rules when using power tools.

Cut List:
- 1 – 1×3 @ 12 3/4″, one end 45 degree miter (roof)
- 1 – 1×3 @ 12″, one end 45 degree miter (roof)
- 2 – 1×3 @ 2 1/2″, one end 45 degree miter (roof overhang)
- 2 – 1×3 @ 13″ (sides)
- 1 – 1×3 @ 9 1/2″ (base)
Step 1: Assemble roof. Attach long side to short side using glue and 1 1/4″ finish nails.

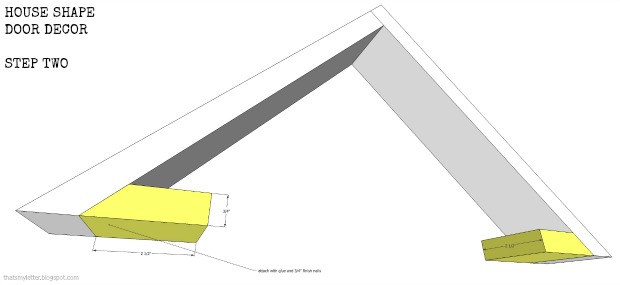
Step 2: Add roof overhang pieces to mitered ends of roof. Use glue and 3/4″ finish nails here. Below demonstrates how to cut these super short mitered pieces.

First make your 45 degree miter cut into one end of the board. Then line up the long edge at 2 1/2″ long and clamp down the remaining board. Now you can make the cut safely and still have all 10 fingers!

Step 3: Attach the sides and base using glue and 1 1/4″ finish nails. Apply wood putty as needed, sand and paint.


Step 5: Drill a small hole for the wire hanger into the roof line and glue the wire hanger in place.
To make your house more stout (and less looking like an arrow), shorten the side pieces. You could use just one large heart and add the family name for a personalized gift. Hope you enjoy this unconventional door decor idea.

The post Home is Where the Heart Is – Door Decor appeared first on Pretty Handy Girl.