
Make It \\ DIY Minimalist Daybed with Storage


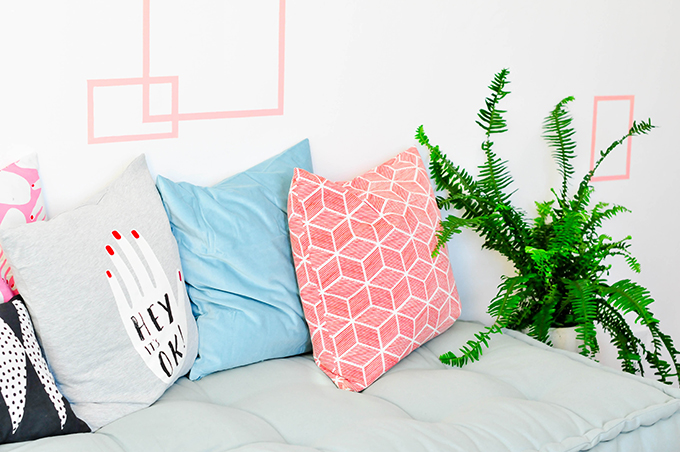
We had thrown around the idea of just buying a daybed after finding this Rohini Daybed Cushion from Urban Outfitters. I loved how the cushion looked and loved the simple daybed it was styled with, but didn’t want to shell out an extra $300 for a bed ON TOP of the $150 for the cute cute cushion. I knew we could build our own and so we got to work sketching up some plans for a DIY minimalist daybed. And we came up with a literal box with storage! And it is my favorite. And it only cost about $90 so it is Logan’s favorite.
Materials needed for your own DIY Minimalist Daybed with Storage
- hammer
- 2 inch finish nails (1 box)
- orbital sander and disks (180 and 220 grit)
- hand sanding blocks (220 grit)
- 4 utility hinges
- 2 lid supports for hinges
- level
- measuring tape
- pencil
Cut List
- pine plywood – 85″ x 32″ (2)
- pine plywood – 85″ x 14″ (2)
- pine plywood – 30″ x 14″ (4)
- 2″ x 4″ (1) – optional

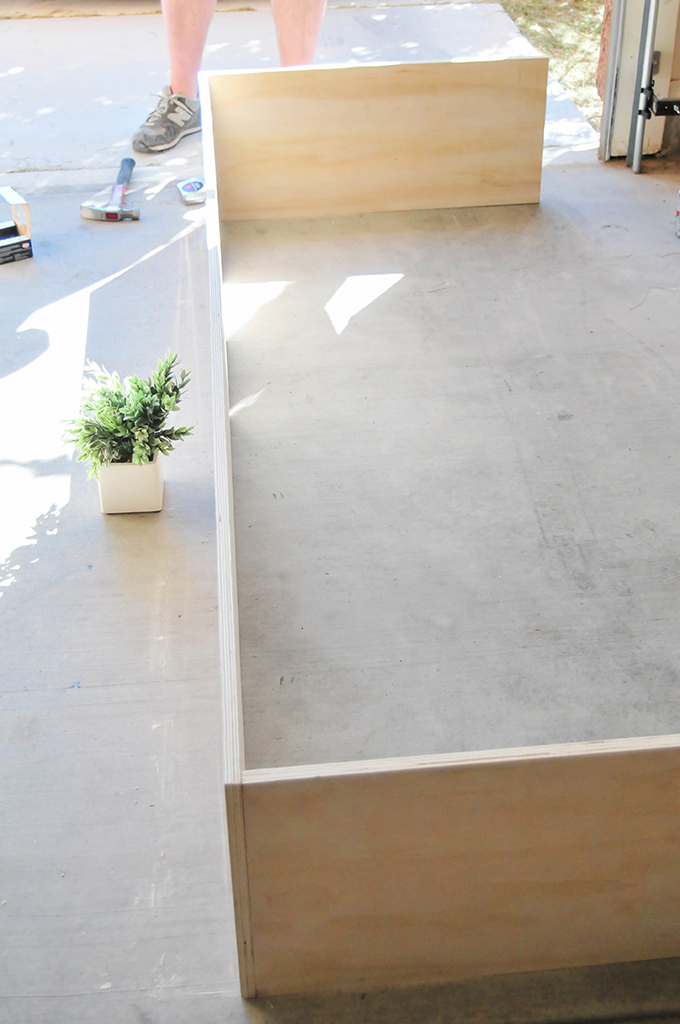
Step 1. We started by doing a mockup of how we wanted the bed to look. Just lay everything out on an even surface (this case being our garage floor!) and make sure everything measures correctly.

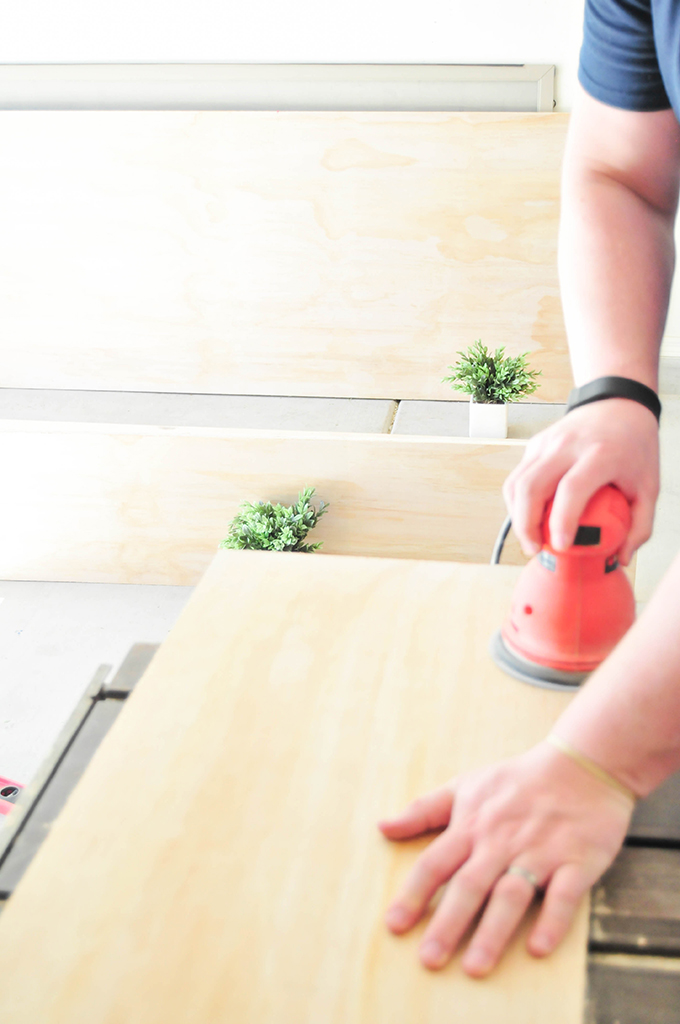
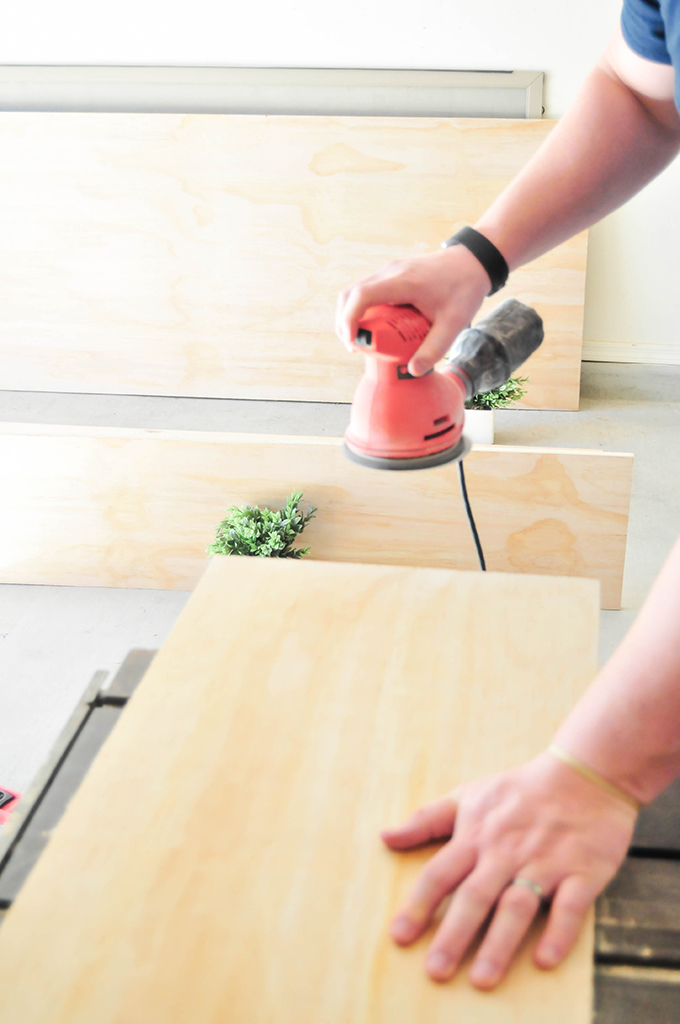
Step 2. Use an orbital sander to finish each piece of wood. This particular plywood came pretty sanded and finished, so it wasn’t a lot of work. We just sanded away any dirt, dings, or minor scratches.


Step 4. Start nailing! We first built the base by attaching the 4 30″ x 14″ pieces to one of the long and skinny sides (85″ x 14″). We placed 3 nails per small board and used a nail set to get them deep without damaging the wood.


Step 5. Turn the box on its side and hammer the second long side (85″ x 14″) to the 4 small boards. Use a tape measure to make sure things are spaced evenly. To give you an idea for spacing, we nailed a small board (30″ x 14″) every 21 3/8″ inches.


Step 6. Nail the bottom large board (85″ x 32″) to the perimeter of the box and flip the bed. We placed a 2×4 inside the middle storage box to help keep the wood from bowing.
Step 7. Check that all edges are flush and place the final top piece (85″ x 32″). attach 4 hinges to the back of the bed to secure the top.

This is embarrassing. I accidentally deleted the photos of us placing the hinges to the back of the bed. They were good, folks. But ya know how you just sometimes lose your mind? That was me a few weeks ago. So here’s a shot of the hinges in action!

Step 8. Attach the lid supports to the inside of the lid following the label’s instructions. Read these instructions several times over before adding them! Take it from someone who had to practice several times to be sure she did it right. Those lid supports can be tricky business!
Step 9. Go over every surface with the orbital sander to remove any small marks that may have occurred during the building process! And take the bed to its new home!

I attached a strip of leather to the top center of the bed to help when pulling the lid up. The cushion that rests on the bed will cover it and I can just pull the cushion off when I need to get something out of the bed!


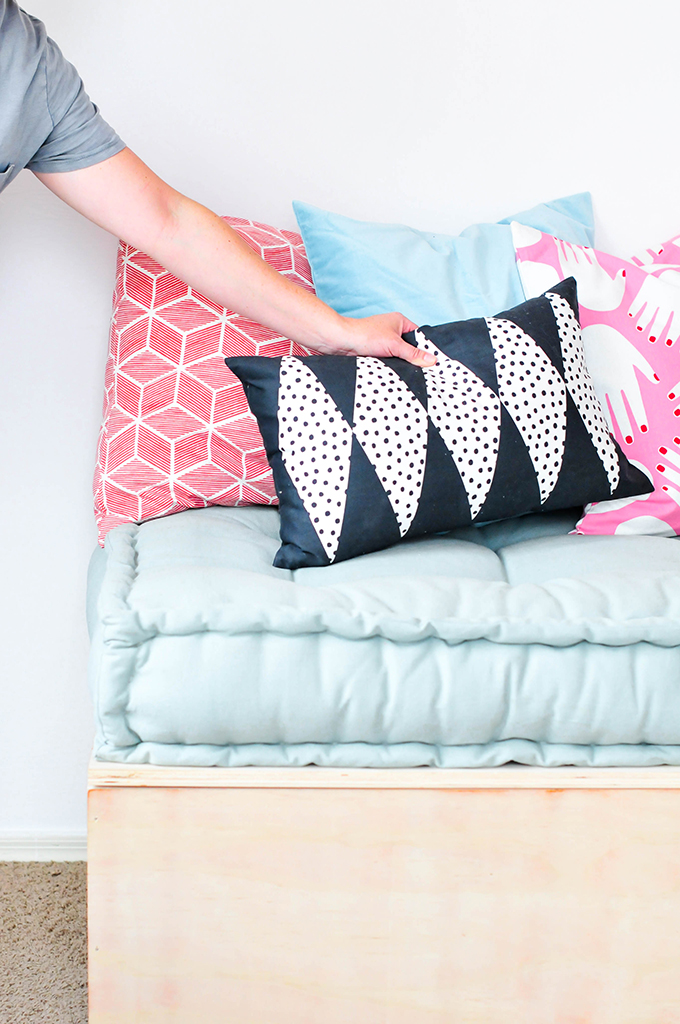
Just look at it. These large wings are perfect for our oversized blankets and quilts that we pull out for guests and camping trips.

I’ve also stored extra pillows and baby items that Vita no longer uses, but that we will need when the day comes that we have another baby in the house!


Because we extended the bed an extra foot beyond the cushion, guests can use it as an acting “bed side table” and place their books and beverages right next to them while resting!
He’s super sturdy. And super heavy! There was a look of sheer panic on my face when I was assisting Logan in moving this from our garage and up a flight of stairs into the new bedroom. He laughed. I had a heart attack. We’re obviously made for each other. The bed is unstained and natural and I kind of love it! I decided to let it stay natural for a few weeks before deciding if I want to stain or paint it. Any suggestions for me? I’m terrible when it comes to daybed-decorating-decisions. What do you think? Would you make your own DIY minimalist daybed? It was honestly all in a day’s’ work!
Check out the full room reveal right over here to see how everything else looks next to the daybed! And if you’ve now got the woodworking bug and are itchin’ to build something, check out a few of our other easy projects like these industrial wall shelves or this rolling storage bin!
concept, styling, & photography \\ Lexy Ward
The post Make It \\ DIY Minimalist Daybed with Storage appeared first on PROPER.