How to Build a Faux Fireplace and Mantel
Our Remodelaholic motto is builder-grade to beautiful, on a budget. Home renovations start with simple things like paint and hardware changes, but what really takes your home from cookie-cutter to custom are the things that add character and architectural features to your home. We have many skeptics who swear that we must be pulling a fast one, and that our living room can NOT be the same one as in the before pictures. But I promise it is — and that is the beauty of adding statement-worthy features, and what makes it worth all the work to renovate stairs, build bookcases (two kinds!) and add architectural columns and arches.
So why am I going on today about all of this? Because today’s guest, Lauren, is SO good at making her home beautiful and stylish, while on a tight budget. She took an average living room and made it sing by adding this gorgeous faux fireplace!

And, the best part of it is — she’s here today with ALL the details! Give her a warm Remodelaholic welcome!
DIY Faux Fireplace
by Lauren of Bless’er House
Hello, DIY warriors! I’m Lauren from Bless’er House, and I’m practically doing backflips over how excited I am to be here today. I blog all about my adventures to make my new basic builder grade house look like a cozy eclectic cottage on a major budget. My little family of three just hit the 1 year mark of living in the Charlotte, North Carolina suburbs. You can check out an entire before and after progress home tour over on my blog.
Our biggest transformation of all has been our DIY statement-making faux fireplace that we accomplished for less than $600. I am thrilled to be sharing all of the step-by-step details with you! If you’ve been dying for a fireplace in your home but don’t have thousands of dollars in your pocket, this is definitely the way to go.

When we were building our house over a year ago, the upgrade for a fireplace was going to cost $5,000 for a very basic, small fireplace. That wasn’t going to work for our budget, and we didn’t need one in the mild climate of the Carolinas anyway.

Part One: Faux Fireplace Carpentry
Here are the materials we used:- The ready-made mantel front (found for $100 on Craigslist)
- Paint stripper (We used Citristrip)
- Chemical resistant gloves
- Scraper
- Bucket
- Basic paint brush
- 3 plywood sheets
- 9 2×4 boards
- Carpentry nails
- Finishing nails
- Drywall screws
- Tape measure
- Pencil
- Circular saw
- Jigsaw
- Piano hinge
- Hammer
- Power drill
- Hack saw

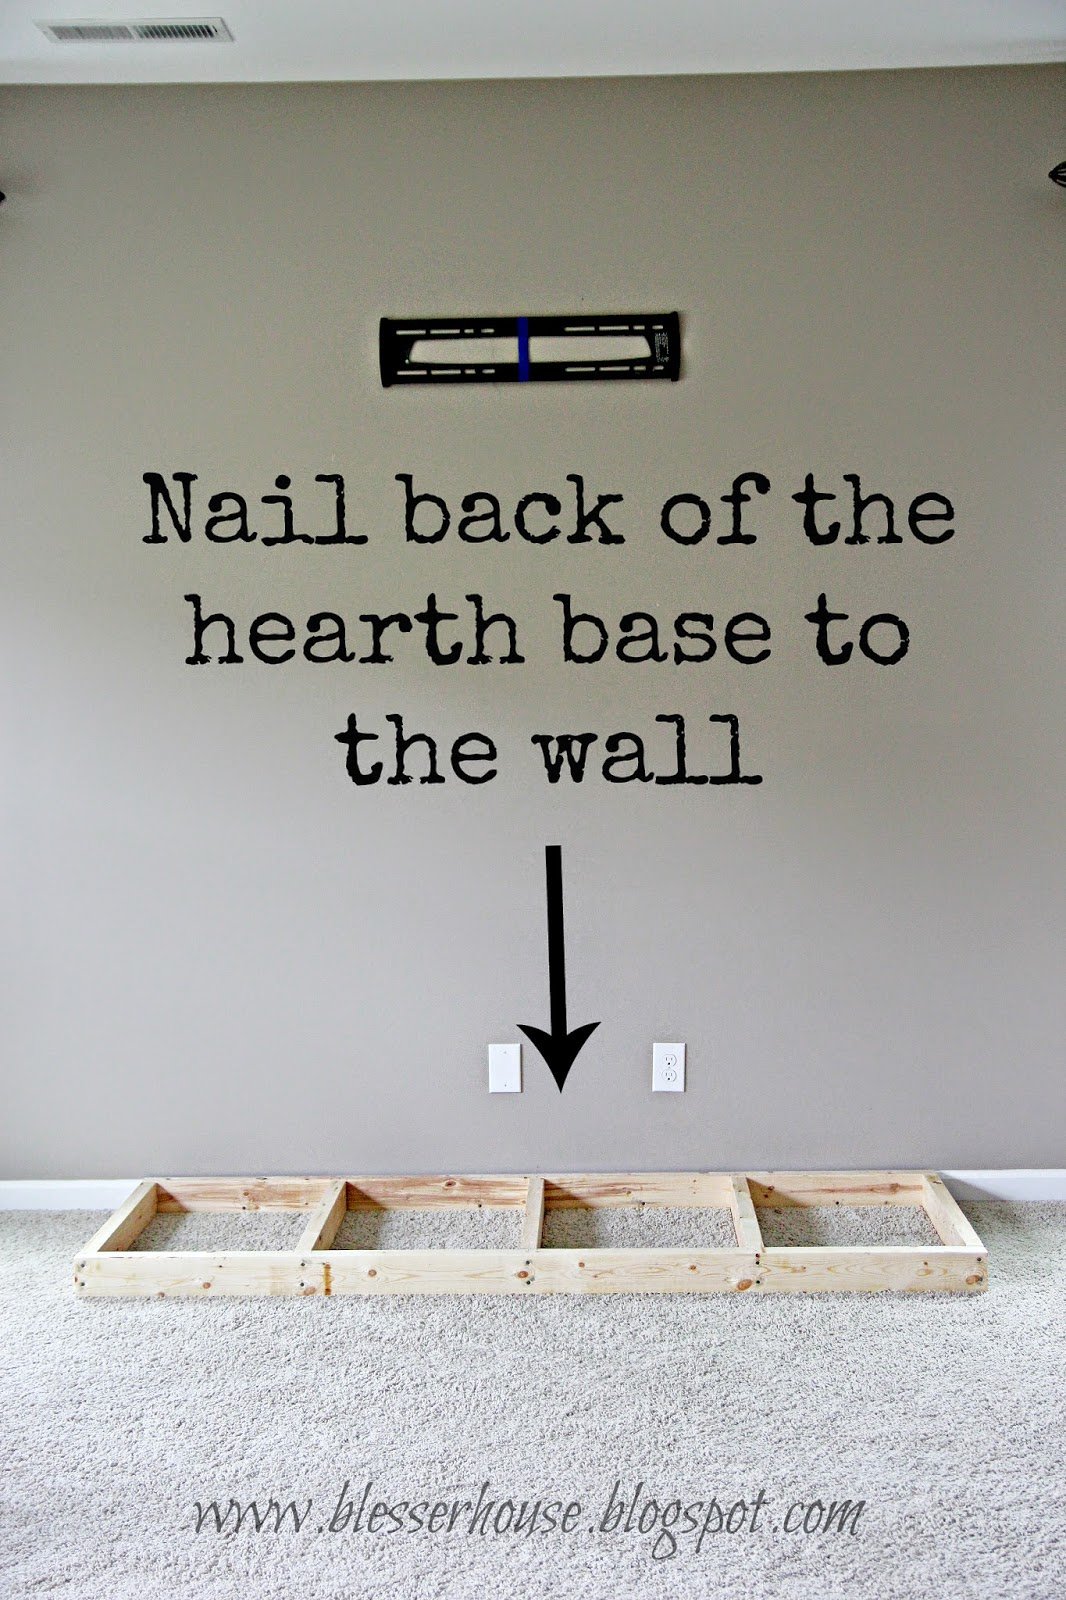
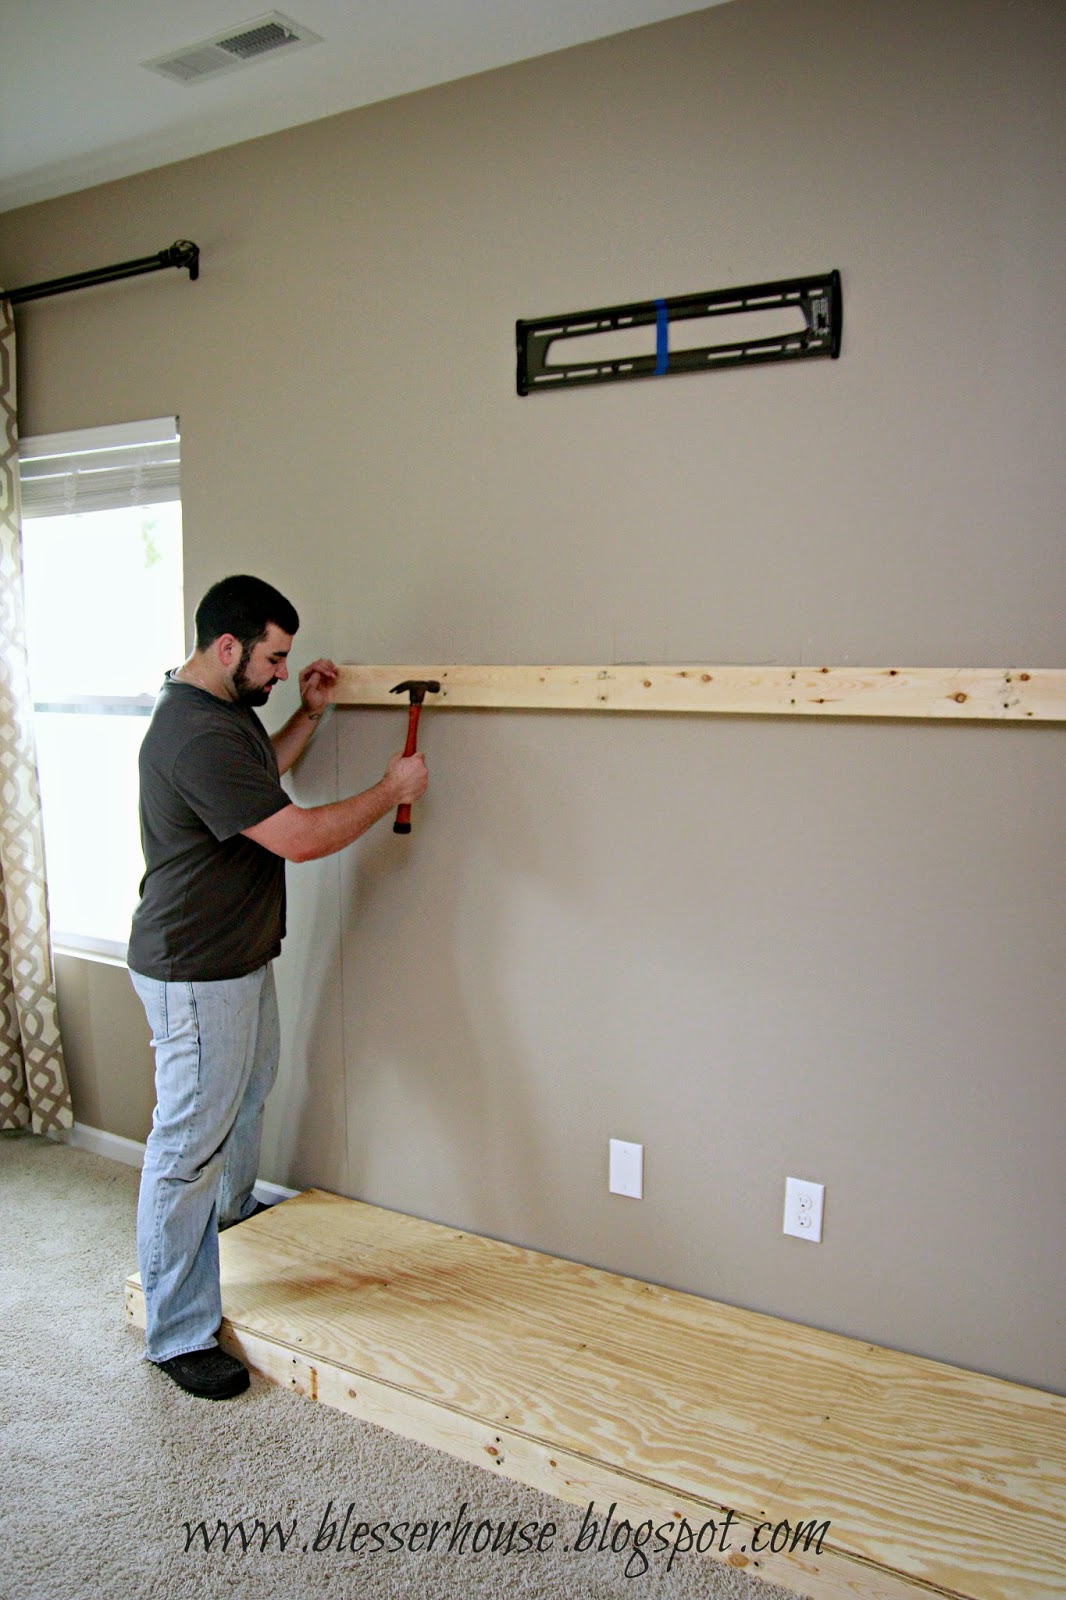
My father-in-law is a whiz at woodworking, so he and my husband mainly did the handiwork. First thing we did was find the center of the wall and decide on the measurements based on the existing mantel front.


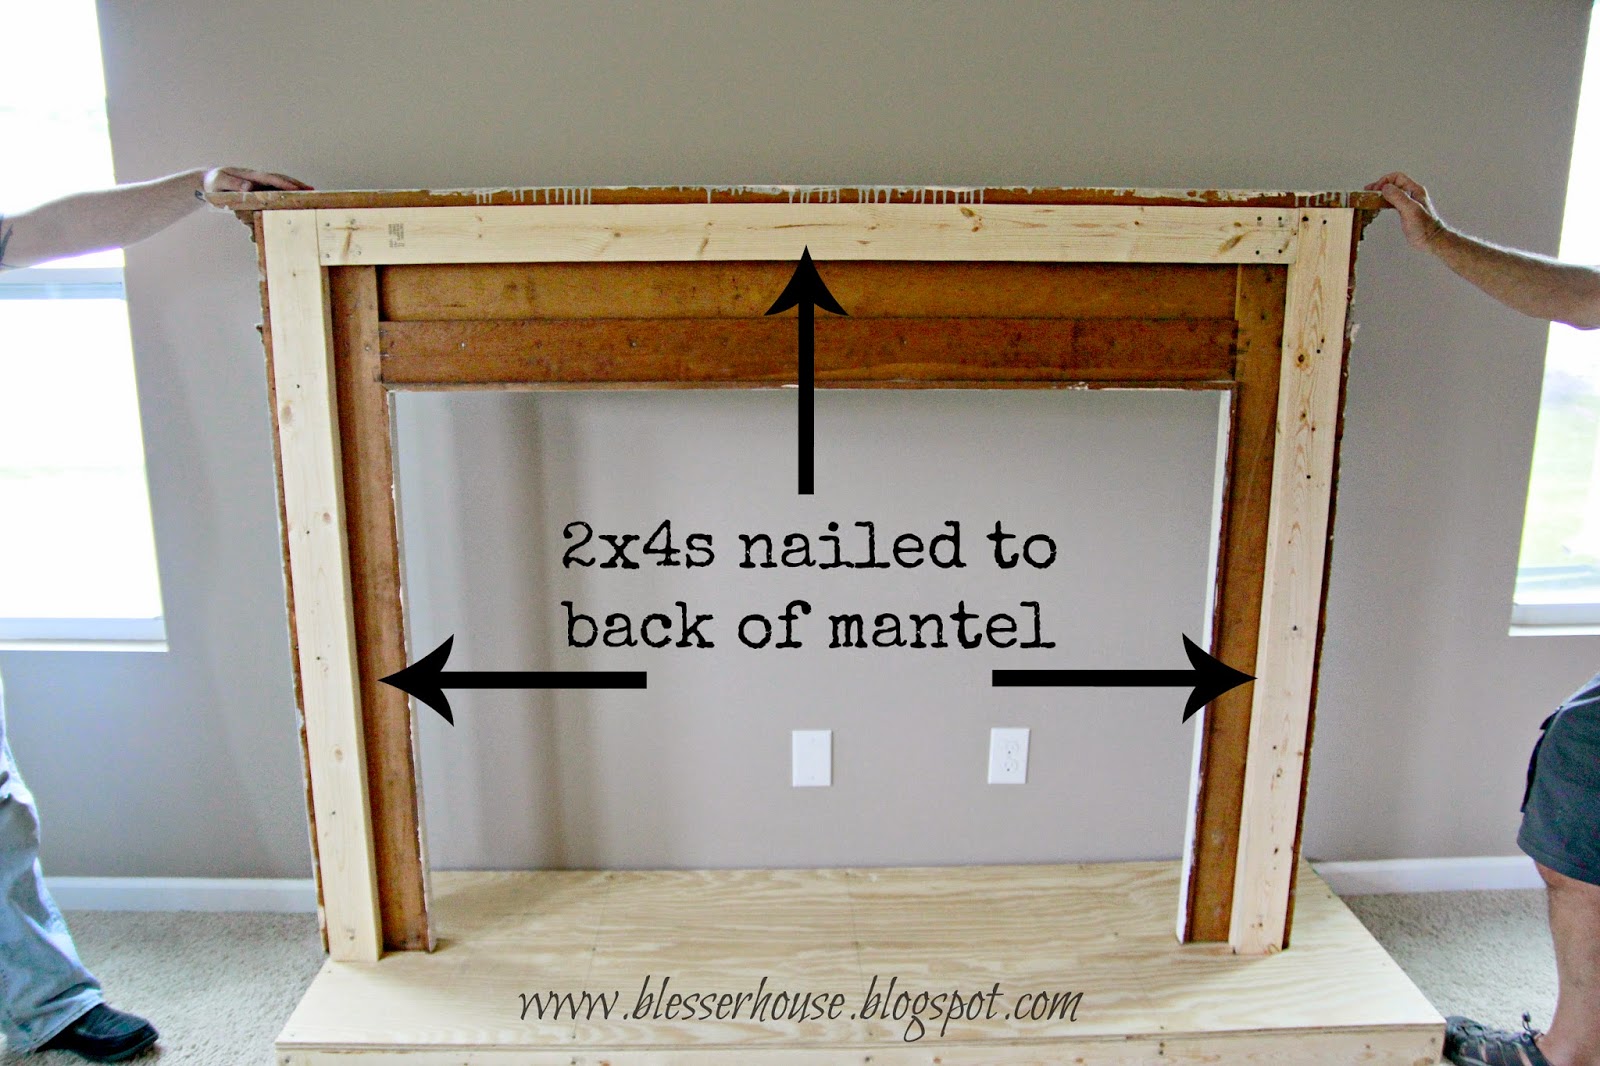
For the mantel, we nailed in 2x4s inside the back of the frame to later use as an anchor to the wall.


Here’s where our faux fireplace becomes a bit more than a faux fireplace.
We wanted this space to still be useful, so we put in a door to fake a firebox and have access to our outlet on the wall behind the fireplace to run our cords out of sight like a media cabinet. We measured the faux firebox door and left a little space at the bottom to create a threshold and prevent the surround from bowing.


Part Two: Faux Chimney Plank Wall
Materials we used:- 9 1×6 boards cut to width of mantel (70″)
- 2 1×4 boards cut to height from mantel to ceiling (50″)
- Level
- Pencil
- Popsicle sticks (or other type of spacer)
- Finishing nails
- Hammer
- 2 strips of quarter round finishing trim (50″ each)
- Drill and hole saw drill bit (optional)


Part 3: Adding Paint and Stone
Materials we used:- AirStone bought at Lowe’s
- Hack saw
- AirStone adhesive
- Putty knife
- Popsicle sticks (or other kind of spacer)
- Concrete patio stones
- Rags
- Paint brush
- Paint bucket
- White paint (We used Valspar color matched to Sherwin Williams Pure White in semi gloss finish.)
- Gray paint sample sized pot (We used Valspar Rugged Suede.)
- Black chalkboard paint or other flat black paint
We painted two coats on all of the places on the fireplace with the Pure White that wouldn’t be covered with stone.


I chose to whitewash the hearth AirStone in the garage and attach them later so that I wouldn’t have to worry about getting whitewash on our floor.
To make the whitewash, I mixed 1 part of the white paint with 1 part water in a bucket.


The great thing about AirStone is it’s only $50 per 8 square feet of coverage, and no power tools are needed to cut them. All we needed to cut the stones to fit them was a hack saw.


I later went back over the stone with a second coat.
At this point in hindsight, I realized that I would rather paint the AirStone white than live with the whitewash, but that was a personal preference. So I ended up painting it all white, but it’s better to try whitewash and paint after than to paint and wish you’d tried whitewash. Once you paint, there’s no going back.

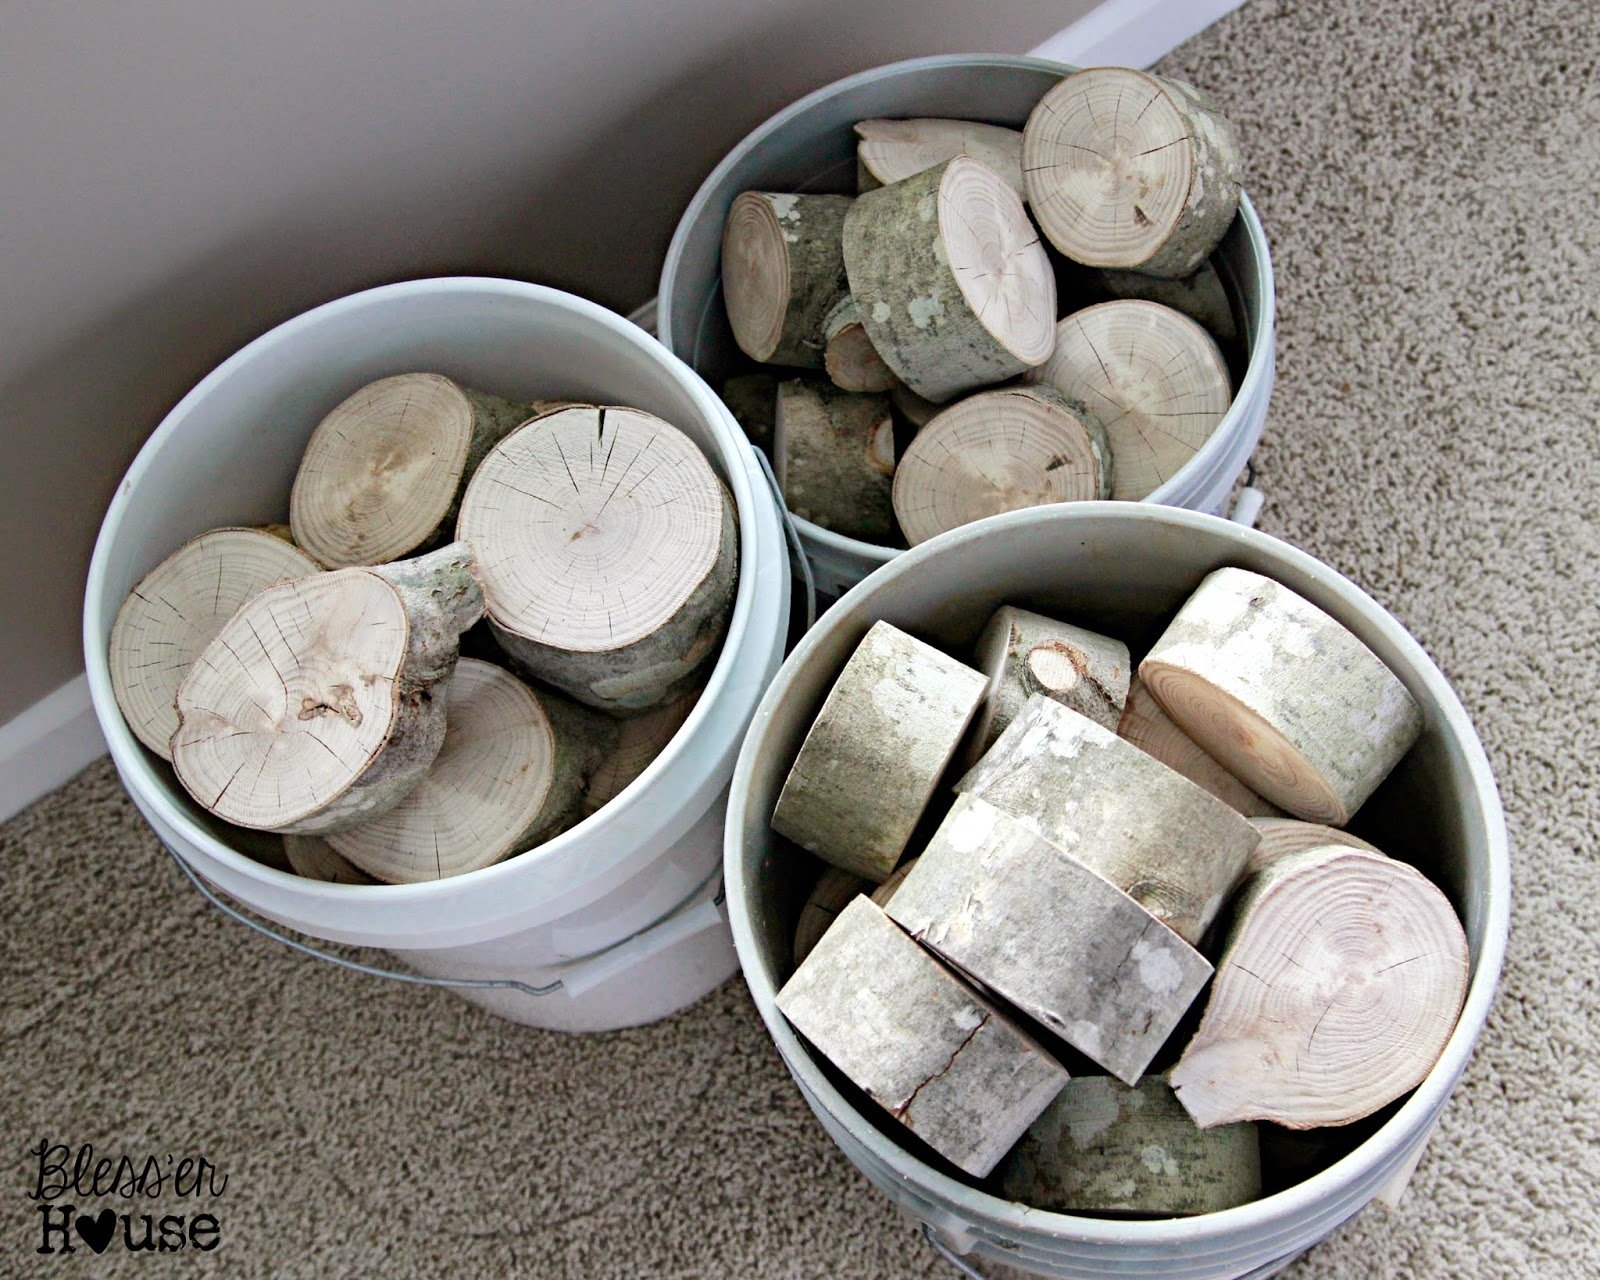
Part Four: Faux Stacked Log Front
Materials we used:- Log slices cut on a band saw at 2 inches
- Gorilla Glue (or other strong adhesive)


Once we screwed the firebox door back on the fireplace, we realized the door was too heavy to constantly open and close as we accessed our electronics from inside of the firebox, so we chose to keep them on the mantel instead until we could figure out a better solution. But we can still access the outlet.
And that was that! Our living room officially had a fireplace!


———————————-
Okay…. now that you are all positively drooling over Lauren’s fabulous faux fireplace (WOW!!!), put your tongue back in your mouth and run over to Bless’er House to see more from Lauren. I suggest you try the faux reclaimed wood tabletop and faux planked bookcase, but it’s hard to go wrong with budget industrial light fixtures — and I know you’ll appreciate 8 ways to make the most of having NO money for home decor!
PS: subscribe to follow us by RSS or email so you don’t miss a single one of our amazing holiday guests!
You can also follow along on social media: Facebook | Instagram | Google | Twitter | Pinterest
Want to be featured here on Remodelaholic? Submit your best project here.
Get your fireplace fix with 25 gorgeous fireplace makeovers:
