How to Make a Tablet Holder
Hi, it’s Amy from Hertoolbelt. I like trying new recipes and most of them are online. My tablet is so handy in the kitchen, so I don’t have to run back and forth checking on the computer for the next step. A tablet holder is a must have. I love the rustic bread board look, and it’s so easy to make. One pine board will cost a little over $9, and will make 3 tablet or ipad holders. You can make 1 for yourself and 2 more for friends or family, it’s a win/win!

How to Make a Kitchen Tablet Holder
Materials
- 1″ x 10″ x 6′ board (actual 3/4″ x 9 1/4″)
- 1″ narrow utility hinge
- 12″ of 3/8″ sisal rope
- 2″ brad nails or screws
- sandpaper
- wood filler
- stain or paint
- 2 – small eye hooks or 1/2″ pan head screws
- 8″ of string
Step 1
Trim the width of the board to 3/4″ x 8″. Download and print the bread board tablet holder pattern, make sure the print settings are on 100% and not ‘fit to page’. From the end of the board, measure and mark 10 3/4″. Place the bread board pattern on the board, lining up the 10 3/4″ mark, and trace the pattern. Also trace the pattern piece with the notch.
Cut out the bread board and the notch piece. Cut a piece of wood that is 3/4″ x 3/4″ x 8″, and a piece that is 3/4″ x 1 1/2″ x 6″ this piece is the kickstand. Sand all of the pieces as necessary.

Step 2
Stack the breadboard, 3/4″ wide piece and notched piece, making each piece flush at the bottom and sides. Apply wood glue to the joining faces and secure with 2″ brad nails or screws. I nailed a few of the nails from the front and a few from the back.

Once the glue is dry, if you’d like, use the sander to round over the bottom outer corners. Drill a 3/8″ or bigger hole in the center of the handle.
Step 3
Remove any excess glue, apply wood filler to holes, cracks and blemishes and allow to dry. Sand the wood filler and holder until smooth, finishing with 120-150 grit sand paper. Paint or stain the holder and kickstand, allow to dry.
I wanted a nice rich dark brown/red color. First I applied pre-stain conditioner to the kitchen tablet holder and waited about 30 min. Then I applied minwax dark walnut stain, let it sit for 5 minutes or so and wiped off the excess. I let the walnut dry over night. Finally I applied a coat of minwax polyshades mahogany bombay and let that fully dry. The mahogany bombay left a nice rich color on the wood. One perk of the polyshades is that it contains a top coat, so no need for polyurethane later.
Cut about a 12″ piece of rope, thread it through the handle hole. Tie a simple knot in the end of the rope.

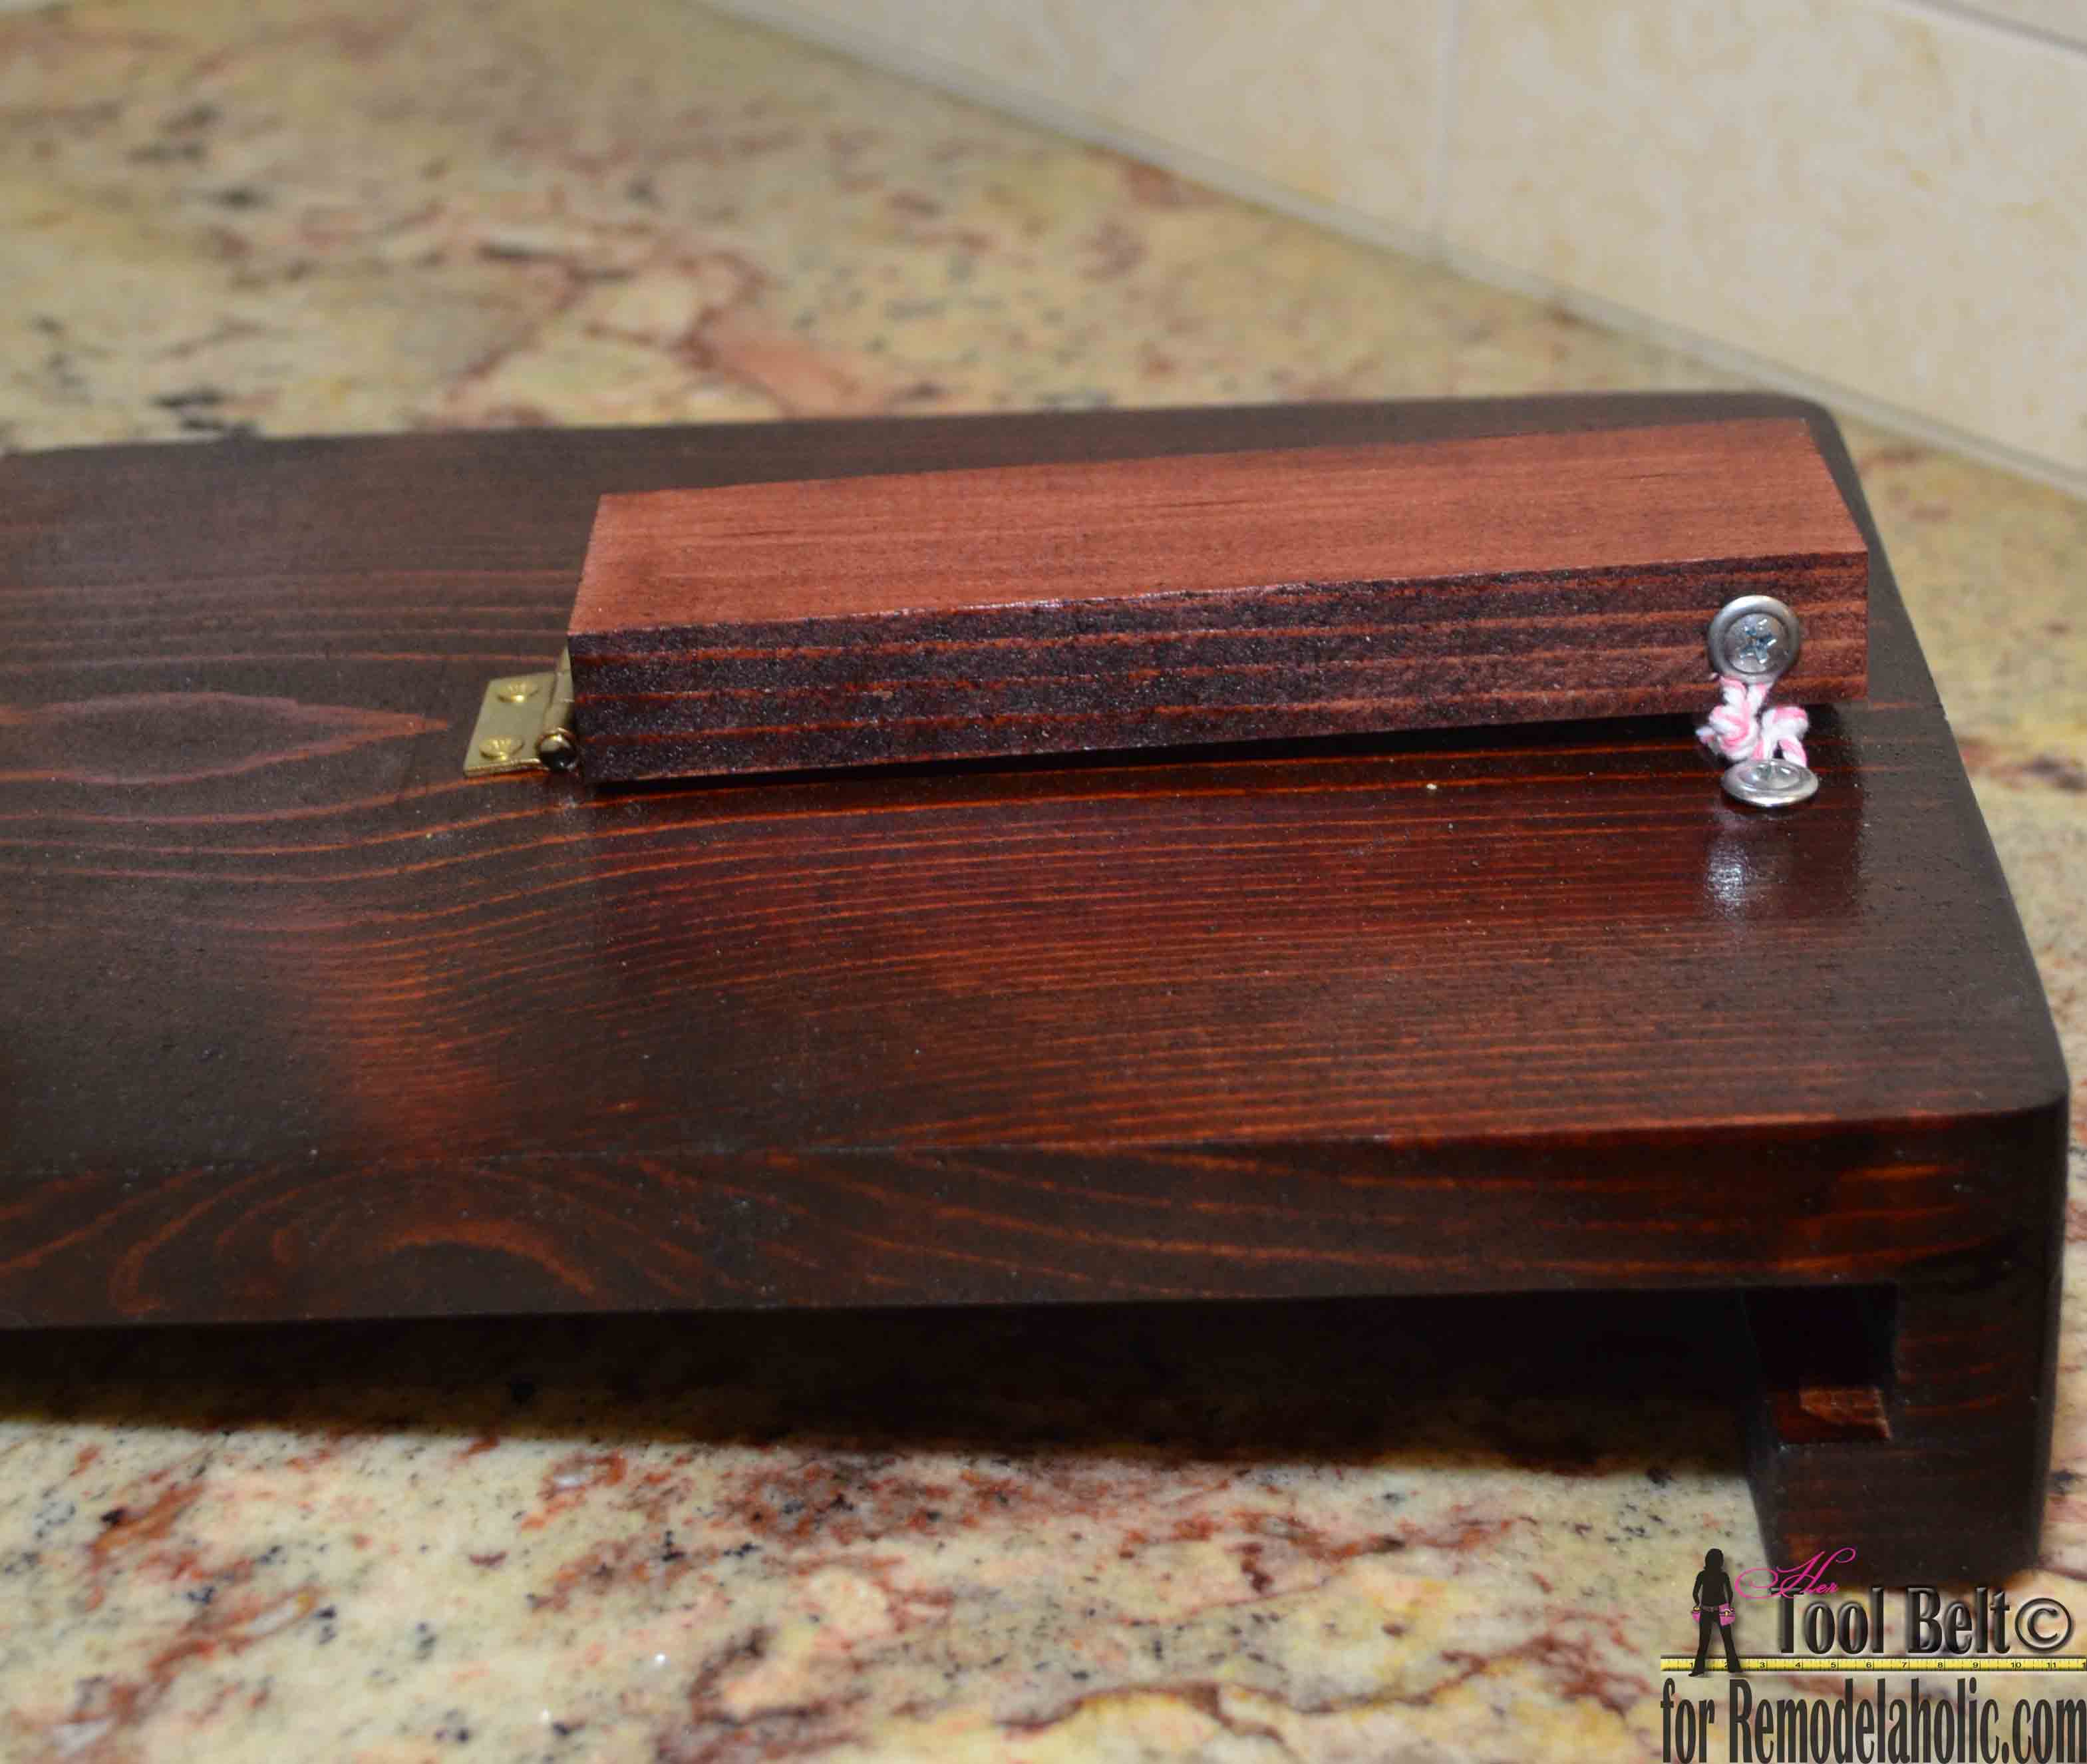
On the back of the kitchen tablet holder, measure up and mark up 7″ from the bottom and the center. Place the 1″ hinge flat on the wood, with the hinge top at 7″. Pre-drill and install the accompanied screws into the back of the holder. Flip the hinge halfway up and mark the holes on the end of the kickstand piece. Pre-drill the holes and install the hinge screws. Pre-drill a small hole in the lower side of the kickstand, install a small eye hook or pan head screw. Pre-drill a small hole in the back of the holder and install another eye hook or pan head screw. Attach a piece of string to each eye hook or screw.

Adjust the string to the length that will let your kitchen tablet holder sit at a good angle. Then tighten the screws or knots.

