
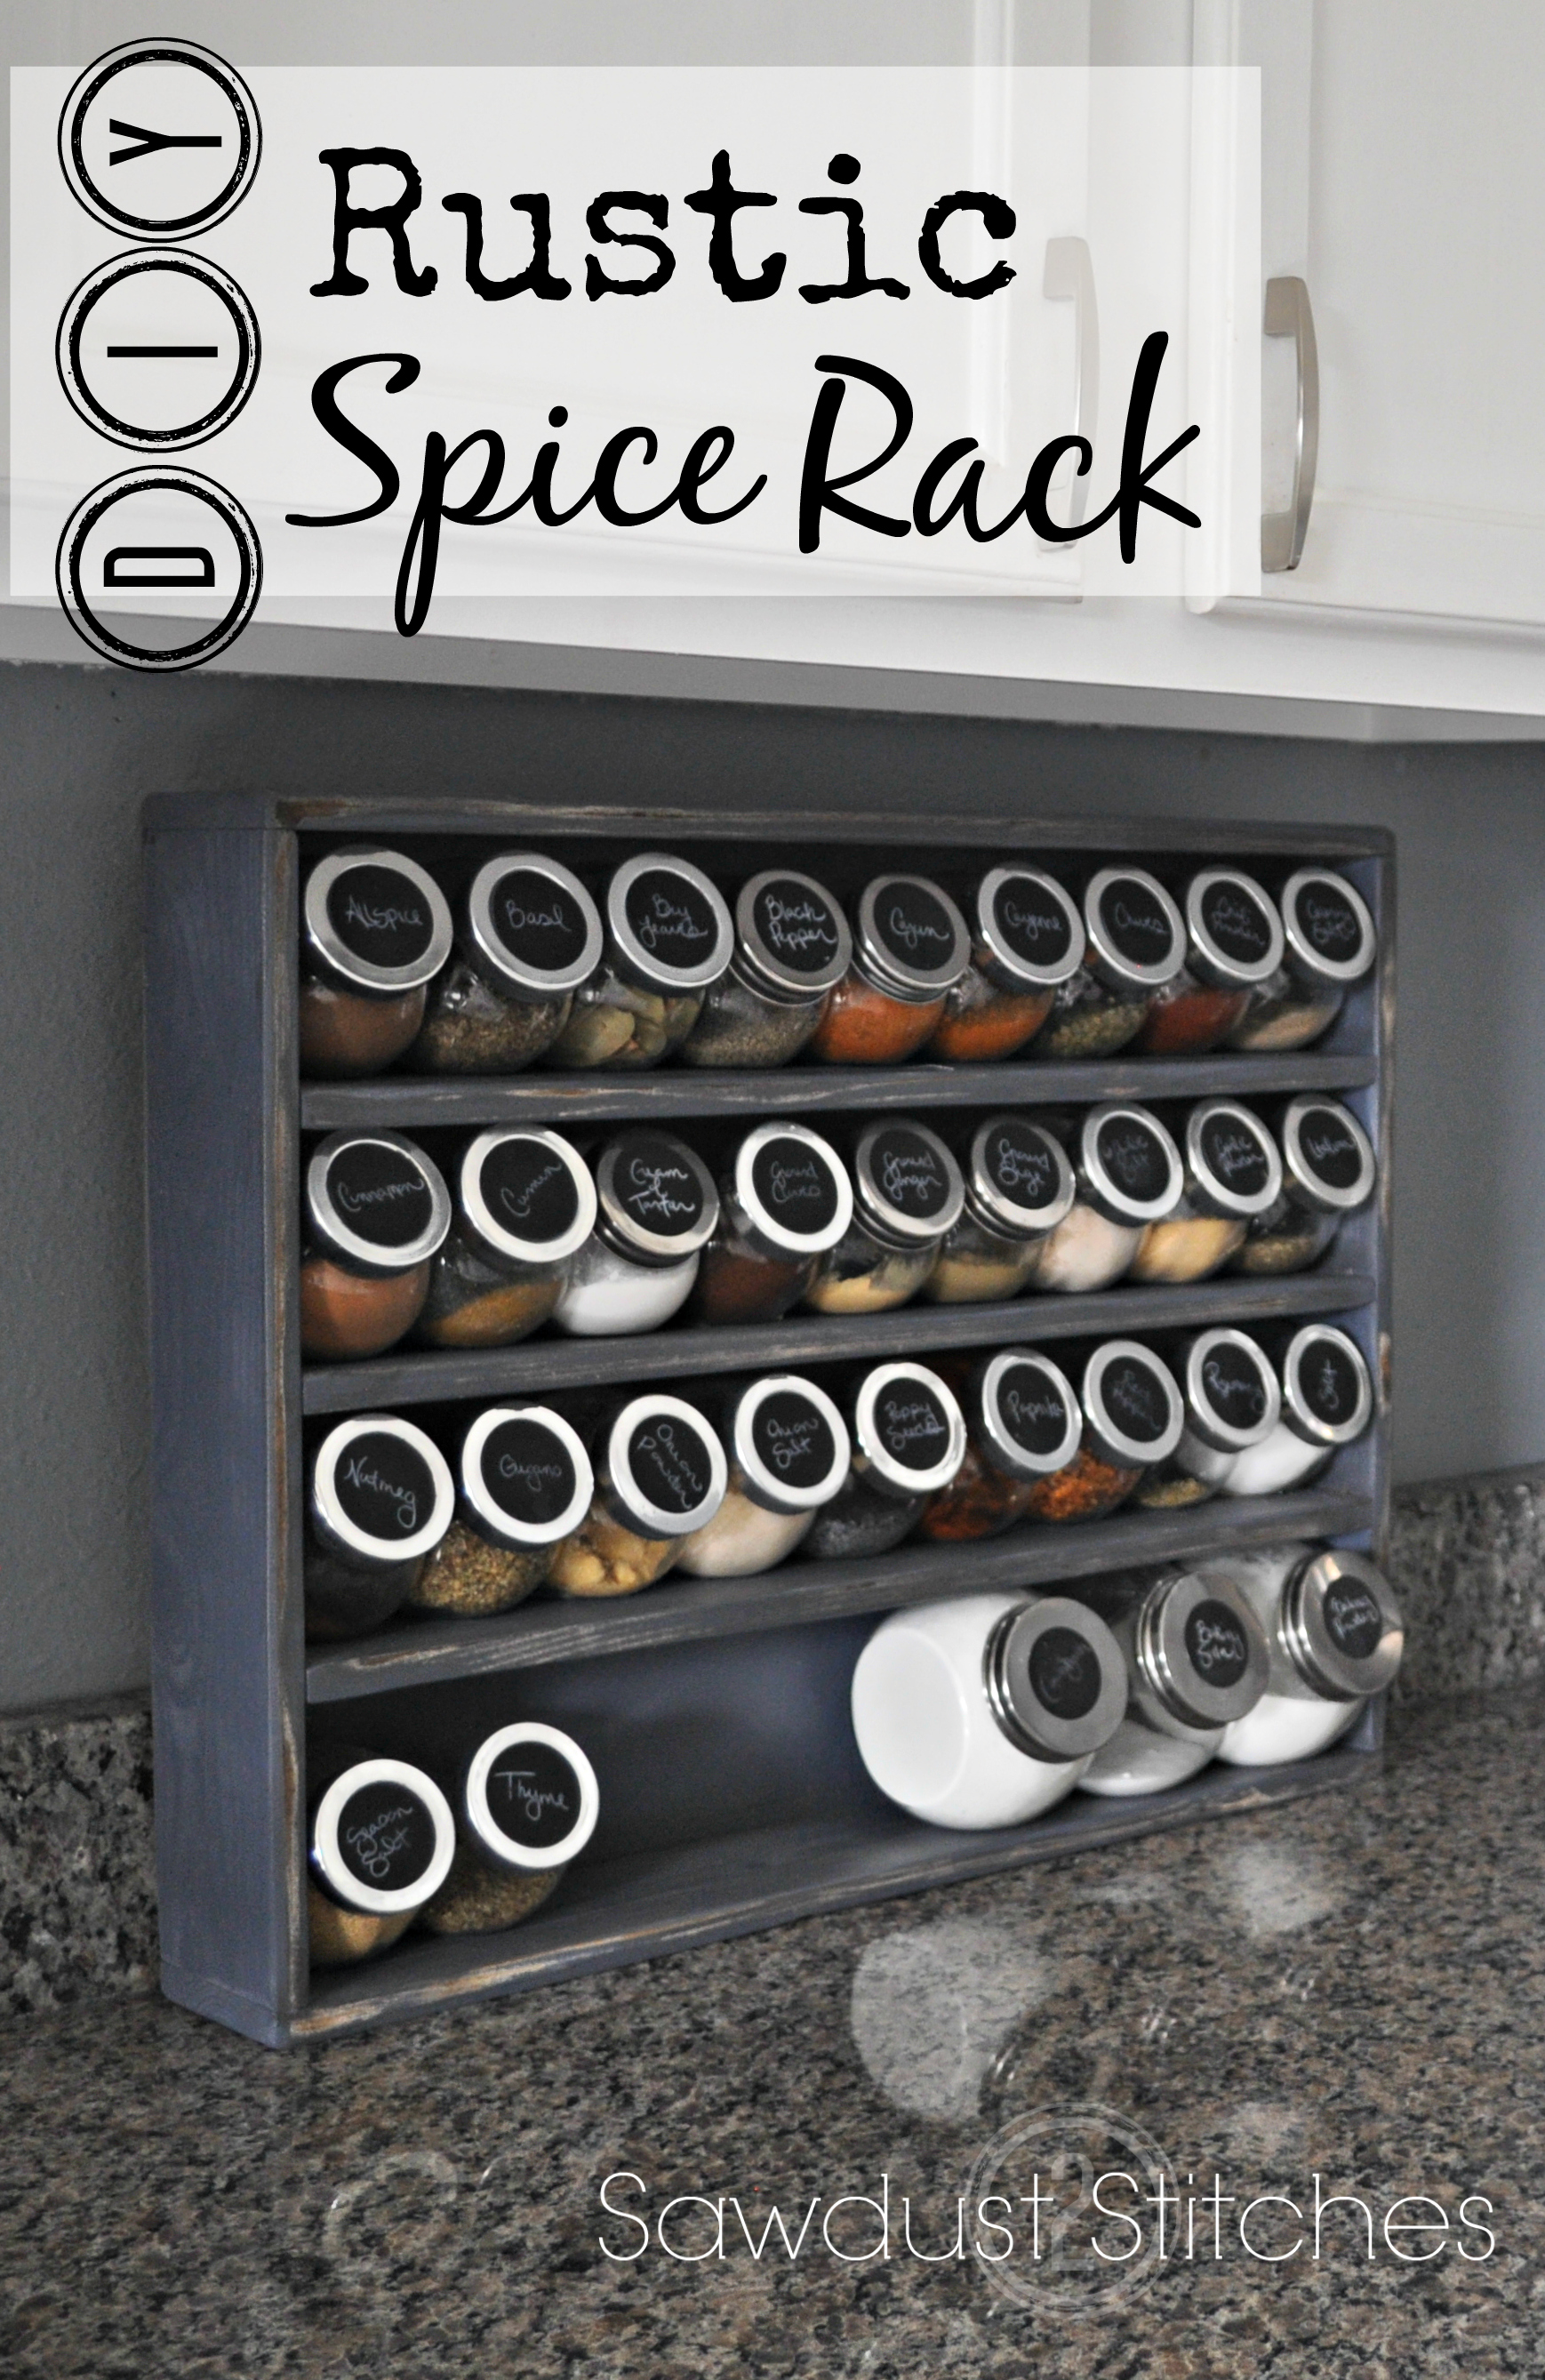
Spice Cabinet Makeover

The holidays are coming up, which means a lot of baking, and cooking. Are you ready ? Well, kitchen organization has been lacking a little… Especially my “baking” cabinet. It needed a little bit of a facelift.

Supplies Used:
- 1×4″ (2)
- 1×2″ (1)
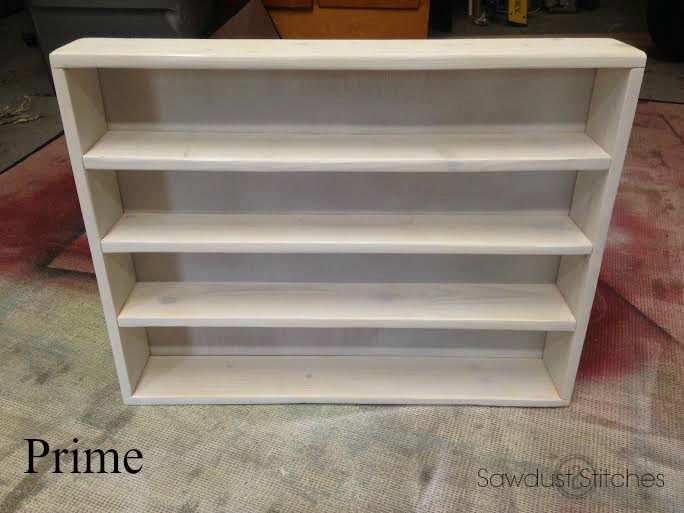
- Primer
- Paint
- 2″ Nails
- Glass Jars
- Round Stickers
- Black Primer
- Screw in Hooks
- Paneling
Tools Suggested
- Miter Saw
- Sander
- Paint Brushes
- Nail Gun
- Compressor
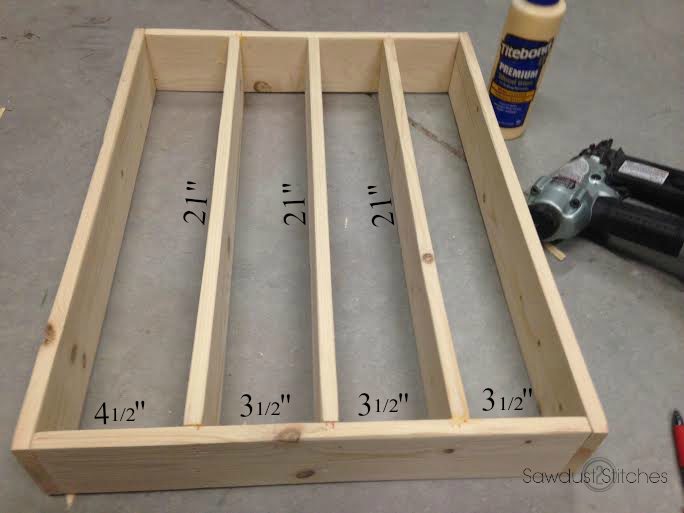
Cut List
1×4″=
- (2) 17 1/4″
- (2) 2 1/2″
- (3) 21″
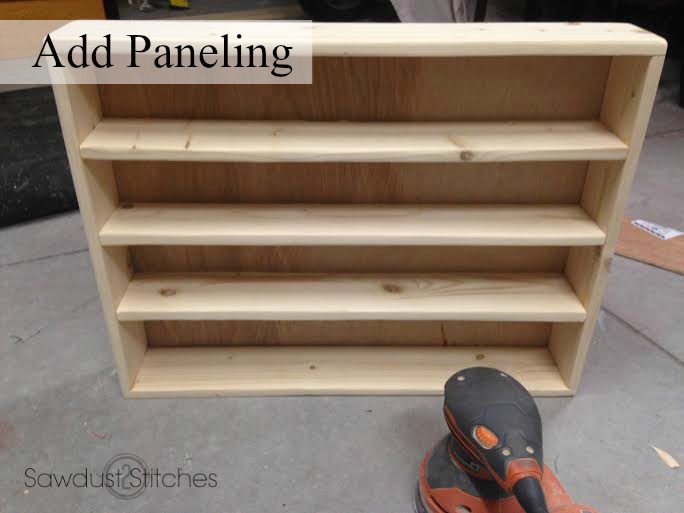
Paneling=
- 18 3/4 x 22 1/2″
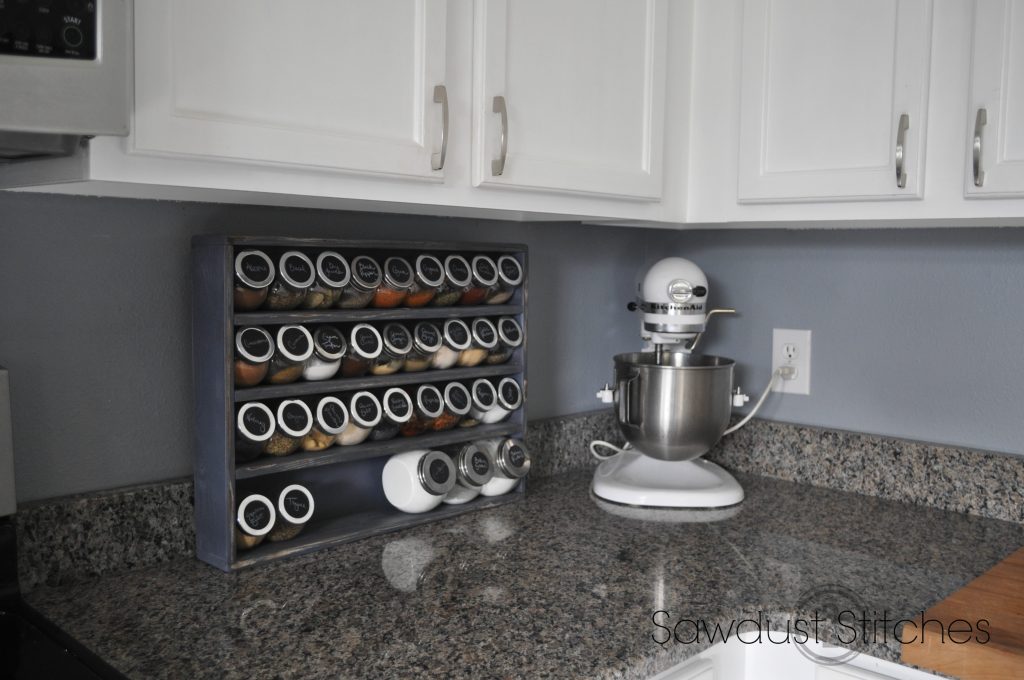
Spice Cabinet
Cut boards, sand all the boards. I first applied glue, and then reinforced with 2″ nails. Make sure to use a square when constructing the shelf. Once constructed fill all holes with nail filler, and then sand.


Once the shelf is constructed, I then applied glue to the back, and then reinforced the paneling with 1/4″ nails.


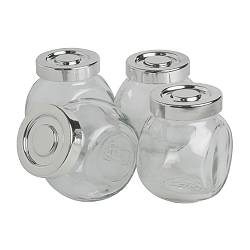
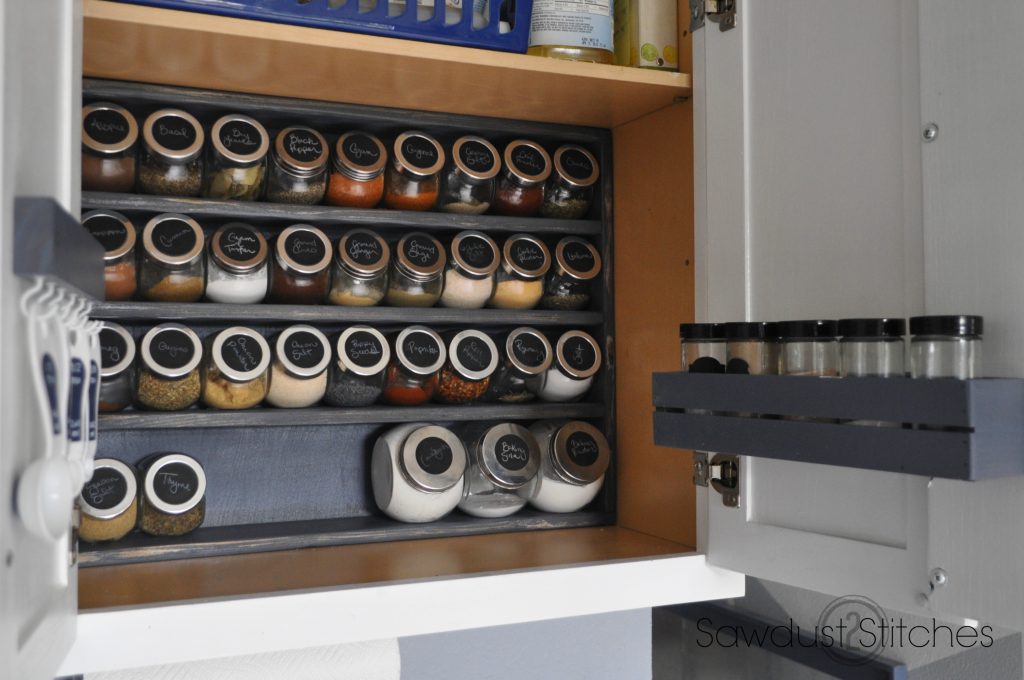
I used glass tilted jars, I know you can purchase them at Ikea and Hobby Lobby. If you have access to baby food jars that would be and awesome/cheaper alternative.

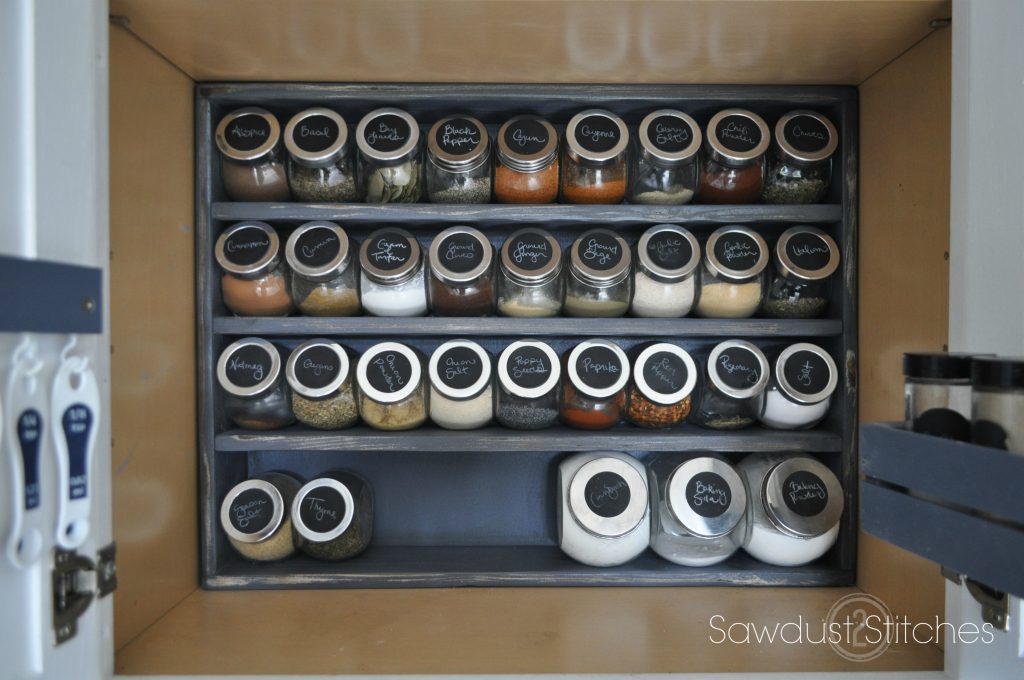
I used chalkboard stickers for my jar labels. When I originally made this spice organizer, chalkboard stickers were not readily available. If you have trouble locating chalkboard stickers. Consider this alternative.


I liked it so much that I added a few more modifications. Next on the agenda ?
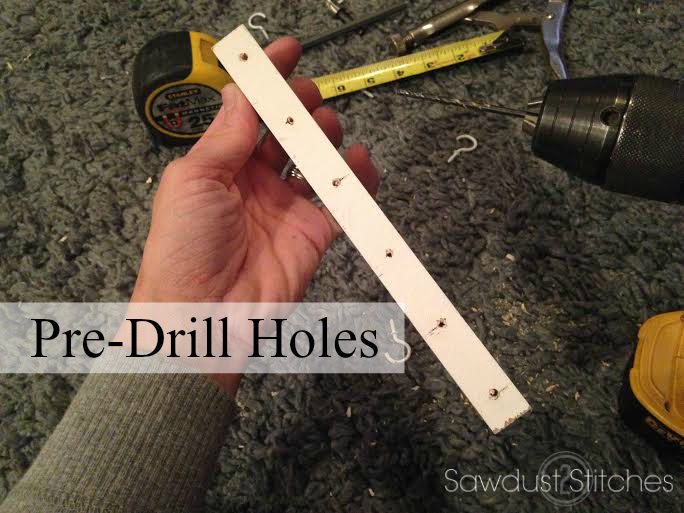
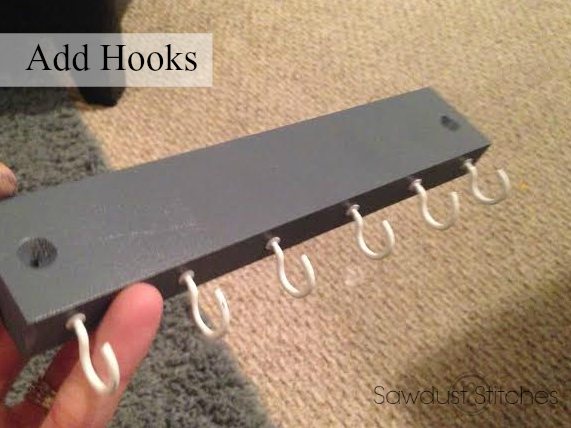
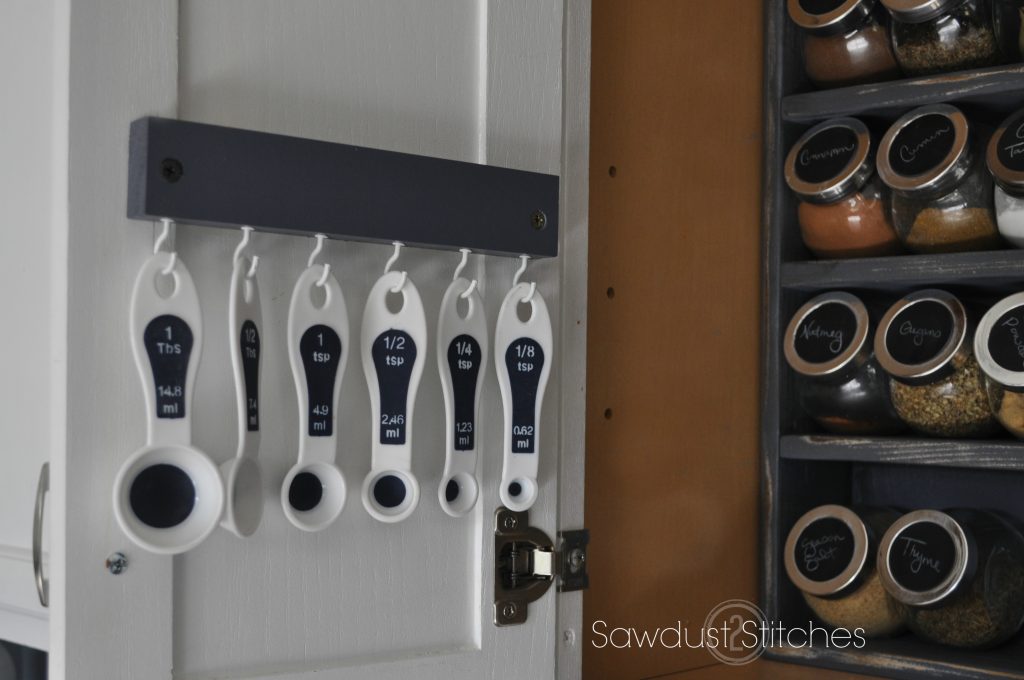
Measuring Spoon Rack
I used a 1×2″ board. I then pre-drilled holes.


I even ended up adding an extra shelf to the other door. It is perfect for salt, pepper, and commonly used spices.

So there you have it folks, an easy fix for the cluttered cupboard!