
Shoemaking: The verdict on the first pair of ballet flats

If you've been following along since the beginning you would have seen me making a plan on how to start, customising my shoe last, making a pattern to fit my customised shoe lasts and finally a post full of pictures of my first ballet flats. It's already been quite a learning curve and it's really exciting to be learning so much and acquiring a new skill!
I started this pair of shoes Monday night and I was finished them by Tuesday night. I estimate that I spent around 12 hours making them which makes them sound super quick compared to some of the things I've sewn! Don't be fooled though, shoemaking is hard work!
Seeing as I have so much to say let's talk through the positives, followed by the negatives and then round it up with my plan for my second pair now that I'm learning a bit about my preferences in shoe making.

The Good
The KitThe kit from icanmakeshoes.com is fantastic. I've said it before and I'll say it again. It's a very clear, easy, step-by-step venture into making a great looking pair of ballet flats. The website has two different patterns for ballet flats. One with the rounded toe like I used called the classic ballet pump and another called the high front ballet pump, for obvious reasons. The booklet that shows you through every step is basically a sew along all put together in one continuous book. It has big, bright, easy to follow photographs and basic step by step instructions with a few hints and pointers thrown in so you feel like you know what you're doing. Even though it's really easy to follow I recommend reading through the book a number of times before starting. Get out all your included pieces and get familiar with the materials, what you're meant to do with them and in what order.
Using Leather
This kit is well thought through in that it asks you to make shoes out of leather. First of all if you're going to go to the effort of making your own shoes and spending a bunch of money on a kit, it's a great idea to make your shoes special by making them out of leather.
Secondly it's a brilliant choice for the method they teach you. You may have noticed from the photos that the outer fabric is turned over 5mm and glued down to itself to create a smooth line around the foot. The lining however, extends that 5mm out until right at the end of making the shoe where you drag a blade around the line at an angle and cut it clean off. This would not be achievable without leather (or suede) and would require stitching and under stitching. Not having to sew much makes this kit all the more accessible for anyone to pick it up and make a great pair of shoes without a lot of technical knowhow.
The final product
If you were to follow this kit to the letter using standard lasts and the templates on the website you would absolutely end up with beautiful looking, wearable shoes. Unfortunately I'm a bit ambitious so of course I had to go and change the shape of my last and of course I had to go and make a whole new pattern and of course I had to change the shape of the insole. You are probably not me. Which means you're going to make great shoes if you use this kit.
Where I went right
The modelling clay I masking taped to my lasts worked a treat. I was not even thinking about whether it was squishing in all the right or wrong ways during the making of the shoes. The fact that I didn't think about it until I pulled the last out of the shoe (out of sight out of mind) means it was all fine and dandy. Fabulous.
My new pattern turned out great! I made a muslin out of faux leather so it would have a similar hand to the leather. I basically lined up my marking for the dart over the centre of the heel and cut a dart with the same width of the pattern, sewed it up and it worked fine. Also the dart is a funny thing. It helps shape the fabric around the heel so that when you pull on the fabric to glue it to the insole it makes the whole thing easier. It's worth it just for that. However as soon as the fabric touched the insole I realised I'd have to cut the entire dart away anyway (along with tons of fabric that gets pleated and then cut out.) So I didn't need to fuss so much about the positioning or the grain line of the fabric or any of that nonsense. The fabric tells you what it wants to do and you just trust that.
The Bad
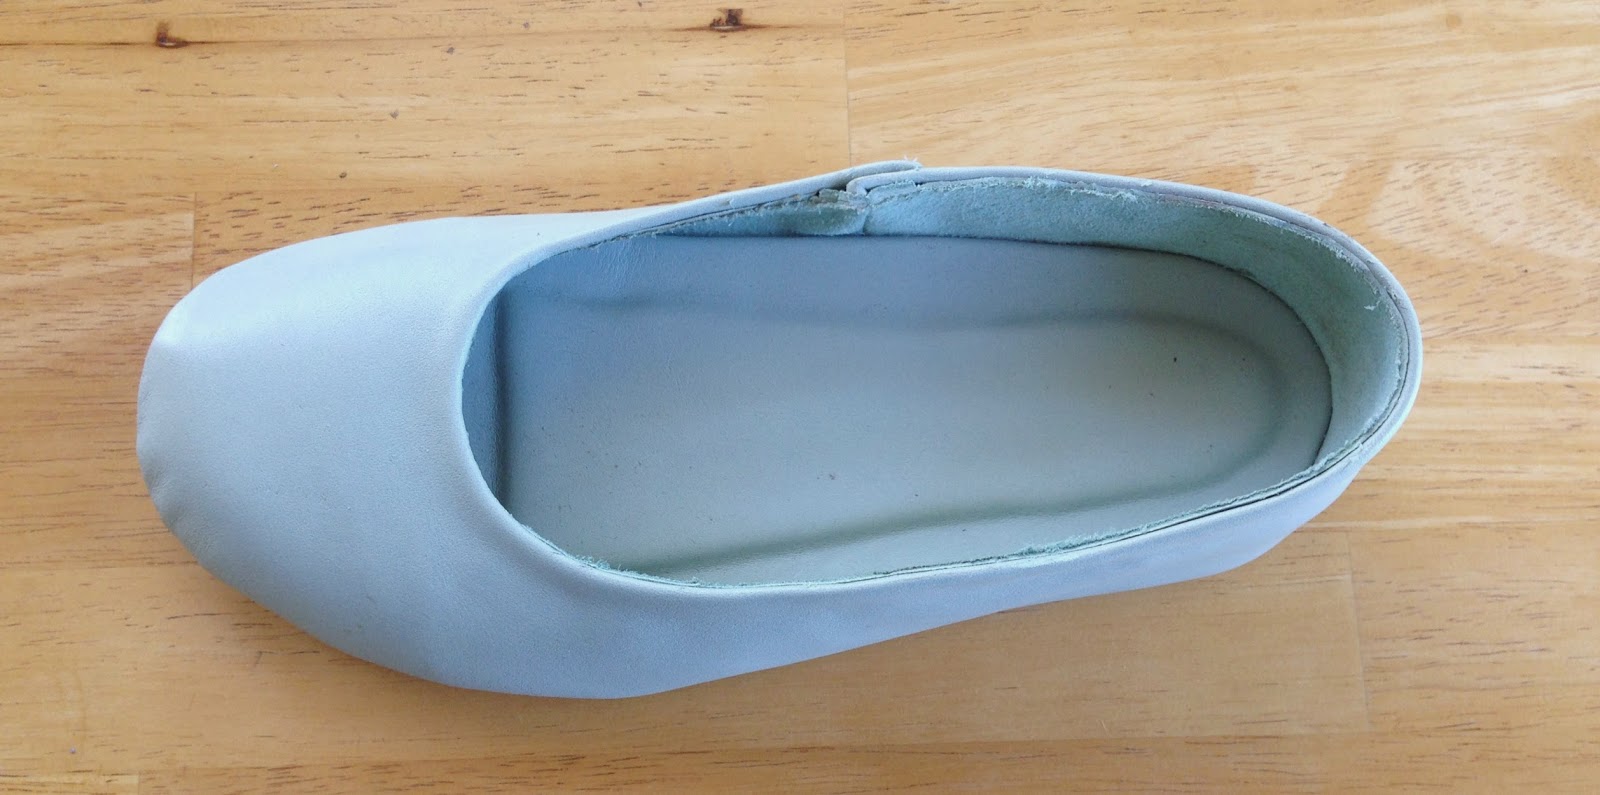
During the making of these shoes I questioned some of the things included in the kit and the process. Now I'm sure this has all been chosen for a reason and I'm sure the kits are mostly designed for students actually attending classes so they get all the added value of having a teacher there to talk them through at difficult moments so my opinion could be a little skewed seeing as I'm on the other side of the world locked in my sewing room staring down a kit. But this blog is about my opinion so I'm going to give it to you anyway.The (lack of) sewing I don't love that the outer fabric and the lining aren't stitched together. I knew this before I made the kit and I'm pretty sure this would only bother someone who sews (meaning everybody who reads this blog.) The consolation here is that since the shoe is made of leather you don't really have to but I'm pretty sure the next time I make shoes from leather I'm going to stitch and under stitch my pieces together. Most of this opinion is based on this side seam you see below - so bulky! Imagine if you had sewn these pieces together, cut away the excess to reduce bulk on the inside and flattened the seams properly before making the rest of the shoe? Not to mention the bulk wouldn't be visible on the outside of the shoe it would only be thicker looking from the outside. This would be better for me. It would not be better for anyone who doesn't sew because that would make the process more difficult and the kit much harder to work out for a non-sewing beginner but hey, it's how I feel.

So while we're already here let's talk about that side seam. You're meant to fold over 5mm on either end of your pattern piece and glue it to itself. Then you overlap these pieces and top stitch them down. So what you have here is 4 layers of leather to sew through which is already difficult but then because you're top stitching you kind of want your stitches to look good because it's the only visible seam. Trust me when I say my stitches don't look good on this seam. I hand cranked this entire seam and it was still wonky and uneven. Maybe this would be better done in a class so the teacher can help?
Reducing Bulk One thing the kit didn't suggest to do was reduce bulk. I'm such a huge fan of pressing during sewing now that I couldn't let that go. I got out my hammer and bashed the leather until it laid as flat as possible. Perhaps they have you do this in the class but it wasn't mentioned in the book.
I'm back on the side seam again. Have a look at that photo again and tell me it doesn't make you cringe seeing that sole have to curve around all that bulk. Luckily you can't feel any of this as you walk but I feel like there's a better way.
The Insole
The provided texone board feels really stiff compared to every shoe I've owned. Potentially this is because I only ever buy cheap shoes. Whatever the case I'll be hunting down a material that is a tiny bit more flexible than this for my insoles.
Where I went wrong
This bit's painful to talk about peeps. I mucked up the insole and it affected everything about the shoe. I can't believe I managed to reshape a last, create a freaking pattern with no pattern making knowledge and then managed to stuff up the entire shoe just because of the insole. I'm kicking myself. I really am. (Kicking myself - ha! Because of shoes - ha! geddit?)
So let's talk about the insole. Because you're not me you would be using a standard insole template which they kindly provide on the website. I however made up my own. My theory was sound. My practise was not. Along the way of doing all my adjustments you'll remember I traced around my foot with a pencil, then I went around this line in sharpie so it would be easier to see and use. Then I stuck it to the bottom of my last and filled out my last with modelling clay. I didn't want to mess with the toe because I liked the shape of it so I left that alone. I traced the new shape with pencil so I would have a new "me" shaped insole. I covered the pencil line in sharpie line laid it over the texone board and traced around that sharpie line. Finally I covered the whole thing in leather.
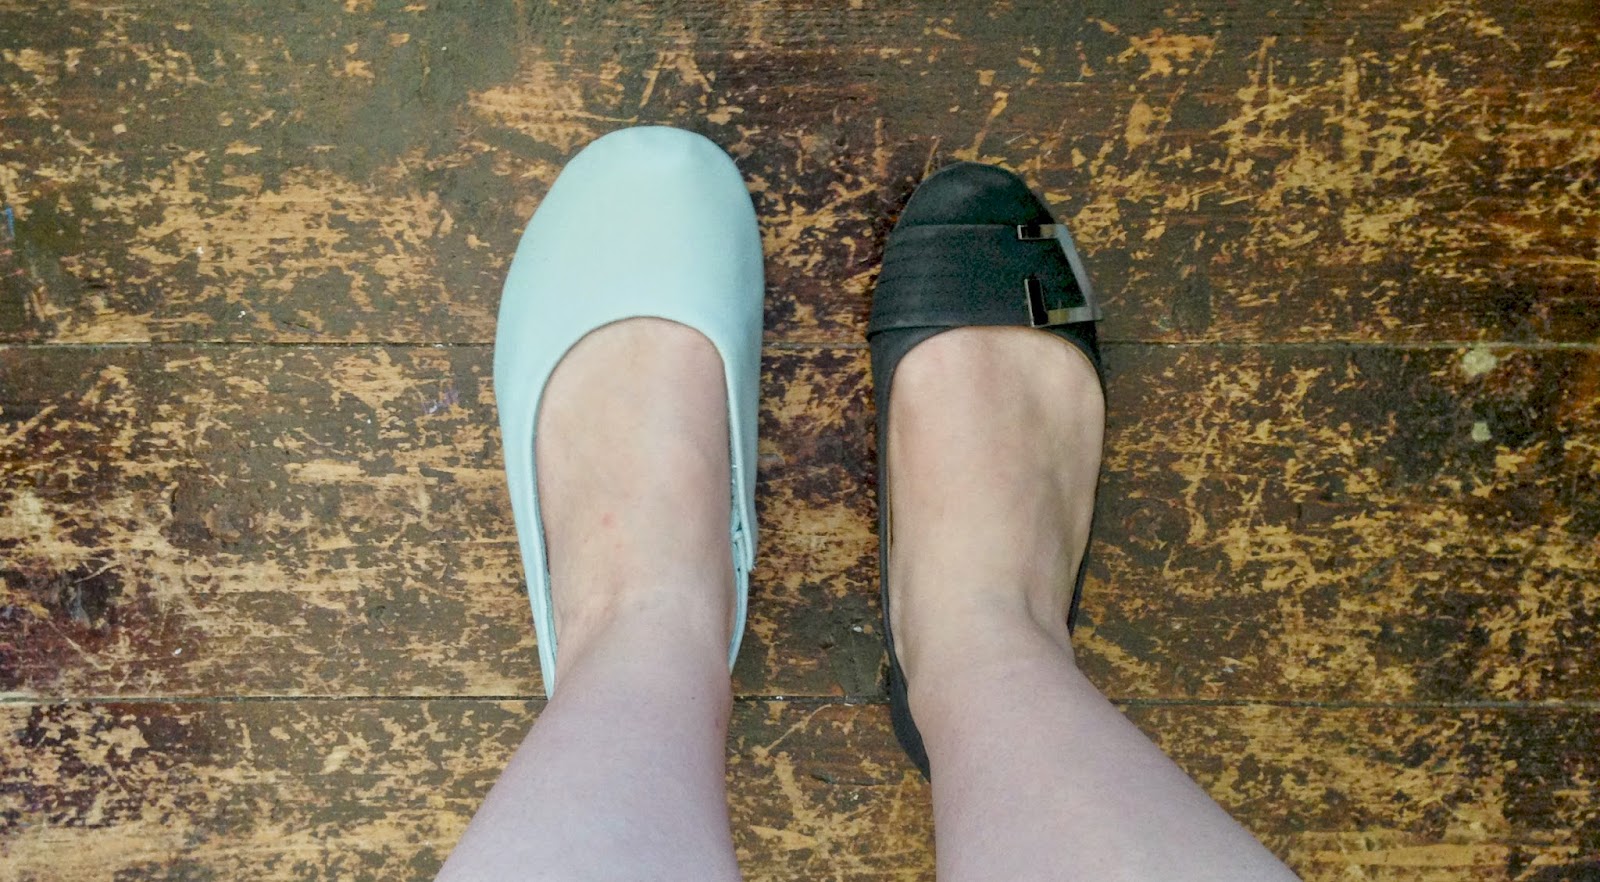
You may see where I'm going with this. That pencil line (which I drew straight down and not on a slight angle to compensate for the width of the pencil) would have already been skewed very minutely. Then I add a thicker line from the sharpie which added to the width minutely. Then I cut around it (again straight down and not on a slight angle) which added width minutely. Then I covered it in leather which added width minutely. All of this only really adds up to about 5-6mm but let me tell you it's the difference between well fitting shoes and clown feet. Seriously.
I know all this because I left the toe shape the same as the last and there's still 5-6mm too much insole going on around the toes. Cringe.
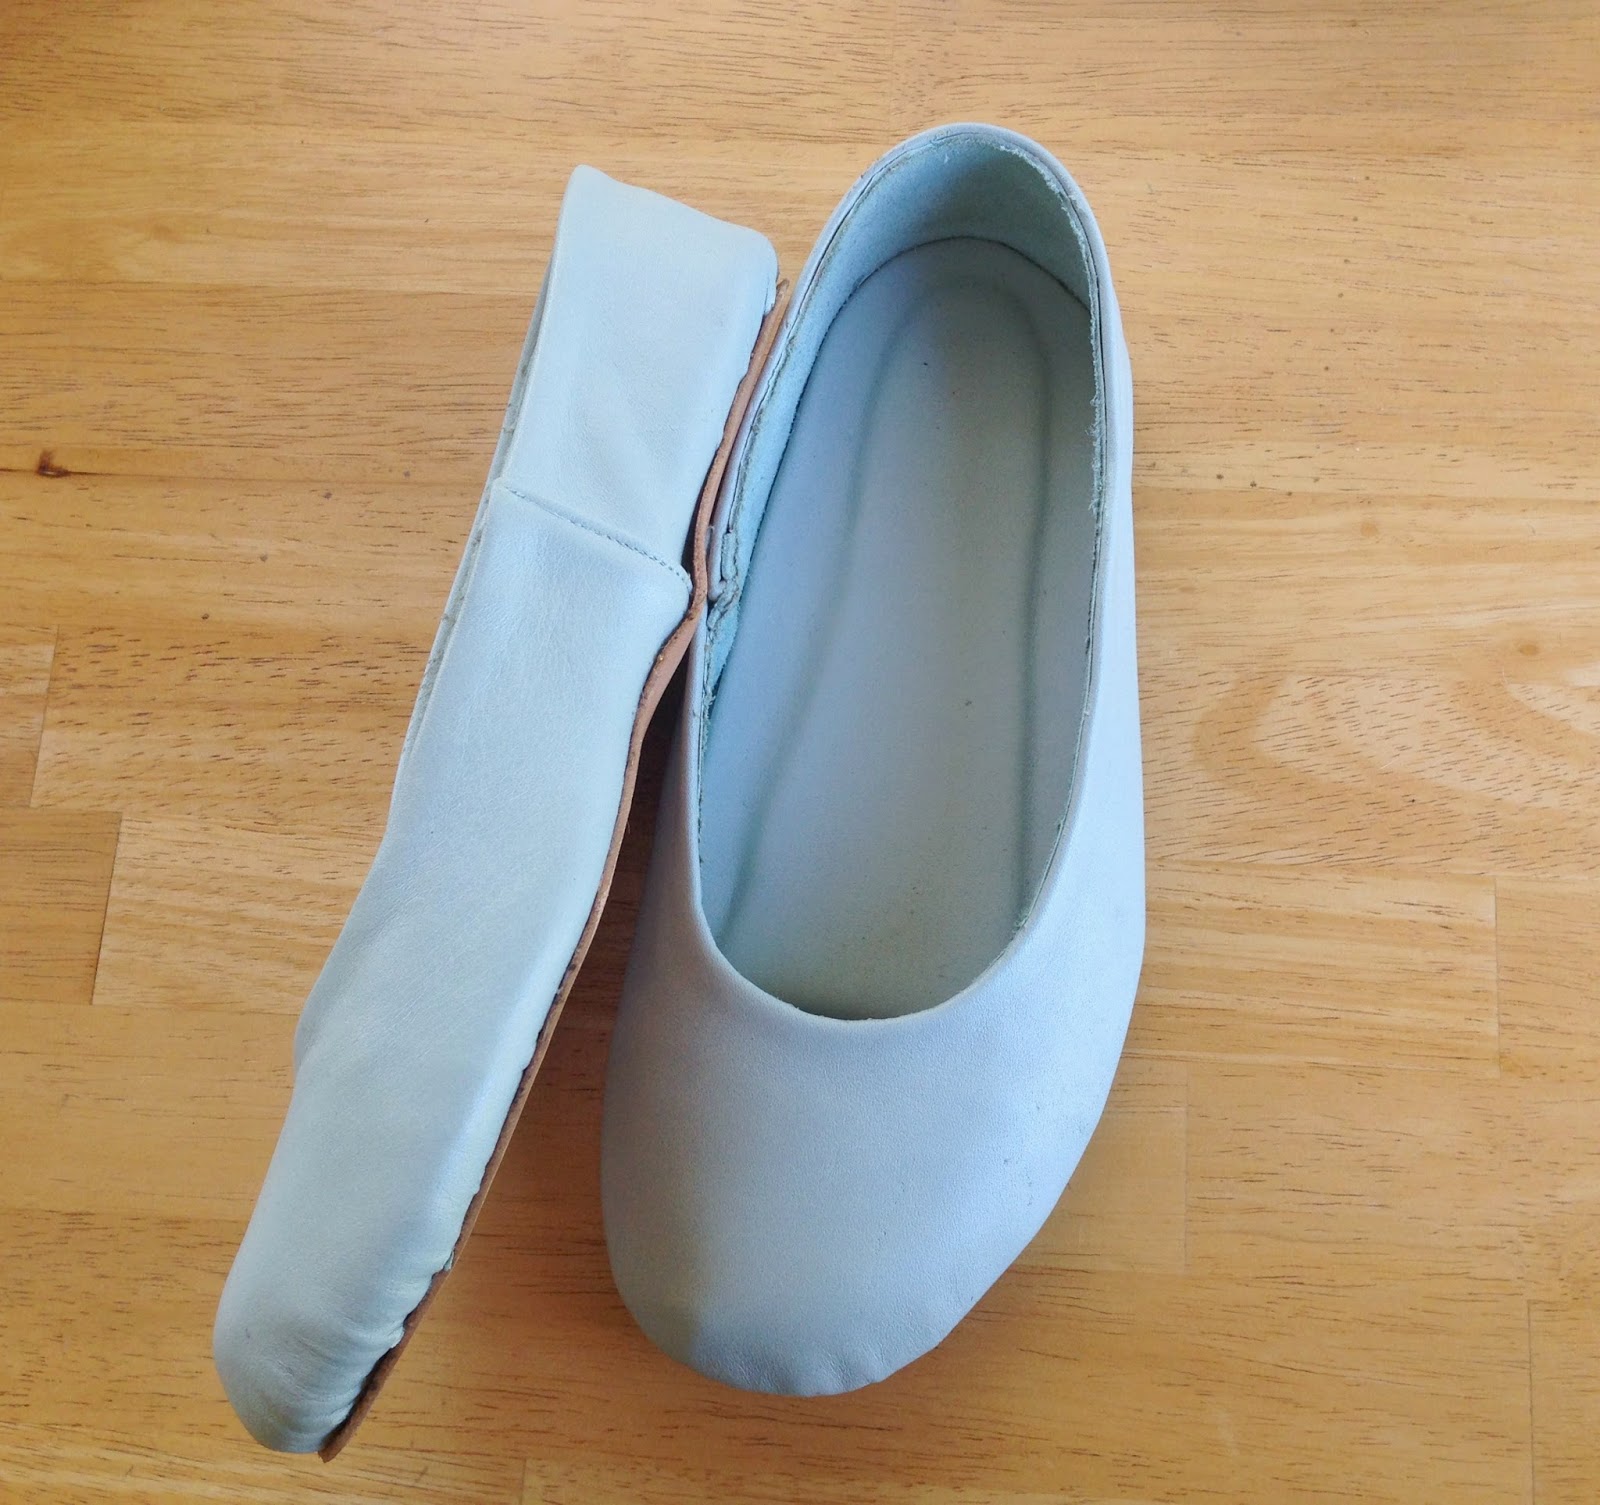

Notice first how the extra 5mm all around makes the shoe huge.
Then notice that my pattern got a lot more of my foot in my shoe.
And so here's where things get honest. The shoes actually look horrible on my feet and I'm not going to wear them. They are the most expensive pair of shoes I now own and I can't wear them. To be fair though I think you learn more rapidly with shoemaking as there is so little fitting to worry about so I'm equating this one shoe with like 1-2 years of my sewing curve (remember the beginning where nothing ever fitted?) and somehow the amount of fails and fabric I had to throw out/donate would make these shoes pale in comparison. So there's that.
The Cost
Looking back on my original post on materials I work out the cost of the kit, booklet and shipping to be about $120 Australian. I used half a leather hide I bought from The Fabric Store which is around $40. This means all up these shoes cost around $160. This would totally be worth it if they fit.
Looking forward and making a plan
This always helps right? You rise from the ashes only by reflecting, setting new goals and going out and proving you are actually good at things even after you've failed? I do.
I am going to research the shit out my insoles. I'm going to draw and redraw and muslin those things until I have the best damn insoles the world has ever seen. Yeah.
I'm sticking to my original plan too in that I'll put all this kit stuff aside and follow along with the book. I'm really, really looking forward to it because firstly it's way cheaper and secondly I get to sew and have a professional finish which is obviously going to make me feel better about my shoes and myself.
Also I'm super keen to make sandals! They look incredibly easy. These shoes took 12 hours to make but I'm pretty sure you could make sandals in maybe around 2 hours or less? Also I'm pretty sure even with all leather materials plus clasps/snaps/thread etc, they're not going to cost more than about $25-$30. The good news for you is that you don't need shoe lasts to make sandals. All you need is your materials, your foot, good shoe glue and you're off and away! I hope that some of you may join me in making sandals once I get my materials sorted, make them and blog them.
I'll be back to sewing for the next couple of weeks until I gather materials and get ready for my next pair of shoes. This process has only made me more excited and determined to succeed.
More posts from Jodie Clark