
Triangle Quilt Pattern Update: How to get Sharp Triangles

I think I’ve been promising this post for about 2 years…oops! This is a follow-up to the original Modern Ombre Triangle Quilt Pattern! The original pattern has lots of info in it, but this post will fill in all the gaps to make it super easy to achieve a triangle quilt that you will be proud of! I also updated the pattern piece so there is less guess work!
Not all of my points are sharp in my original quilt. By the time I finished the original triangle quilt I had figured it out. So don’t worry if you’ve made one and it wasn’t perfect. We still love ours.


This post includes:
-An updated pattern piece to make crisp tips easier
-photographed tutorial to make sure you get pointy triangles
-a few extra tips for sharp points
-and a full illustrated tutorial for the triangle quilt


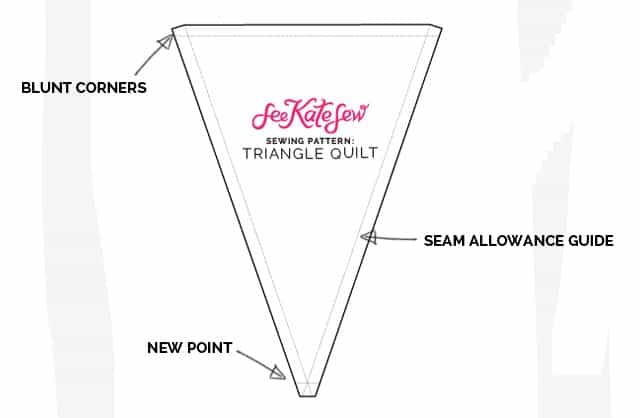
The updated pattern piece is just tweaked slightly, but it will make a big difference in getting those sharp point that we all want.
UPDATE: 1/4″ seam allowance is INCLUDED in the pattern piece.
Download the pattern piece HERE.
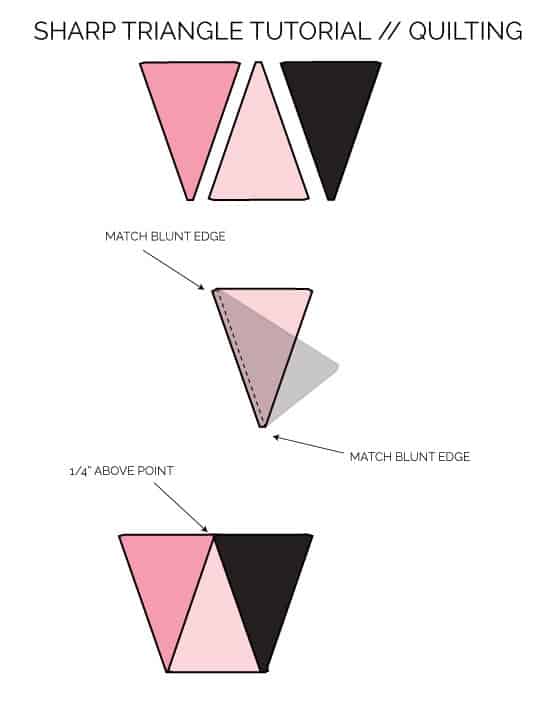
HOW TO GET SHARP TRIANGLES//
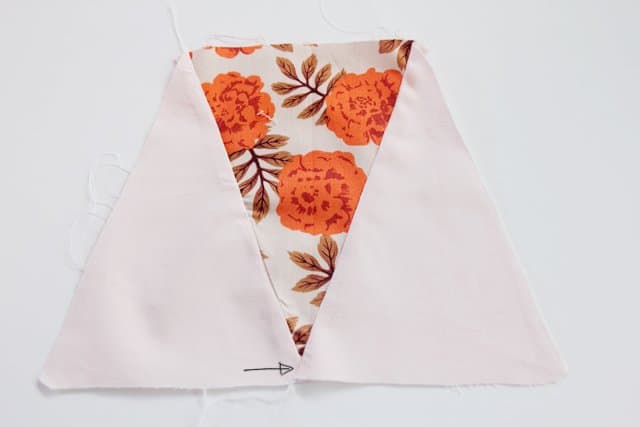
The new pattern piece has blunt edges instead of sharp edges and a slightly different point to make achieving sharp edges easier. With the old pattern piece, you had to stagger the triangles slightly to get it right. But with this one you can just line up the edges perfectly and use 1/4″ seam allowances and everything will work out. There is less guess work with the new pattern piece! Yay!
Here’s how:


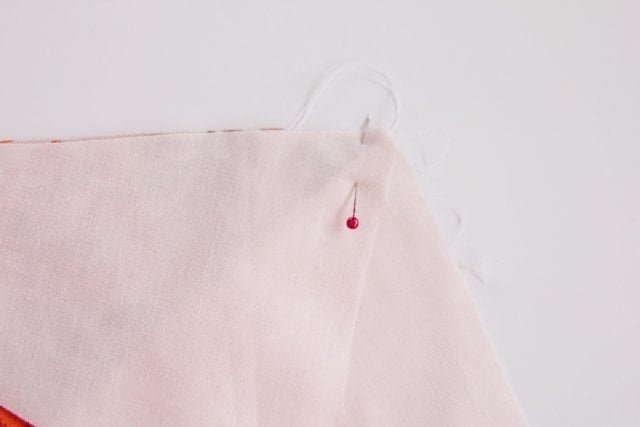
Here’s a little close up of where the point meets the blunt edge. You can see that the blunt edge is flush with the edge of the fabric.


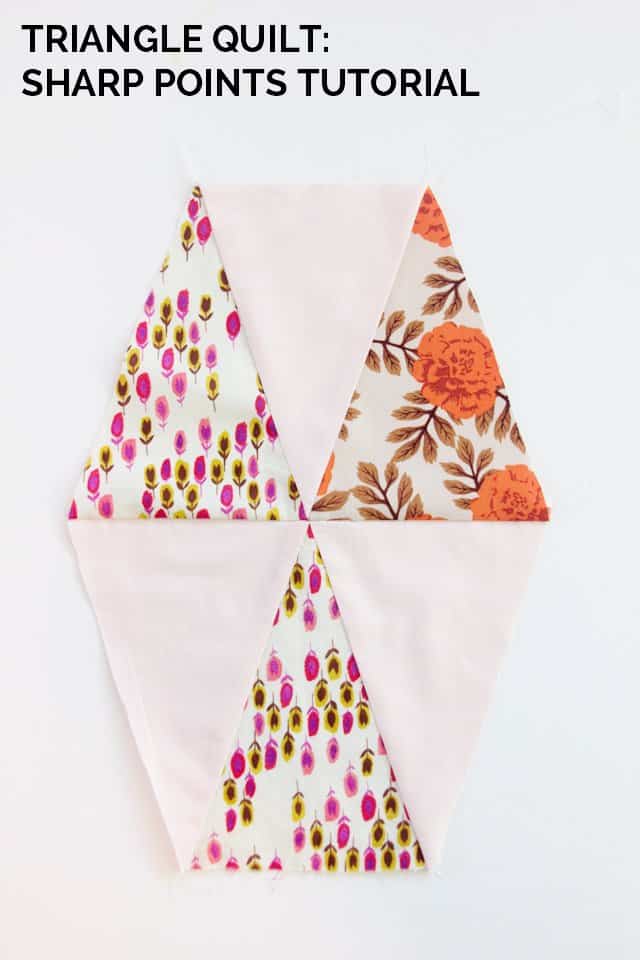
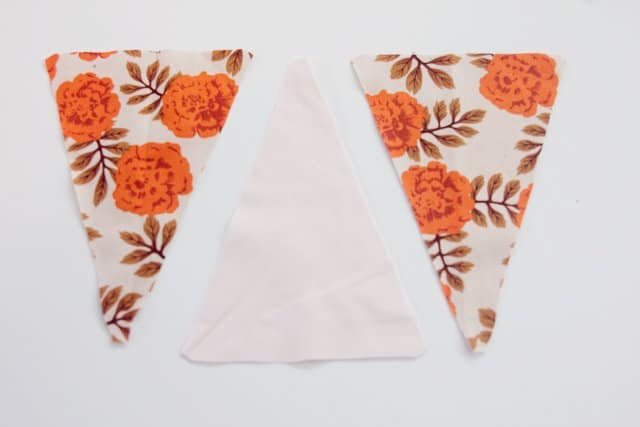
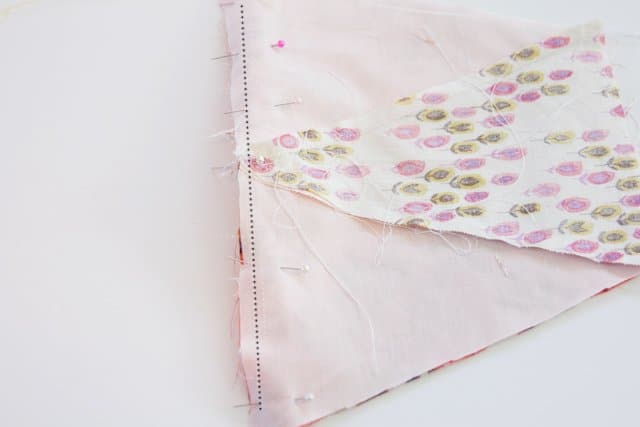
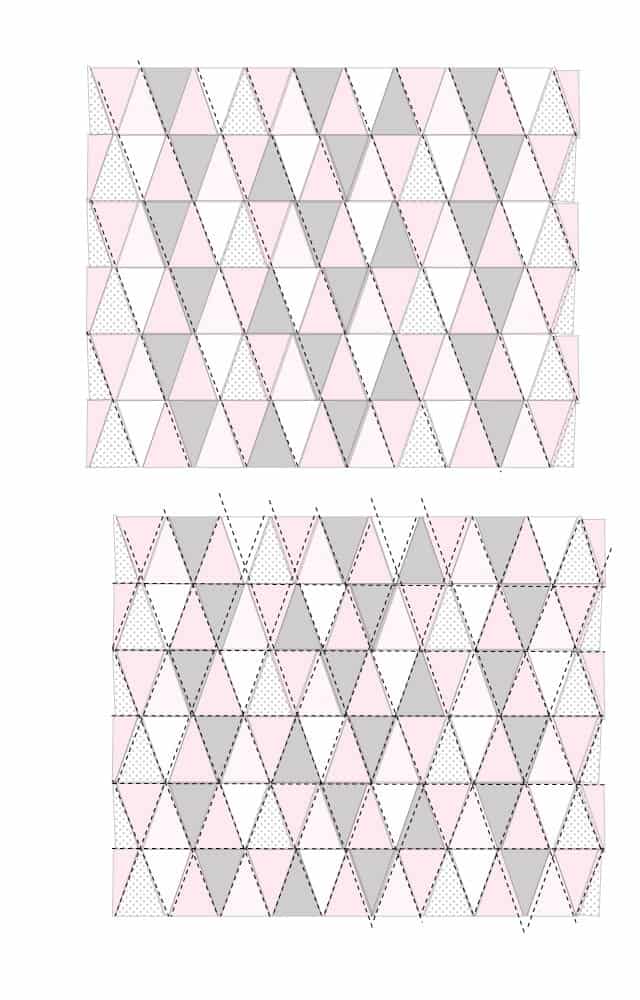
Getting the points sharp in each row is the first step. When you sew the rows together, you have to pay extra attention to the points to make sure you don’t cut off the tip or leave too much space so the tip is floating too high above the seam. The best way to do this is to use a pin to keep the points aligned.


EXTRA TIPS FOR SHARP POINTS//
Get it, tips! Tips for sharp tips. Hah.
- Use a 1/4″ seam guide and foot to make sure
- Press fabric frequently
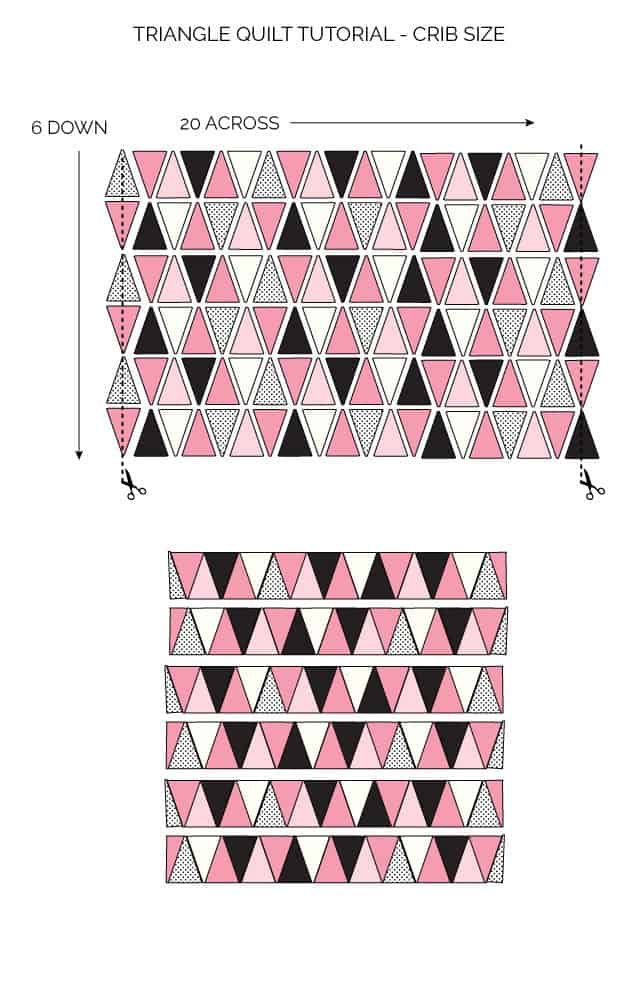
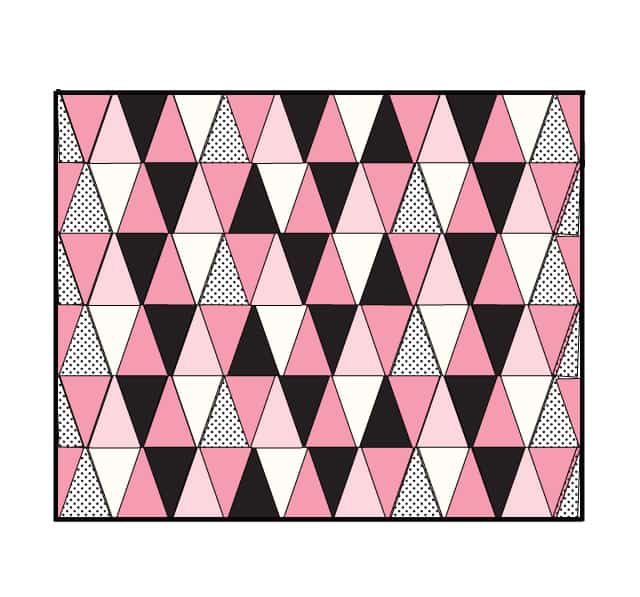
THE TRIANGLE QUILT- START TO FINISH
- Cut out all your pieces and arrange them in rows. See the original post for a pattern if you want a good random quilt.
- Cut outer triangles in half to make a flat edge.
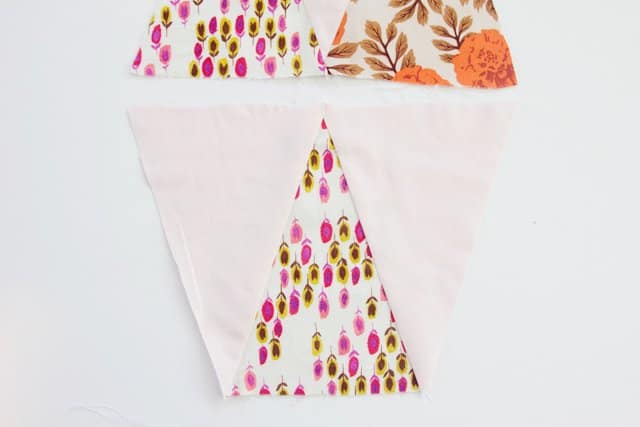
- Sew triangles into rows using instructions above.

- Sew rows together. Match the points together and pin each one carefully to line up points. (See Above)
- When all the rows are sewn together, press the quilt well so seam allowances are flat. You don’t have to press them open, just press them flat.
- Now, lay out your backing fabric and lay batting on top. I love the natural cotton batting. It isn’t as high loft, so it’s a little easier to work with.
- Trim backing fabric and batting so it is the same size as the quilt top
- Use spray baste to stick them together. This is really easy, but I’ll share photos tomorrow. It’s just like spray adhesive. Spray it on the batting and then smooth the fabric over it. Then flip it over and repeat with the quilt top.

- Quilt fabric by sewing in the ditch of all the triangle lines, or 1/4″ away from them. You can choose how you want to do this for different effects. You can also make random patterns. Whatever you want!


That’s it! This quilt is fairly easy, it just takes a little time!
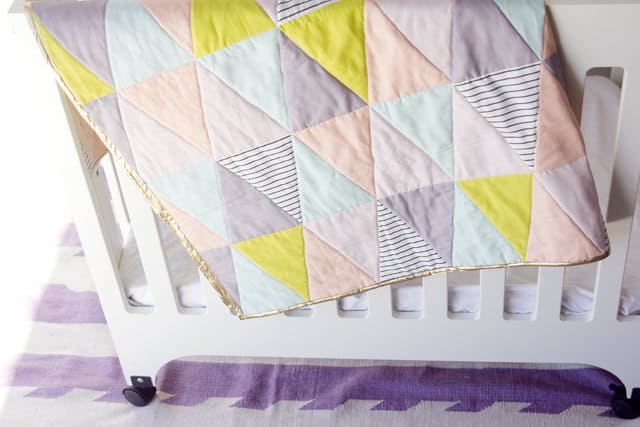
Tomorrow I will show you how to speed up this process and share more pictures of my pastel/striped triangle quilt. It has gold binding!


The post Triangle Quilt Pattern Update: How to get Sharp Triangles appeared first on see kate sew.