
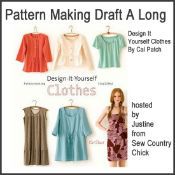
Design It Yourself Clothes Draft Along, Intro
Welcome to the Design It Yourself Clothes Draft A Long! I am so looking forward to creating my own library of basic patterns that I can tweak to create designs I know will fit. Making your own patterns is a big step in your growth as a sewist. Once you can draft your own patterns you can start to consider yourself a designer, if you don't already.

There is a lot of information to go over today so sit down and make yourselves comfortable!
Today I will be posting the schedule, giving an overview of what projects we will be drafting and sewing from the book, and the supplies and preparations needed to start the first project.
I will be posting on Tuesdays and Fridays. Tuesdays I will be documenting the drafting of the patterns and Fridays I will blog about sewing that pattern. I hope doing a project a week isn't too fast, but if I don't, it will take months to get through these patterns and I think the project will lose momentum.
Most of you already have quite a bit of sewing experience, especially if you are at the point of wanting to make your own patterns. With the exception the drafting of the pants, which we will cover over two weeks, because they can be tricky, most of the other basic patterns shouldn't be too time consuming to sew. Well, maybe the button down shirt will be tricky too.....
Here is a list of the the basic patterns we will be drafting and sewing from the book starting this Tuesday.
- Week one starting Tuesday: The basic A line skirt
- Week two : The basic knit t shirt
- Week three: The basic button down shirt
- Week four: The basic dress
- Week five and six: Basic Trousers
I will be posting a linky party every week for those participating so we can go and visit and learn from each other, support each other, and learn from each other. If you have questions we can all communicate through the comments section. I am looking forward to getting to know some of you better!
You can post each weeks' progress on the link up posted on the following day of the draft along. For instance, when we draft the skirt on Tuesday you can post your links on Friday. And when I post about sewing up the project, you will have until Tuesday to post that project too. I will leave the link ups open too, in case you dont finish and want to post your photos at a later date. Also, if you are having trouble keeping up because life gets in the way, feel free to go at your own pace and link the projects when you are ready.
If you are on Flickr, Cal Patch would love for you to post photos of your projects on her Design It Yourself Clothes Group pool for projects made from her book. She would love if you would stop by her Flickr group and post your photos. The link for Cal's Flickr group for the book is here.
Today I will be posting the first linky and if you have blogs you can post a link today to your home-pages so I can stop by and say howdy y'all from Sew country Chick!
If you have questions about the pattern drafting that you cant find answers to in the book, I do have some pattern making training and will try to answer them for you. And if I am stumped Cal Patch is making herself available for questions too. She is a very experienced designer by the way. You should stop by check out her blog, Hodge Podge Farm and say "Hi!"
So let's get started !
I won't be drafting anything today as we will be going over pattern making supplies and the necessity of taking accurate measurements.
Since we are using a book in this sew along I won't be describing each step in detail, just giving an overview of my process. Cal's book explains everything in detail so I don't have to.
There are a lot of steps in pattern making and I will be referring to specific pages in the book from time to time. If you haven't bought the book, it's not too late.You can press below to see it on Amazon.
Amazon.com Widgets About pattern making supplies. I am going to show you a few of my pattern supplies now. You won't need all of these supplies for your projects but I thought I would share some of my own supplies and what I use them for:

My pattern paper rolls. The thick manila on the left is for transferring your perfected, final draft of the pattern and the numbered and dotted paper on the right is for working out your first pattern draft and tracing new designs from the manila blocks. I buy my supplies at theAce Sewing Machine shop on 8th & Maple in downtown LA. This store is so great! But a roll of brown craft or packing paper from the drugstore will work just fine too.

Rulers: The top one is for adding seam allowances and drawing straight lines. You will need this.
The bottom rulers are designed for specific pattern making and pattern altering functions. The one in the middle is for front and back armholes and the package below it contains two rulers: one for drawing the crotch curve and the other for drawing the waistcurve and hem sweep on skirts. The little white hook is for hanging up your patterns, I love these rulers but they are expensive. The Dritz design hip curve ruler from most sewing stores will work just fine.
The bottom rulers are designed for specific pattern making and pattern altering functions. The one in the middle is for front and back armholes and the package below it contains two rulers: one for drawing the crotch curve and the other for drawing the waistcurve and hem sweep on skirts. The little white hook is for hanging up your patterns, I love these rulers but they are expensive. The Dritz design hip curve ruler from most sewing stores will work just fine.


Scissors I use for manila, drafting tape, pattern weights, (these are washers from the hardware store), a tape measure, and a tracing wheel for transferring pattern markings to manila.
You don't have to run out and buy the things I have to get started but you will need these supplies:
Taking your measurements The next step will be to take your measurements.
Follow the directions on pages 30 & 31 for accurately taking your measurements. You will need some help and your tape measures. You can take all of your measurements at once and get it over with... there are alot of them!
Or you can take only the measurements you need as per project.
Next up.... Tuesdays post: Drafting the A line skirt
Introduce yourselves!
You don't have to run out and buy the things I have to get started but you will need these supplies:
- Paper of your choice wide enough to draw patterns on.
- A tape measure
- A clear 18 inch by two inch ruler with a measuring grid for adding seam allowances like the Quilt & Sew ruler shown above
- A pencil and eraser
- Scissors for cutting paper. Never use your sewing shears.
- Transparent tape
- Tailor's chalk or dressmaker's carbon
- The hip curve ruler is listed as optional but I would recommend getting it.
Taking your measurements The next step will be to take your measurements.
Follow the directions on pages 30 & 31 for accurately taking your measurements. You will need some help and your tape measures. You can take all of your measurements at once and get it over with... there are alot of them!
Or you can take only the measurements you need as per project.
Next up.... Tuesdays post: Drafting the A line skirt
Introduce yourselves!