
How To Shorten A Zipper - Tutorial

I wanted to make this sweet little triangle pouch using the tutorial by A Spoonful of Sugar, but the project required a 4" zip which I didn't have and wasn't available at my local store. The smallest they had in stock was 5".
I decided to shorten a my zip using the same technique I use for adding zipper tabs when I make pouches. I took photos at each step so I could share it with you!
Firstly, to shorten a zip you need to use a zip with a plastic coil. (For more info check out my post about zippers here.) This allows you to sew over the zipper teeth safely without breaking your machine needle.
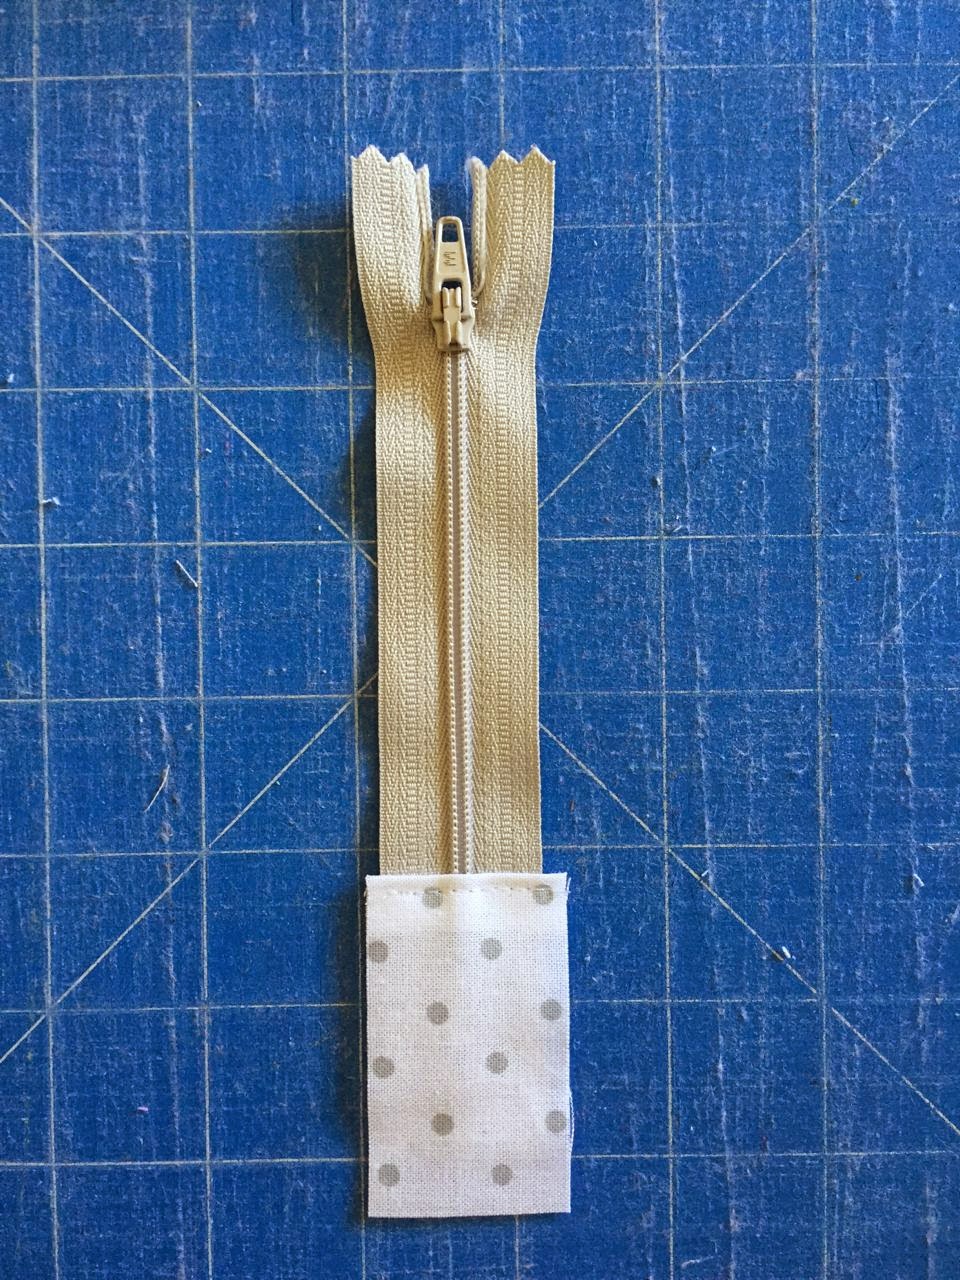
You also need a small scrap of coordinating fabric.

Fold one end of the fabric over by a 1/4" and press. Use a measuring tape to work out exactly where you need to stitch it onto your zipper in order to create the desired length.


The fabric piece allows the zipper to stop nice and neatly, and it also stitches up cleanly into the project.
Here is the triangle pouch I ended up making using a pink and grey colour scheme. It's a lovely quick project and is great for scrap busting.

I also sew fabric tabs like the ones above to existing zippers to lengthen them if I need a longer zip but I don't require the zipper to open the whole length of the project.
For more sewing tips and tricks check out my resources page and to regular updates for all my new posts and tutorials, make sure you sign up for my newsletter!

More posts from Roslyn {Sew Delicious}