
Dress Up Party – Pattern Review – Smooth Sailing Trousers

This post is part of Dress Up Party. For contest rules, full details, and schedule, please click here!
Today’s post is from Shannon of Adventures of a Young Seamstress.
Hello! I’m Shannon from Adventures of a Young Seamstress, where I share my sewing and knitting projects (and lately, my Me-Made-May selfies as well!). I’m so happy to be a part of Sara’s Dress Up Party. Since I’ve been away from home (and my sewing machine) for school, I chose to review a pattern that I made up last summer but never got around to blogging about: the Wearing History Smooth Sailing Trousers.

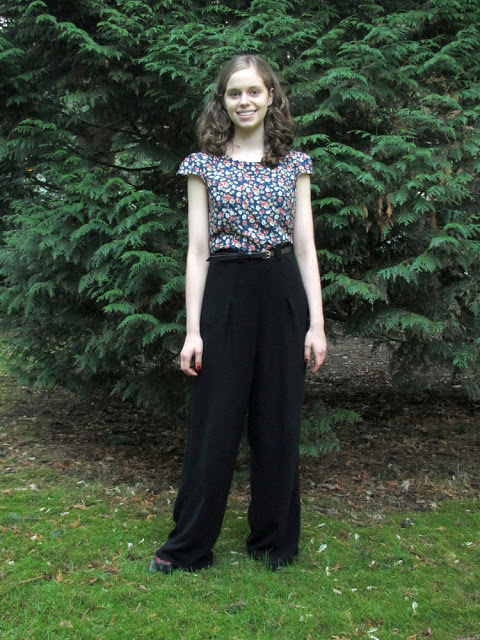
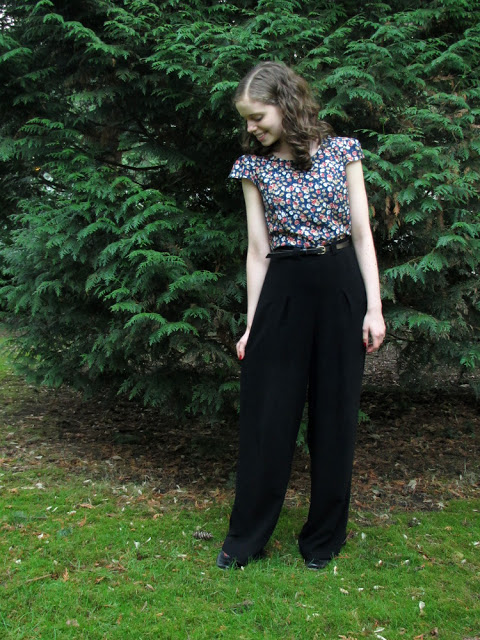
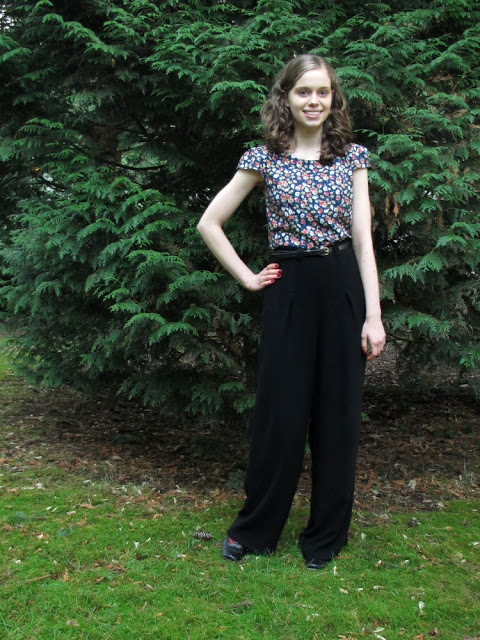
The pattern is for wide-leg, high waisted, 30’s/40’s-style trousers. It features pleats at the front, darts at the back, a side zipper, and optional cuffs, belt loops and belt. As far as pants patterns go, this one is quite simple, which is exactly what I was looking for in a pattern for my first pair of pants.
I bought the e-pattern since that was all that was available at the time, although you can now purchase a printed pattern for the set that includes the matching blouse. (I noticed when linking to the pattern that you can actually buy these pants pre-made now as well.)

You can only buy the pattern in 3 sizes at once – something that could be inconvenient for someone that has to grade between sizes. I bought size pack A, and for my muslin, cut a size 12 at the waist, and graded out to a 14 at the hips.
Now, when the instructions say that the pants have very little ease at the waist, they mean it! My muslin fit, but I like a little more ease for moving, sitting, and, of course, eating. The crotch was also a little too low, so for the real pants, I cut a 14 at the waist, but kept the darts and tucks from the size 12, and cut out the crotch curve from the size 12. I cut out the version without the cuffs, and I also shortened the pattern pieces by 2″, since I’m on the short side (5′ 2″).

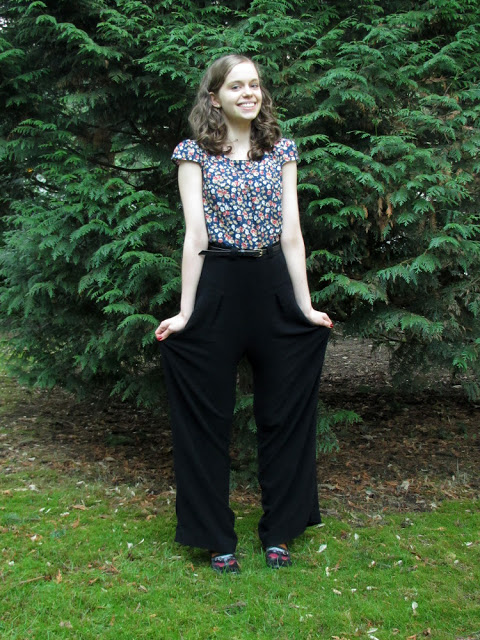
The fabric I used for these has an interesting story behind it – I bought it (for $3/metre!) from a fashion designer who was clearing out her stock that she used for making samples, same as the fabric for this dress. I’m not exactly what to call it – it’s bamboo rayon with nice drape, but it’s also quite thick. Before washing, it was very crisp and linen-like, but after washing and drying, the texture changed completely! It got much softer, but also much shiftier and lost its crispness. It also shrunk like crazy – I had about 6 metres and cut a 2 metre piece for the pants, and it shrunk over half a metre. In the end, this fabric really wasn’t a good choice for these pants, but more on that later.

These pants came together pretty quickly and easily. The instructions are well-written and thorough, and include detailed instructions for inserting the zipper and other useful tips – I feel like a beginner with a few projects under their belt could probably follow these easily enough, maybe with some help from a book or the internet.
Although it’s not in the instructions, I would suggest staystitching the waistline of the pants and possibly the crotch seam as well. My waistline stretched out quite a bit before I thought to staystich. I tried easing it into the waistband, but in the end I had to take in the side seams a little to make it work.

I found the order in which you sew the seams to be interesting, although I can’t say if it’s a standard way to put together a pair of pants or not, since this was my first pair. You sew the two front pieces and the two back pieces together above the notches (so, above where the crotch seam begins to curve), then sew the side seams, the inner leg seams, and then the rest of the crotch seam, in that order.
For the zipper, I would have done a lapped one, but the seam allowances are only 1/2″ and I forgot to add extra, so instead I just did a centred zipper, and hand-picked it. The interfacing that I used to stabilize it was probably too heavy, since the fabric was bulky already, and the extra bulk made it ripply. Once they’re on, though, it’s not that noticeable.
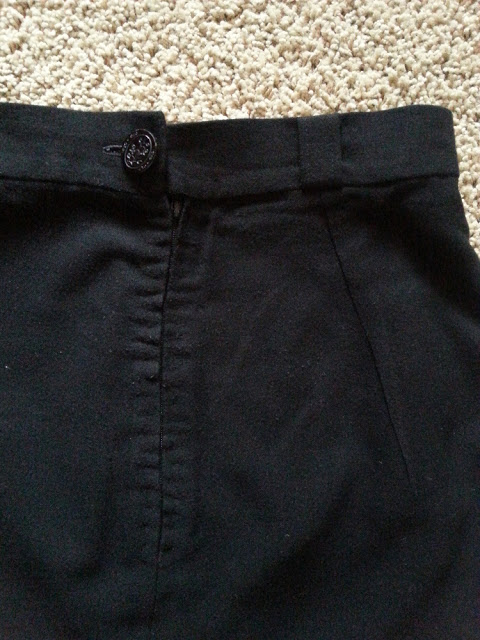

The instructions don’t include this, but once I sewed the crotch seam, I stitched over it once more with a slightly smaller stitch length, for strength.
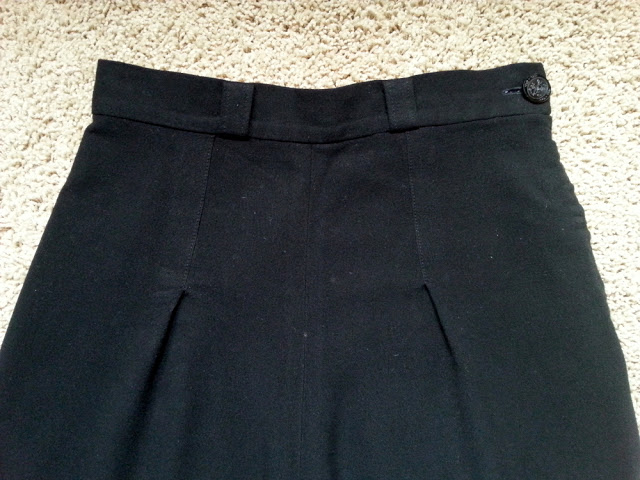
The rest of the construction was pretty much as I expected it to be. I added belt loops, but rather than using the turned belt loop pieces included, I took the belt loop piece from the Sewaholic Hollyburn Skirt, which I had made recently at the time. I find this method (folding in the edges of one long piece then cutting it) faster and easier, though it does make wider loops.
Because you sew the loops onto the waistband before attaching it, I couldn’t quite get my belt loops to line up properly with my pleats (I think because the fabric stretched). I do like that they’re stitched into the seam though, because they’re very secure.

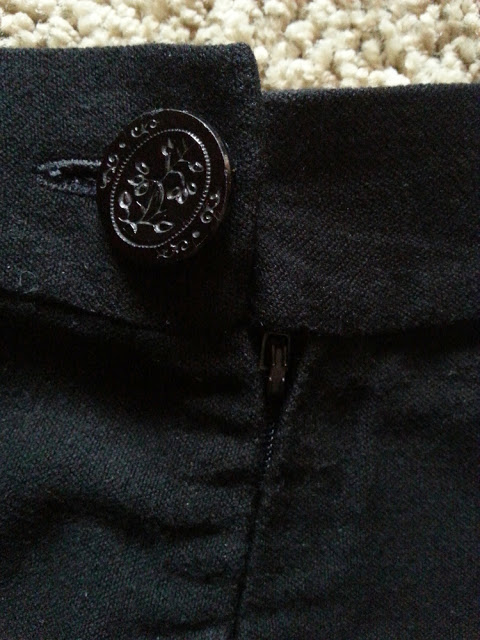
You can add either a button or a hook and bar above the zipper, and I chose to add a beautiful vintage button from my grandma’s stash. (The waistband does actually line up in real life, I promise.)

If you’re not making the cuffed version, the instructions suggest turning under 1/2″, then turning up 1″ for the hem. Since my fabric was quite thick, I just turned up 1 1/2″ and hemmed by hand with rayon seam binding. I originally hemmed these to wear with heels, since I think that looks nicer, but I’ve since ripped out the hem and will re-hem them to wear with flats – I just don’t wear heels enough!

I skipped the belt, since I have a couple black belts already.
A final note on the instructions – there are two places where the instructions contradict what’s written on the pattern pieces. The first is the waistband – the pattern piece just says “Cut 1 Interfacing”, which I did, and ironed on. When I got to the waistband in the instructions, it says that the interfacing should only be half the width of the waistband piece. If you’re like me and don’t read the instructions before cutting out your fabric and interfacing, this could be a little annoying, although the interfacing I used was lightweight enough that it didn’t matter. The other discrepancy is pretty insignificant – a 2″ hem is marked on the pattern piece when the instructions say 1 1/2″. Neither of these are that big a deal, because everyone has their own preferences as far as interfacing and hemming anyways, but I thought I would point them out.
The final verdict? I kind of have a love-hate relationship with these pants. I LOVE the style and the pattern, but as I mentioned earlier, this fabric really wasn’t right, and they’ve stretched out quite a bit, which really bothers me. I took these photos when I was home for Christmas (hence the wool socks worn in my heels – I was cold!), and they’ve stretched out even more since. I’m in the process of re-hemming them, and might also take in the side seams and move the button, but I just really dislike alterations so I haven’t made much progress.

Instead, I recently (as in, yesterday, while writing this post) decided to make another pair!
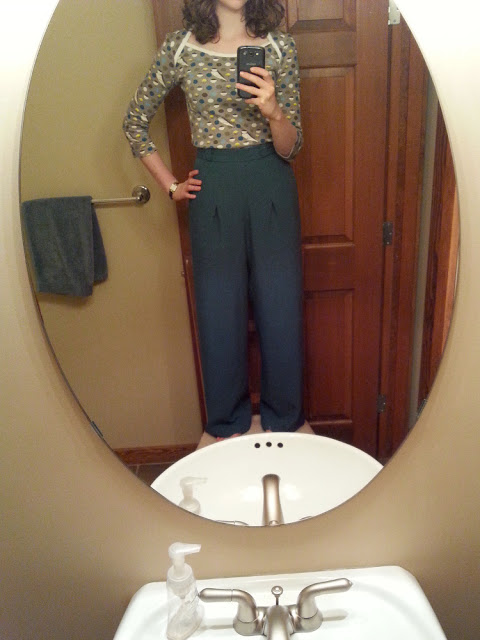
I used a teal suiting fabric that I believe is a rayon-poly blend, which I got from Our Social Fabric, a group that recycles fabric. It seems to be the perfect weight – it still has some drape, but it’s more substantial than the black fabric.
On a whim, I narrowed the legs just slightly by grading down to the size 12 at the hips. I also added inseam pockets, which I add to everything I possibly can. I had to move the zipper to the centre back to do this, and I was worried that the pockets might droop and bunch up, so I modified my go-to pocket pieces to be able to secure them in the waistband. I’m putting together a tutorial on how I did this that will be up on my blog soon. This post is already long enough, so I won’t babble on about the second pair (not to mention, I haven’t found anyone to take proper pictures for me yet), but I’m very happy with the fit and the pockets. I’ll post about them as soon as I can get some decent pictures, but in the meantime, here’s a sneak peak (apologies for the lousy phone selfie):

So, to sum up my thoughts on the pattern:
- The style is fabulous! I know that the vintage, wide-leg style isn’t to everyone’s taste, but I love them, and this pattern was exactly the style I was looking for!
- It’s easy to fit and simple to put together, great for someone new to pants.
- There’s very little ease at the waist, so make a muslin first to test the fit!
- The instructions are clear and well-written enough for an advanced beginner, although there were a couple of details that could be added.
- Choose a fabric with some drape, but one that’s not too shifty or stretchy. These pants would be great in wool gabardine for winter or linen for summer.

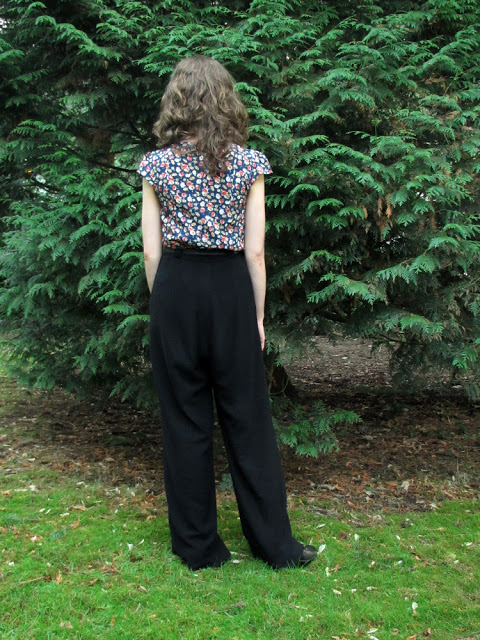
I also made this blouse – it’s the Sewaholic Pendrell with the cap sleeves borrowed from the Alma, and the fabric came from a muumuu that I bought at a thrift store.
Thanks again to Sara for inviting me to be a part of her Dress Up Party!
The post Dress Up Party – Pattern Review – Smooth Sailing Trousers appeared first on Sew Sweetness.