
How to Set Up a Craft Show Booth
Welcome back for part 3 of our series on craft show selling success! Today we’re going to talk about how to set up your booth in order to showcase your products and attract plenty of buyers. Let’s get started!

Tips for Selling at Craft Shows, Part 3: Booth Setup
When it comes to setting up a craft show booth, there are a lot of areas to cover! So let’s break them down, one by one.
Step 1: Booth Size & Filling the Space
The first step is to know how big the booth is that you will be given. If possible, use painter’s tape to mark out a space in your home – your basement, garage, driveway, or even your living room! – in these dimensions. That way you can practice filling the space, and set up a “trial run” of your booth before the day of the show.
Once you know how much space you’ve got, it’s time to think about the larger pieces of furniture you want to use. These pieces might include:
- tables
- shelving units
- temporary walls
- hanging displays such as a clothesline
- other large props such as a ladder, quilt rack, or clothing rack
Begin by adding in a few tables, and move on from there to determine the best arrangement of furniture. Try to make your booth welcoming – create a clear path for the customer to travel so that she can easily walk through your booth and see all of your wares without feeling trapped in a confined space. Remember that your booth can become crowded if you’re having a good show, so try to leave open space in the center and a few different access points to your displays.
Tip: Don’t have a lot of spare furniture? Don’t worry! You don’t have to buy everything new – try finding things you can repurpose! Dust off or paint a wooden ladder out of your garage and hang your products on the rungs. Dig a card table out of your basement and add a pretty tablecloth. You can even stack up 2-4 large plastic storage tubs on top of one another, cover them with fabric, and you’ve got an instant display stand or check-out station!
Step 2: Building up from the Bottom
Once you have your large pieces of furniture in place, it’s time to add smaller display areas. Your needs for display systems will vary depending on what you sell – large pieces of framed art, for instance, need a lot more space than jewelry does. But here are some basic tips for ways you can display your products on tabletops, and add extra space to a small booth by building up toward eye level:
- Use a tablecloth in a solid color on top of your tables so you can create a neutral backdrop for your products.
- Use milk crates or baskets turned on their sides to hold mid-sized merchandise like skeins of yarn or candles.
- Those collapsible wire storage cubes are ideal for holding all kinds of products, and you can even use clothespins or safety pins to hang your merchandise on the back and sides of these cubes. Stack them in pairs on a tabletop to get more height out of your display.
- If you have several small items to display, spray paint the lid of a cardboard paper box and use it as a tray. You can even fold a small piece of fabric or burlap inside of it before adding your merchandise.
- For jewelry pieces like earrings, take an empty photo frame and stretch horizontal lengths of jewelry wire across the middle (tape the wire down to the back side where nobody will see it). Hang the earrings onto the wire to display them, and then prop up the frame on a tabletop.
- Peg board propped up on a tabletop is a great way to display smaller items like bags, where you want to be able to hang them up.
- For more fun ideas check out Dream Displays on Pinterest.
Step 3: The Finishing Touches
When you have the logistics of your booth plan in place, it’s time to make it all work together with a cohesive branding statement. If you already have a website or shop where you sell your items, pull the colors from that shop and use them in your booth. Don’t have one yet? That’s okay! Pick a palette you like and go with that – maybe something seasonal, or something that catches your eye on Design Seeds.
The goal is not to overwhelm your customers with color, so keep it simple. The parts of your booth that will be filled with colorful products should just be neutral – think black tablecloths, white shelving, etc. Then you can add in pops of color in other areas to give your booth a cohesive look (like on the signs you use, and the smaller displays).
Here are some tips to help you put the finishing touches on your booth to make it polished and professional:
- Have a sign with your company or brand name or logo on it. You can have one printed for you if you’ve already got a logo, or make it yourself! Use a large chalkboard or dry erase board and turn that into your sign. If you don’t have a brand name yet, make up something simple, like “Crochet by Catherine” or “Sally’s Sweet Treats.”

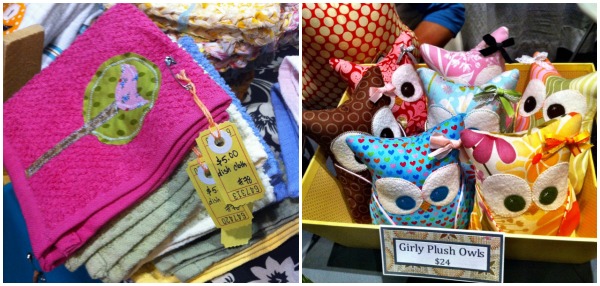
- Include prices on every product – if people have to ask you how much it is, they’re more likely to just put it down and walk away without buying. If it’s too time-consuming to tag every product, try grouping products together and then including a sign near them that tells the customer the price for everything in that group (Scarves – $20 or Earrings: $5). An easy way to do this is to use tag board or mini chalk boards to make your signs.
- Give people a way to remember you and come back later to shop again! Put your website address on your sign (don’t have a website? Include your e-mail address instead!). Make an additional sign that tells people you also sell online, or that you’re happy to accept custom orders, and include your online contact information there. Put out a basket with business cards, or even better, something they can wear (like buttons or stickers) with a cute picture and your shop name and website. Then the people who stop by your booth and pick one up become walking advertisements for your brand!
Do you have any suggestions for setting up a craft show booth? Share them with us in the comments! Then come back for the next post in our series, where we’ll talk about what to do on the day of the craft show. See you there!

Hello! Are you new to The Sewing Loft?
If so, I’m glad you stopped by and hope that something has inspired you to keep your needle moving! Don’t miss a single project and subscribe via email HERE! Bonus- free embroidery pattern with newsletter sign up. Another great way to connect with me is via Facebook, Pinterest, Twitter, Google or Follow along with Bloglovin. I’m looking forward to getting to know you and creating together!
This post How to Set Up a Craft Show Booth appeared first on The Sewing Loft.