
Hipster Cat Quilt || Free PDF Pattern

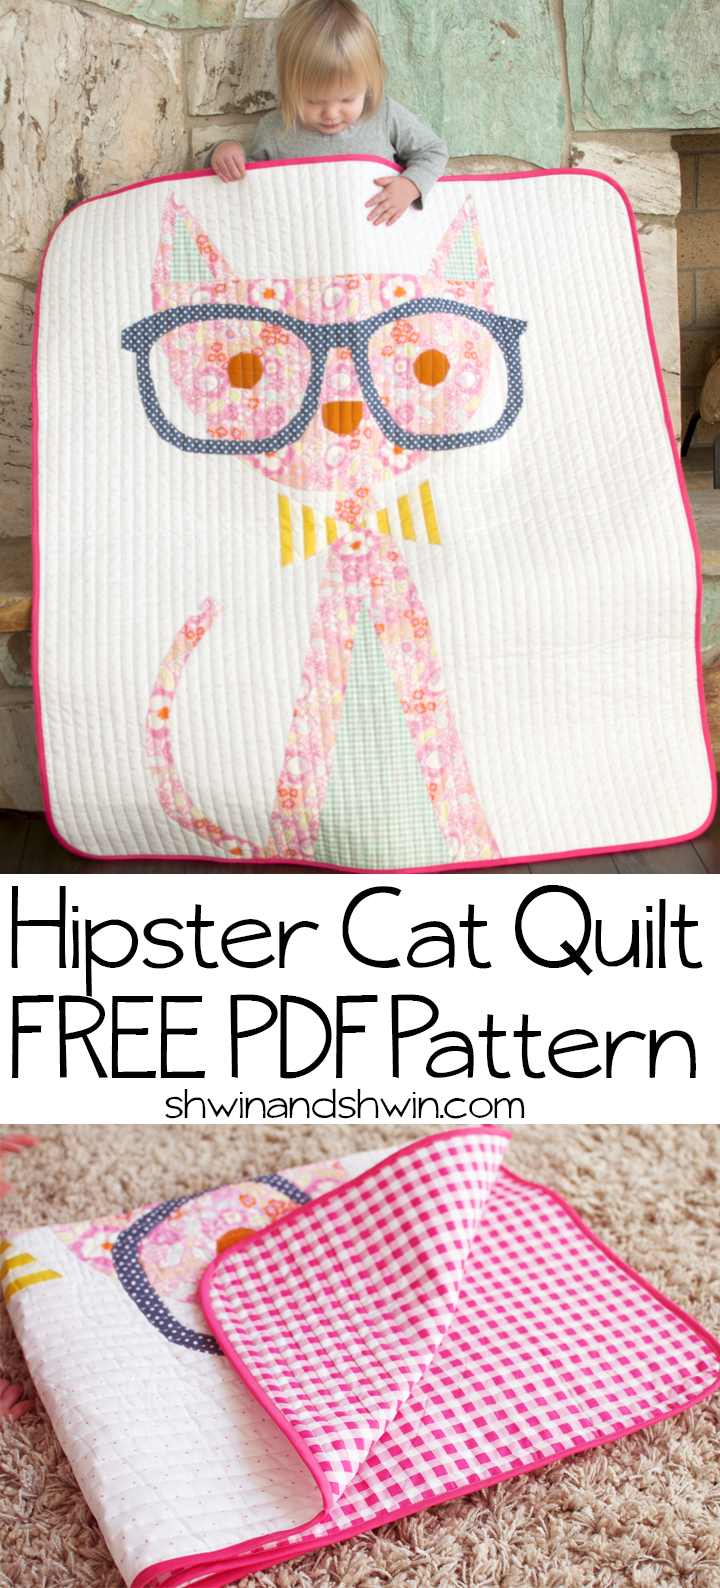
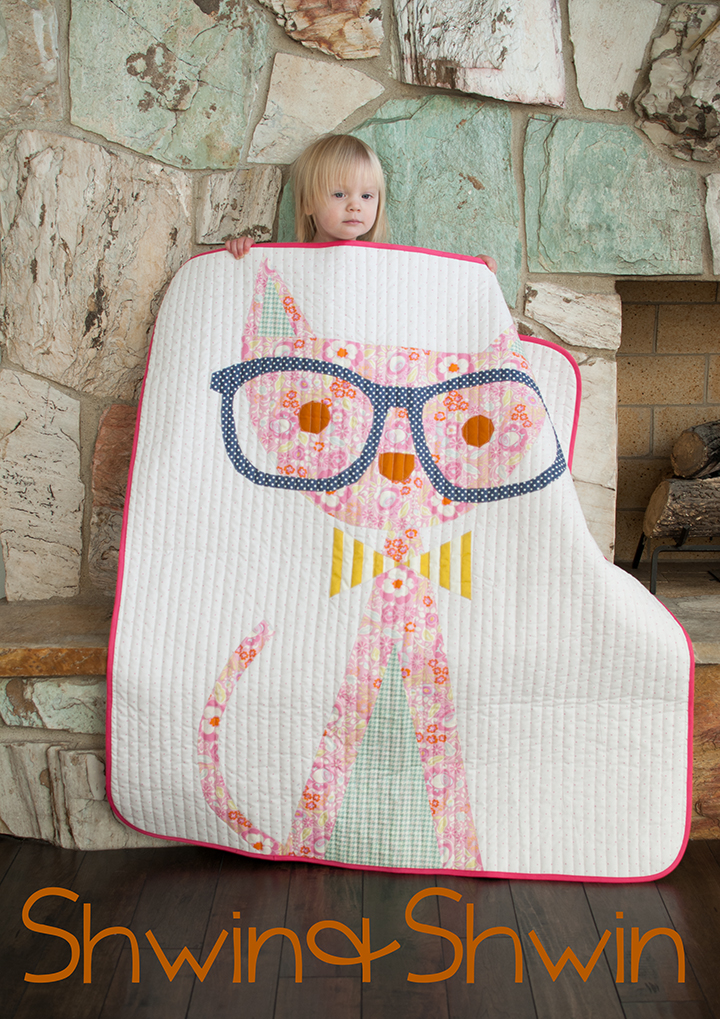
Well I finally did it, I finished Penny’s quilt. It was only fair as Jude and Abbey both had their quilts and poor Penny was left out. (besides the quilt I made for her baby dolls) So the design I had been dreaming about for about a year (possibly longer) finally came a reality in the shape of this Hipster Cat Quilt.

Having had a design in mind for the quilt for about a year, I just wasn’t sure how to execute the design. You see I have admitted a few times, I am not a quilter, although I get the urge to quilt from time to time, my knowledge of quilting is quite limited. After doing the World quilt, the Darth Vader quilt, and the Olaf quilt, I still wasn’t sure how to quite make the cat quilt. I didn’t want the raw edges from the world quilt, or the pieced squares as the others.

So I learned paper piecing, and foundation piecing and I had hopes I could use those skills for the cat quilt but, it seemed like it would be too much. So I kind of combined a few elements from all of the techniques and did freezer paper appliqué. (or so I am calling it) and you know it made the quilt come out exactly as I had hoped it would and it was SOOOO easy, like 6 hours from start to finish. And despite her sullen look in theses pictures Penny was over the moon excited about her quilt, she was just upset that I made her hold it for pictures because she wanted to go cuddle with it.
To make the hipster cat quilt you will need:
- 1 1/4 yard for background (for 44″X44″ quilt)
- 1 1/4 yard for backing (for 44″X44″ quilt)
- Crib size fusible batting (for 44″X44″ quilt)
- 1/2 yard for cat body
- 1/2 yard for glasses
- 1/4 yard for body and ears accent
- Scraps for bow tie and eyes and nose
- Freezer paper
- Spray starch
- Iron

Print and tape the pattern together. Then use freezer paper (shiny side down) to trace off all the pieces you will need.
- Head
- Ears
- Ear accents
- Glasses
- Bow tie
- Body
- Body accent
- Tail
- Eyes & Nose
Tip while tracing and cutting, the edges are not very curved or rounded since I initially planned on quilting it a little differently, I simply rounded the edges a bit while tracing them, it’s easy to do.
Then cut the pieces out so you have your pattern pieces. Note tracing the pattern this way will flip the finished design so it it a mirror image.


Then cut the fabric out around the pattern pieces leaving a good inch or so around the edge. You will trim this later but it’s easier to press if you leave a lot of extra.

Then simply fold up the fabric and press it, using the paper as your guide. Use spray starch to get a good press and ensure that it holds it’s shape, but don’t use so much that you soak the paper.

You will get to some areas where you need to cut slits in the fabric so you can fold it. Don’t cut all the way to the paper stop about 1/4″ from the edge of the paper so that when you turn it the cut doesn’t go to the edge.

Once it’s all pressed trim any hangover you have so that all the pressed edges only cover the paper.


For the triangle pieces and some corners, fold all the edges over and when you get the little tails hanging off…


Then place your pieces down on top of the background fabric. I place the background fabric down over the pattern so I can use it as my placement guide. Simply center the cat body with the fabric, the tail will be off to one side. Most of the cat is symmetrical so you will hardly notice the mirror image flip, however the tail and glasses won’t match up quite perfectly as they are flipped and that’s ok.


Then you will edge stitch all the pieces in place. Sew right along the edge, and be sure to catch every edge.


I just did simple straight lines following the pattern on my backing fabric. You can get as fancy as you like. And by complete happy accident the lines matched up with the stripes in the bow tie, which is perfect and I am so happy that happened as it is sure to never happen again.

Then add the binding along the edge and you are done. I rounded the corner and bound it with simple bias tape so it was quick and easy.

You could easily add the cat to a larger size background to make a larger quilt, I keep mine lap blanket size so I don’t get bored, I get bored easily and since these have all been for my kids they are the perfect size.
The post Hipster Cat Quilt || Free PDF Pattern appeared first on Shwin&Shwin.