
How to Take Instagram Outfit Flatlay Photos
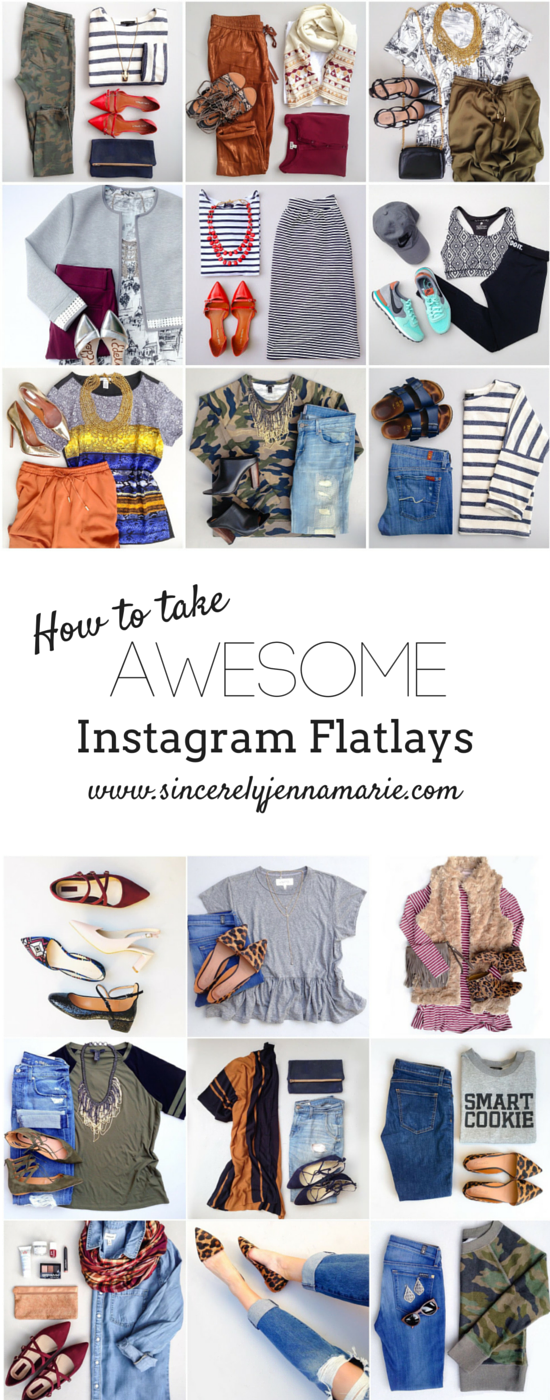
Instagram "flatlays" or "outfit layouts" are pictures of an outfit flat on the ground, usually folded in some way, rather than on a human being. Flatlays are also my most popular kind of instagram content, by a significant margin. One of the questions I get most often is how I take my flatlays, so today I'm spilling my secrets and sharing my flatlay methodology.

The 'Tools'
- iPhone 6s (formerly a cruddy iPhone 5, all above photos were with an iPhone 5)
- The biggest size matboard available at the craft store, I think mine is 32"x40"
- Editing apps of choice
The Photography Process
I shoot all my outfit flatlays outside in natural light on my deck. I prefer to take them when it's overcast, dawn, or dusk, so the light is nicely diffused and there aren'y harsh shadows. Natural light makes a HUGE difference. Is it way more time consuming, and do I usually either freeze or break a sweat? Yup! But to me it's the difference between a 'meh' flatlay and a great one. If you have big windows, you may be able to take them indoors, but my house is a light sucking cave, so I don't have that luxury.
I arrange my outfit to fit within the constraints of the shorter side of the board, so I don't have to fuss with adding margins to make it a square. I typically take anywhere from 10-30 square photos of each outfit on my phone. I then go through and delete the obviously bad ones, and mark the best ones as favorites. Next, I swipe through my favorites and narrow it down to 1-3 options, and transfer those to an album I've created called 'To Be Edited'. That way I don't have to pick the picture I would like to edit from the tiny thumbnails usually provided by editing apps for selection. If for any reason I hate all of them, I'll rearrange the outfit and shoot start the process over. Yes, I am mildly compulsive and ridiculous.
The Editing Process
This is the part where you guys are gonna really judge me, if you haven't already. Flatlays are my insta-bread&butter though, I am very particular about them. Very. I use multiple apps, which I will detail in a future post, but what I do with them can be accomplished with nearly any standard editing app(s).
- Get the outfit to fit in a square. Technically, it should already be a square, but sometimes there is a little non-white background peaking in, or the white space isn't balanced. I use Photos on my iPhone just to straighten and crop the photo until it is satisfactory.
- Adjust any lighting or coloring issues. Since I shoot in natural light, I don't usually have to tweak this much. However, sometimes I shoot too close to dark and my photos are a little too cool, or it is just a particularly yellow light day. When this is the case, I first address the temperature and color balance of the photo. Having overly yellow or blue photos is just yucky, so to achieve a good balance I focus on a neutral gray or white area of the photo, and tweak the temperature until I am satisfied. Then I adjust the shadows and highlights so there is sufficient contrast, but the details are still crisp.
- Address flaws. Scratches in my matboard, wrinkles that went unnoticed in a blouse, and Sherlock hairs are all little details that I fix after the fact with a retouching app or blur tool.
Below is a few more of my flatlays, or you can browse them all here. They were pretty rough at the beginning, but with time and practice I think I've refined them quite well.
If I haven't addressed things or if you have any more questions, leave them below :)


More posts from Jenna Marie