
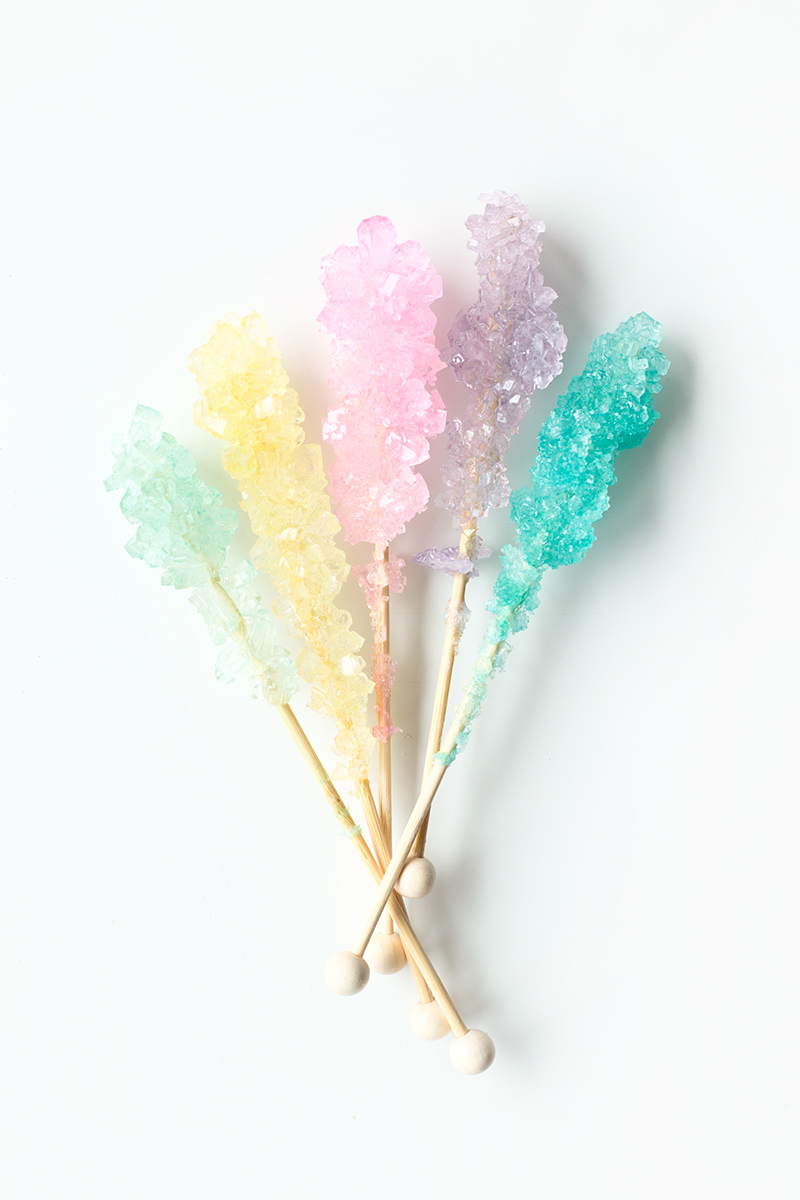
DIY Rock Candy (+ A Giveaway!)

I have wanted to try making rock candy FOR-EVER. I mean, why wouldn’t you want to make it? I hated science in school, but that’s probably because it didn’t involve candy like this little experiment did. Lucky for me (Us, you!) the resident candy and technicolor QUEEN, Natasha of Violet Tinder, had reached out just as our wheels started turning on this project and she was already concocting some amazing DIY rock candy. I’m so excited she was up for sharing the tutorial for making your own rock candy here on the blog today AND she even offered up some of her schnazy and BRIGHT paper goodies to give away to one lucky reader!!
This is such a fun thing to do with kids or friends or on your own and other than having patience it is SO easy thanks to Natasha’s insider tips!


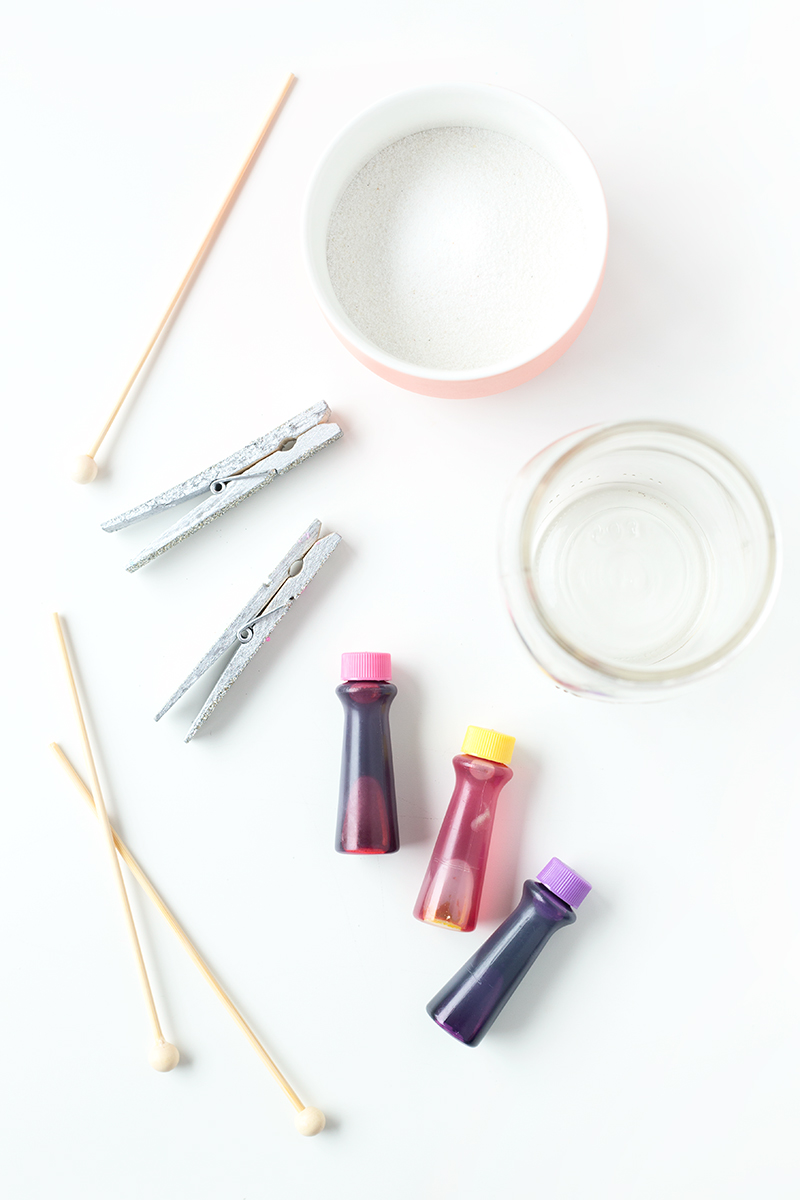
2 cups water
5 cups sugar
A large, open-mouth jar
Rock candy sticks
Clothespin
Food coloring
A pot to boil the mixture
A wooden spoon or spatula to stir
* This will make approximately one large stick. If you’d rather, you can split this solution into two smaller jars to produce two smaller sticks.

1. First, take your sticks and slightly dampen them. Roll them in sugar and set them aside to dry. These are your “seed” sticks and the sugar on them will help give your rock candy something to attach to as it grows.
2. While those are drying, pour the water in the pot and set it to boil. Once it’s boiling, pour in the sugar one cup at a time. In between each cup, stir until it’s thoroughly dissolved- you’ll know it’s dissolved when the solution looks clear (not cloudy) and you can’t see any granules sitting on the bottom. {NOTE: Some tutorials I’ve found will tell you to just keep mixing in sugar until it won’t dissolve any more. That is a LOT of sugar! I found this leads to an over-saturated solution that creates lumpy sugar blobs, not gorgeous rock candy crystals!}
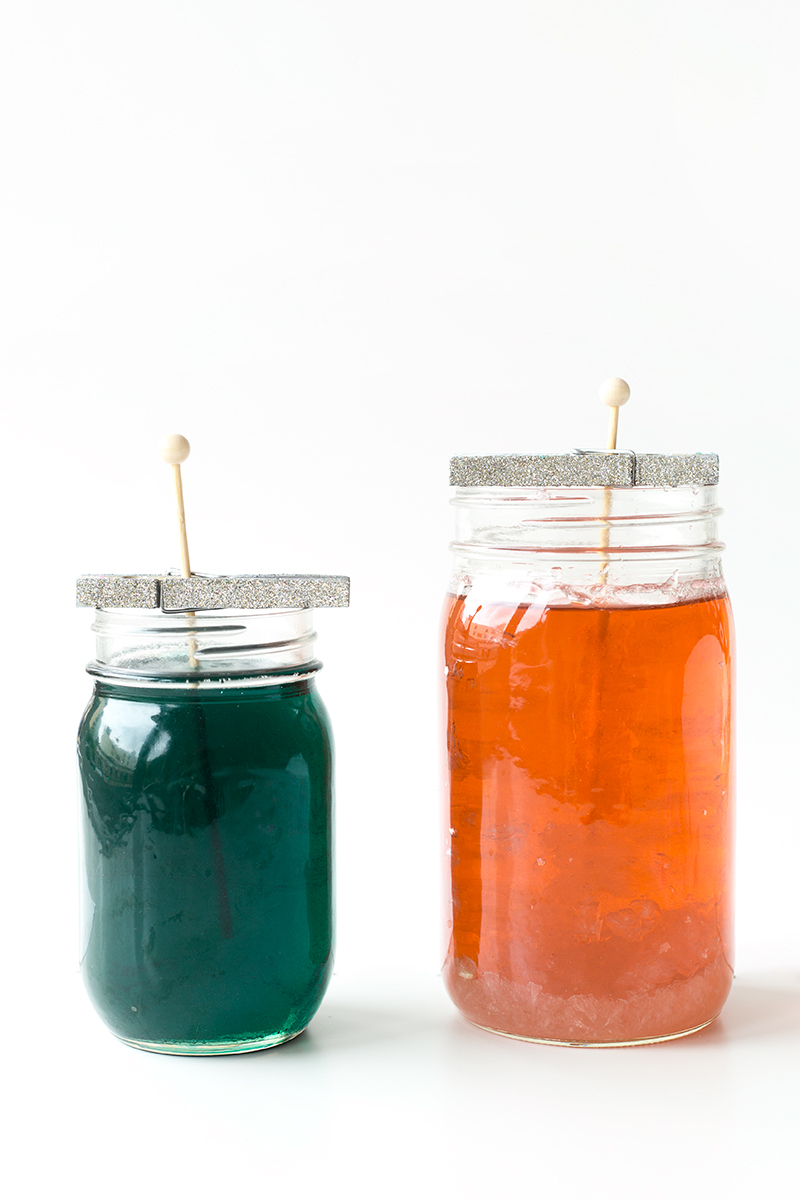
3. When you’ve dissolved all of your sugar, leave it to boil for another couple minutes, just to make sure everything is evenly heated and blended. Then, add in a couple drops of your food coloring. A little goes a long way with the food coloring- usually just a couple drops is plenty! Once you’ve done that, turn off the heat and leave to cool for about 10 minutes.
4. When your solution feels warm but not scalding hot, it’s time to pour it in your jar! Pour it in and set somewhere you’ll be able to leave it undisturbed for a few days. Once the solution is in the jar, take your stick and secure it with a clothespin. When you dip it in the solution, the clothespin will keep it suspended at the top of the jar. It’s important that the stick doesn’t touch the sides or the bottom! If it does, the rock candy will grow onto the jar and it will be nearly impossible to extract it.
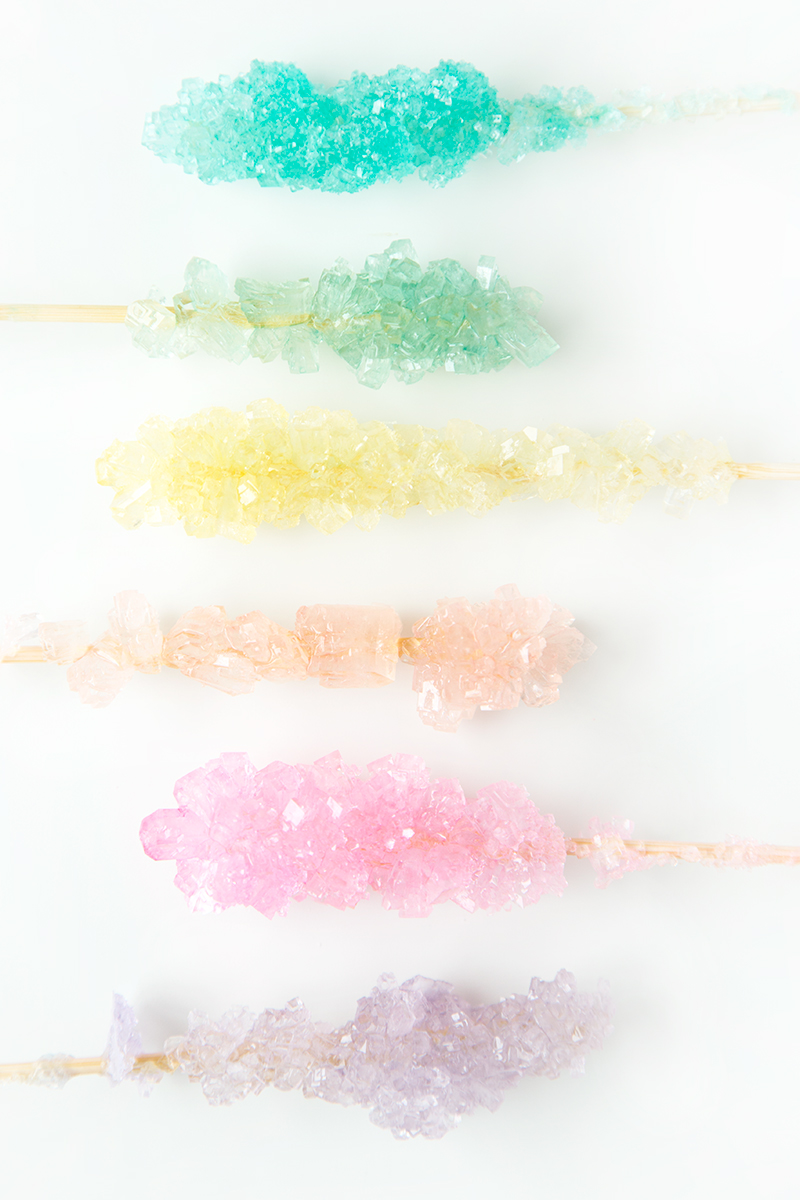
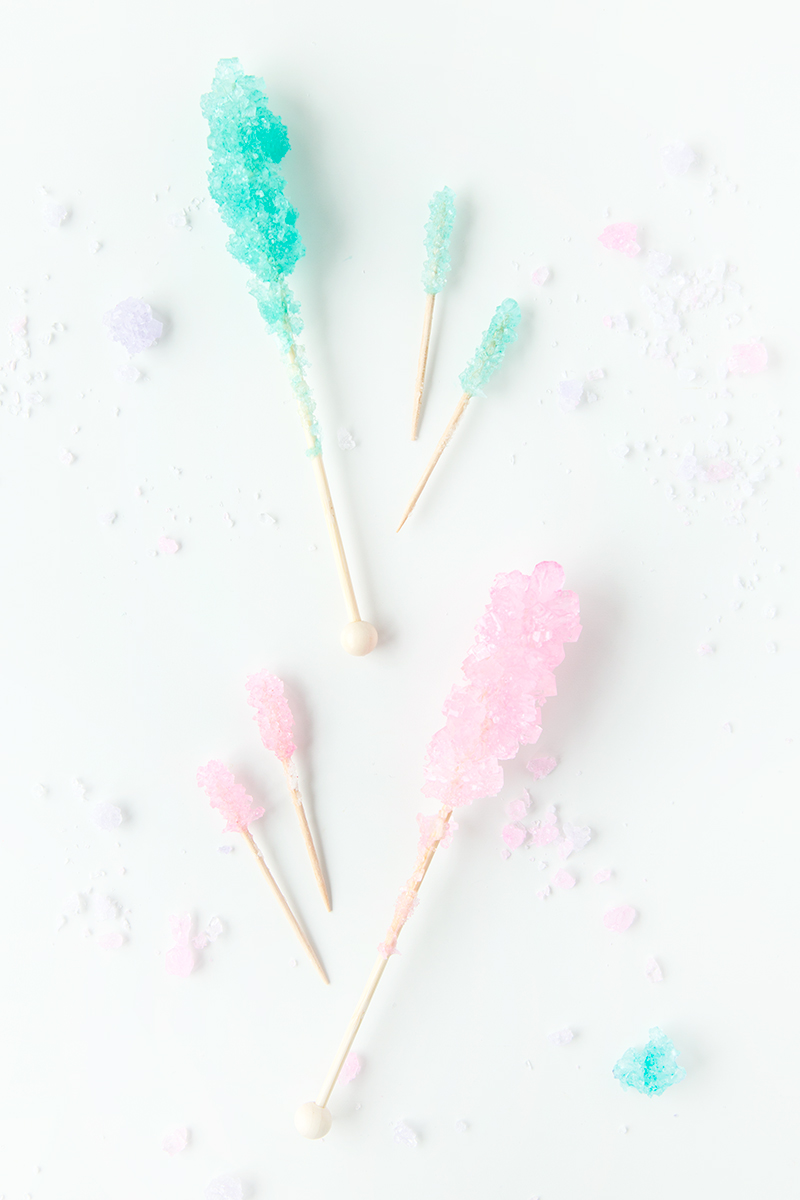
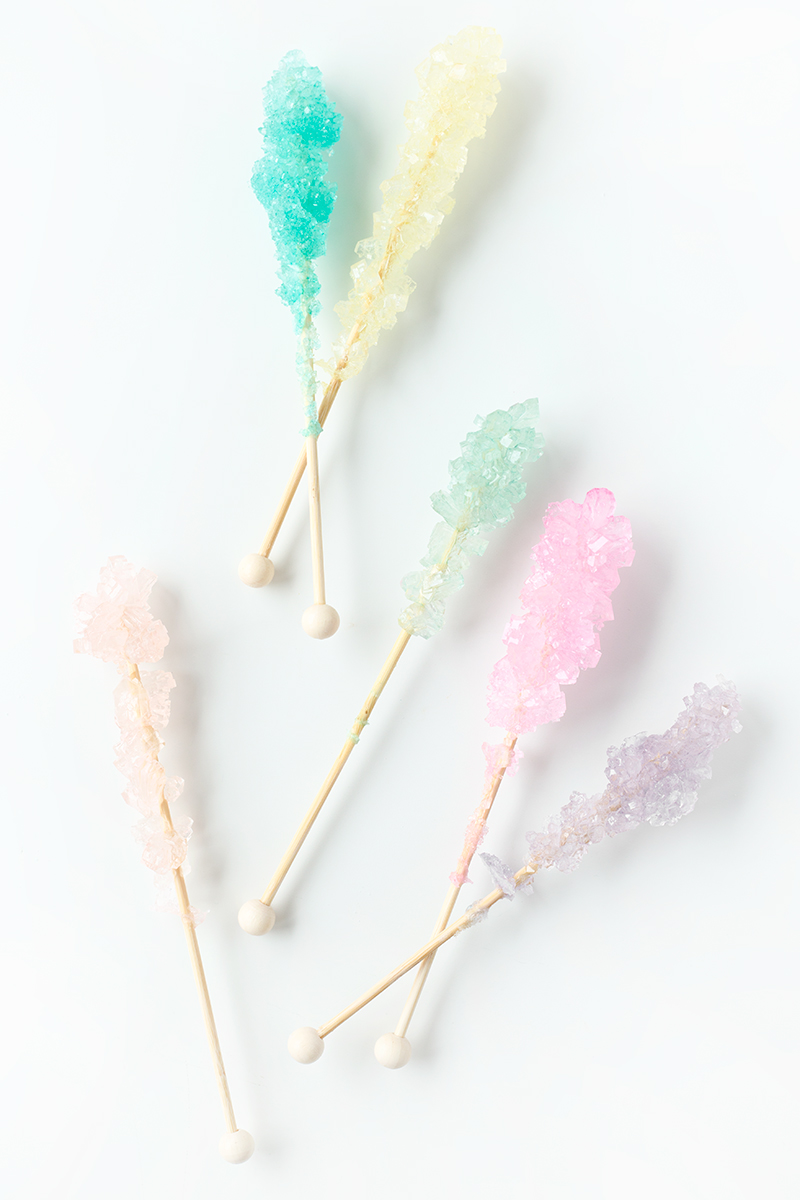
5. Once the stick is in, it’s time to wait! And wait and wait… growing good rock candy takes patience! You’ll know you did it all correctly if you can see tiny crystals start to grow on your stick within a day or so. The longer you leave it, the larger the crystals will grow. This can take anywhere from 3-7 days, so again make peace with the waiting game! When you’re satisfied with the size, you can crack the hardened top layer of sugar off, delicately pull out your stick, and… YOU MADE ROCK CANDY!!
And a couple more tips…
No. 1 As tempting as it can be, try not to touch or move the stick once you have it set in the solution. It can disrupt the crystal-growing process and hinder those really big, gorgeous looking rocks from forming!
No. 2 If your colored sugar solution is too dark to clearly see your stick through once it’s in the jar (this was the case for me with the dark teal food coloring), use a flashlight to take a peek.
No. 3 When you pull out your finished stick, you can temporarily hang it upside down in a glass to let the remaining solution drip off until it’s dry.


Rock Candy Photos by Jeff Mindell | Giveaway Photo by Violet Tinder
Natasha is giving away a whole technicolor BONANAZA of goodies from her shop, Violet Tinder! You’ll get a set of candy cards, stickers, a cute party in a box, THE WORKS! LOOK AT THE COLORS!!! To enter the giveaway, use the Rafflecopter below! Giveaway ends Wednesday, August 19th at 11:59pm and the winner will be notified and announced here shortly thereafter!
One more huge thank you to Natasha for sharing her secrets, I hope you all try making your own rock candy!! And I also hope you check out her shop because if you’re a sugar lover like me… you’re gonna be VERRRRY happy you did so!
Tweet)
The post DIY Rock Candy ( A Giveaway!) appeared first on Studio DIY®.