
Fold over Box Tutorial

I thought I would do a tutorial on how to make my box! I don't know what type of box its really called (if anyone does then let me know!!) so I just called it the fold over box as the lid just fold over the box !!! Its really really easy to make but so effective!
Please bear with me this is very picture heavy !!
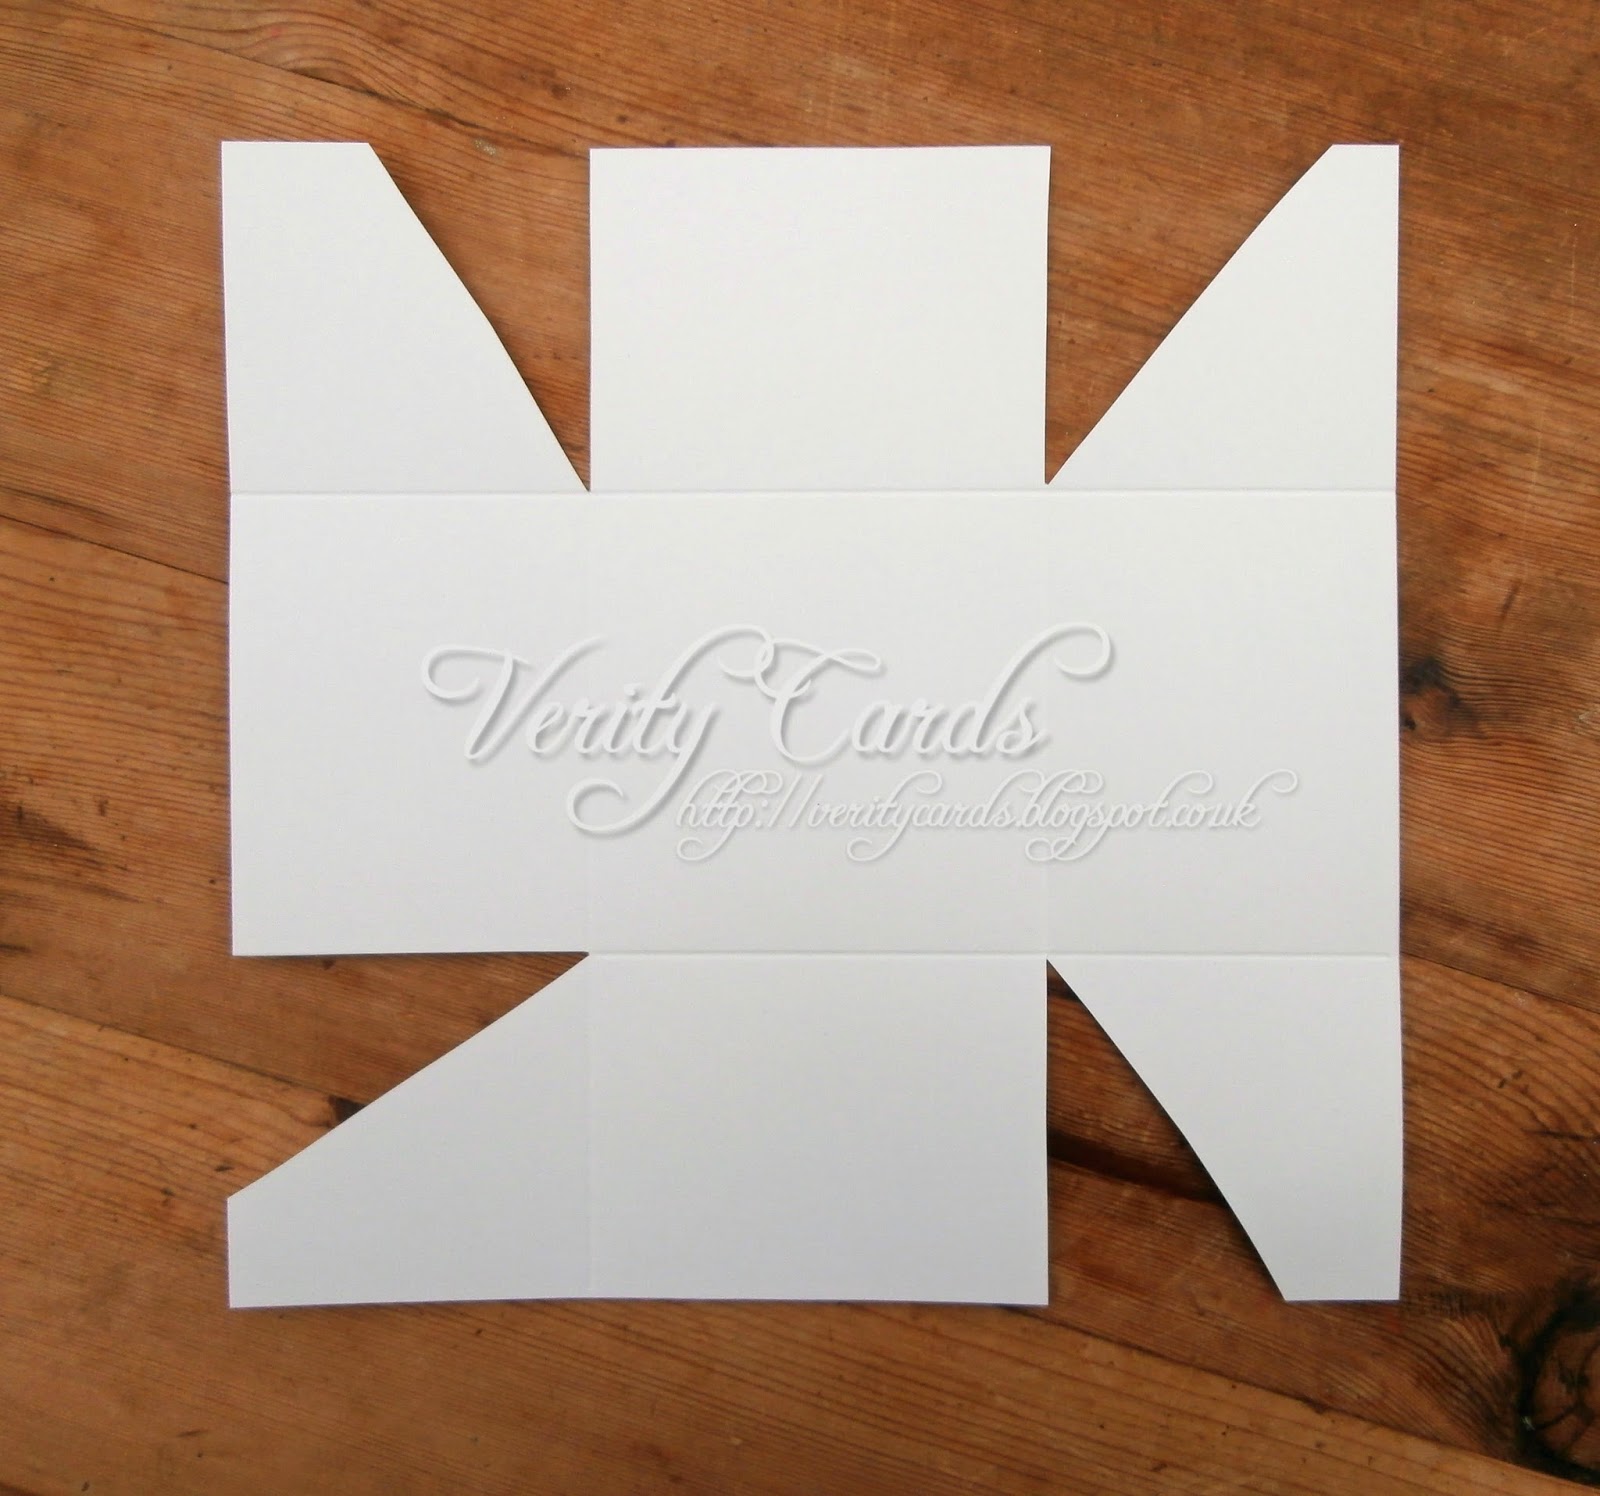
First of all cut a piece of card 15" x 6" and score 6" from each end which leaves a 3" piece in the middle.


Cut 4 pieces of 6" x 6" paper. One for the top, the inner top, the base and the underneath of the box

Now cut 2 pieces 6" x 3" for the inner and outer of the middle of the flip over part of the project.

Cut a 4" x 4" piece for the bottom of the inner of the box. Also cut 4 pieces 4" x 3" for the inner sides of the box.

Now cut 4 pieces 4" x 3" for the outer sides of the box. Note how I used the pattern on the papers to follow through on the sides of the box. You could also use a plain colour and emboss the sides adding texture to your project.

Now to the messy part !! I love getting my fingers inky and gluey !
Adhere the papers to the inner of the box. I used a All purpose Glue as it is repositionable when first applied allowing the paper to be in the right place !


Take the outer of the project. We are going to adhere the papers to the card for the inside of the project. So the box will sit on the bottom square eventually.

Now turn it over for the outer of the project. The top of the finished bx is the top square. Before adhering the papers, adhere two pieces of ribbon in the centre of the edge. These will be used to hold the box together. Use a good length of ribbon so that you have enough for the bow to be tied and retied when given as a gift.


Now turn the project over to the inner side and adhere the box to the bottom square. I usually put plenty of glue on and place something heavy inside to hold it down !

Flip over the top of the box and the body of the box is complete. All you have to do now is decorate it to your liking !

Here is a box I have made previously but I have another coming soon !! If you click on the picture it will take you to the post for that box.

Happy crafting !! Any questions just ask I am happy to help !
More posts from Liz Walker